
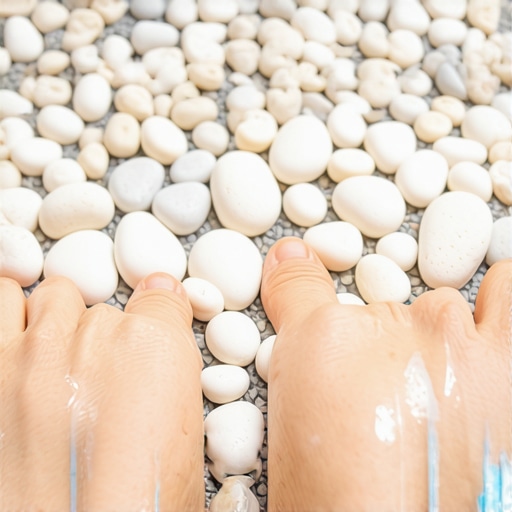
The geometry of the river stone
Grouting a pebble shower floor without dips requires a high-viscosity mix and a multi-stage application process that fills the irregular voids between stones while maintaining a consistent height relative to the stone peaks. You must account for the varied topography of the natural pebbles, ensuring the grout supports the stone shoulders without burying the texture. This prevents water from pooling in low spots, which is the primary cause of mold growth and structural failure in wet areas.
I spent three days grinding concrete on a job last month just so the floor wouldn’t click like a castanet. That experience reminds me of why people fail with pebble floors. They treat them like flat ceramic tile. They aren’t. A pebble floor is a topographical map of a riverbed, and if you treat it like a kitchen backsplash, you will end up with a swamp under your feet. I have seen countless homeowners and cut-rate contractors dump a bucket of sloppy grout over a beautiful pebble mosaic only to find that, once it dries, the floor looks like a series of muddy craters. The dips are not just an aesthetic nightmare. They are functional failures. When grout settles into a dip, it creates a birdbath. That standing water sits against the grout, eventually penetrates to the liner, and starts the slow rot of the subfloor. I can smell a failing shower floor from the hallway. It smells like damp earth and regret.
The physics of a pebble floor are unique. Unlike a 12 by 12 porcelain tile where the grout line is a consistent channel, pebbles create a network of interconnected valleys. The depth of these valleys varies based on the thickness of the stone. If you use a standard grout float and a single pass, the grout will naturally follow the curve of the stone and slump into the center of the void. This is gravity at work. To fight gravity, you need to understand the chemistry of the material you are shoving into those gaps.
Why your shower pan is actually a sponge
A shower pan acts as a sponge if the grout is not packed to its maximum density and the substrate is not perfectly sloped toward the drain. The grout must be dense enough to resist capillary action while the underlying waterproofing membrane ensures that any moisture that does penetrate is directed away from the structural framing. Without this density, the grout becomes a highway for moisture to travel into the thin-set bed.
“A floor is only as good as the subfloor beneath it, deflection is the enemy of every joint.” – Master Flooring Axiom
When we talk about showers, we are talking about managed water. We are not making things waterproof. We are making them water-resistant and directing the rest. Most guys skip the leveling compound on the subfloor or mess up the pre-slope. They think the underlayment will hide the dip. It won’t. If your shower pan has a dip before the stones go down, the grout will eventually crack because the water will sit in that low spot and weaken the bond. I have seen 3/4 inch solid oak floors in adjacent rooms buckle and cup because a shower three feet away was leaking through a poorly grouted pebble floor. The moisture travels through the joists like a virus. People think hardwood floors and showers are unrelated. They are wrong. A failure in the wet room is a death sentence for the expensive white oak in the hallway.
The tactical failure of the standard float
Standard rubber grout floats are too flexible for the irregular surface of river stones and often pull too much material out of the joints during the initial pass. Using a stiff-backed float or even a grout bag allows for more precise placement of the material into the deep crevices without disturbing the grout that has already begun to set. The goal is to overfill slightly and then shave the excess rather than wiping it away.
You need to look at the Janka hardness of the stone you are using, though usually, we worry about that for hardwood floors. For pebbles, it is about porosity. If you are using a soft marble pebble, it will suck the moisture out of your grout faster than a desert sun. This causes the grout to shrink and pull away from the edges, creating those microscopic gaps that turn into big leaks. I always tell people to pre-seal their pebbles. If you don’t seal the stone before you grout, the grout pigment will stain the stone and the stone will steal the water from the grout mix. It is a double-edged sword of failure. I have seen a $4,000 stone job ruined because the installer was too lazy to spend twenty minutes with a bottle of sealer and a microfiber cloth.
The chemistry of the epoxy versus cementitious debate
Epoxy grout offers superior water resistance and structural strength for pebble floors but requires an advanced installation technique due to its rapid set time and sticky consistency. Cementitious grout is more forgiving for DIY projects but lacks the chemical bond and stain resistance needed for long-term durability in high-moisture shower environments. Choosing the right chemistry depends on the ventilation of the room and the skill of the hand holding the sponge.
| Grout Type | Water Absorption | Flexural Strength | Ease of Clean |
|---|---|---|---|
| Sanded Cement | High | Low | Difficult |
| High-Performance Cement | Moderate | Medium | Moderate |
| Epoxy Grout | Near Zero | High | Very Difficult |
If you are working in a climate like the swampy humidity of Houston, cement grout stays wet for too long. It never gets that initial snap you need to clean it properly. In the dry heat of Phoenix, it will dry so fast it cracks before you can get your bucket of water. You have to play the environment. I have seen guys try to install laminate in a bathroom, which is a crime in my book, and then wonder why the edges swell. It is the same logic with grout. If you don’t respect the humidity of the room, the material will fail you. I prefer a high-performance cement grout with a latex additive for pebbles. It gives you the working time of cement with some of the durability of epoxy. It is the middle ground that keeps me from having to come back in six months to repair a crumbling floor.
Viscosity and the slump test
The viscosity of your grout mix determines how well it stays in the gaps between pebbles without sagging or creating hollow voids underneath the stones. A peanut butter consistency is the industry standard, but for pebbles, you want it slightly stiffer so that it can support its own weight as it bridges the gaps between rounded edges. If the mix is too thin, gravity will pull it down, leaving the tops of the stones exposed and the joints depressed.
I mix my grout with a margin trowel by hand. I don’t use a drill. A drill beats too much air into the mix. Air bubbles are just tiny pockets of nothingness that turn into holes once you start scrubbing. You want a solid, dense mass. I let the grout slake for ten minutes. This is a step everyone skips. You have to let the chemicals fully hydrate. If you don’t, the grout will be brittle. It is like tempering steel. You can’t rush the process. While it’s slaking, I check my pebbles one last time. Any loose ones get pulled and reset. If a pebble is loose, the grout will never hold it. It will just rattle until the grout turns to powder.
The art of the sponge massage
The cleaning phase is where most dips are created because installers use too much water and too much pressure on the sponge. You must use a damp, not dripping, sponge and move in a circular motion to lightly shape the grout without reaching into the joints. This process requires patience and multiple passes with clean water to ensure the grout remains flush with the mid-point of each stone.
- Use a dual-bucket system to keep your rinse water clean at all times.
- Squeeze the sponge until no more water can be extracted before touching the floor.
- Work in small sections of no more than ten square feet to prevent the grout from skinning over.
- Use a white nylon scrub pad to break up heavy deposits before using the sponge.
- Change your rinse water every twenty square feet to avoid grout haze.
- Let the grout firm up for at least 30 minutes before the final polish.
I have seen guys use a soaking wet sponge because they want to clean the floor fast. All they are doing is washing the cement out of the grout. What’s left is just sand. Sand doesn’t hold water back. Sand doesn’t stay in place. You end up with a floor that looks like a beach after the tide goes out. It is a mess. I use a microfiber towel for the final pass. It picks up the haze without digging into the joints. It is about finesse, not force. My knees might be shot, but my hands still know the right pressure. You can feel when the grout is starting to take a set. It resists the sponge just a little bit. That is when you stop.
Slope and the physics of drainage
A pebble floor requires a steeper pitch than a flat tile floor because the textured surface creates friction that slows the flow of water toward the drain. The TCNA recommends a minimum slope of 1/4 inch per foot, but for pebbles, a slightly more aggressive slope ensures that water does not dwell in the micro-depressions between stones. This prevents the grout from being constantly saturated, which extends its lifespan and prevents discoloration.
“A floor is only as good as the subfloor beneath it; deflection is the enemy of every joint.” – Master Flooring Axiom
I remember a job where the architect wanted a zero-threshold entry with pebble floors. He didn’t want any T-molding or transitions. It was a beautiful design on paper, but a nightmare in reality. Without a proper curb, that water wants to travel. If your grout has dips, the water stays. If the water stays, the grout softens. It is a cycle of destruction. I had to explain that a pebble floor isn’t just a floor, it is a drainage system. You have to treat it with the same respect you give the plumbing under the sink. If you don’t, you’re just waiting for a flood. I ended up grinding the subfloor for two days to get the pitch perfect because I wasn’t going to have my name on a floor that didn’t drain.
The final seal and maintenance
Sealing the grout after a full 72-hour cure cycle is the final defense against moisture penetration and the formation of dips through erosion. A high-quality penetrating sealer soaks into the pores of the grout and the stone, creating a hydrophobic barrier that forces water to bead up and roll toward the drain. This maintenance step must be repeated every twelve to eighteen months depending on the frequency of use and the harshness of cleaning chemicals.
While most people want the thickest underlayment, too much cushion actually causes the locking mechanisms on LVP to snap under pressure. The same logic applies to shower floors. You don’t want a soft, spongy base. You want a rock-solid foundation. I hate big-box discount retailers who sell cheap sealer that is basically just scented water. You need the professional grade stuff. The stuff that smells like a chemical plant. That is the only way to protect your work. I tell my clients that if they use bleach on their pebble floor, they are stripping the sealer. Use a pH-neutral cleaner. Treat it like a piece of fine furniture, even if you are standing on it naked. It will last thirty years if you treat it right. If you don’t, I will see you in five years when I am tearing it out to fix the moldy mess underneath.