
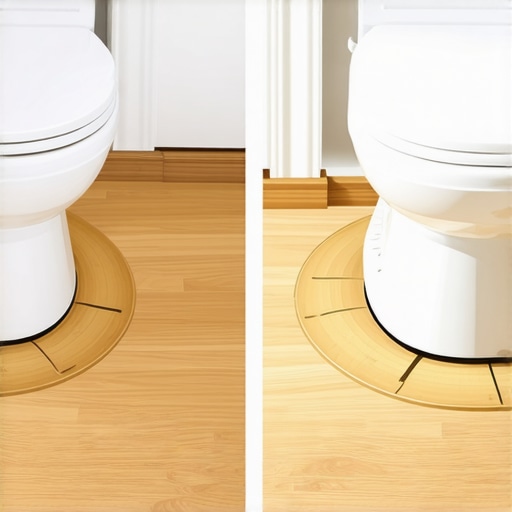
I have spent twenty-five years on my knees with a moisture meter and a level. I have seen more ruined laminate floors than I have seen clean trucks. Homeowners always ask why their waterproof laminate is buckling near the bathroom. Usually, it is because they locked it under a heavy toilet or failed to leave the expansion gap around the flange. I once pulled up a floor where the homeowner tried to caulk the laminate directly to the porcelain base. The first time the humidity shifted, the joints snapped like dry twigs. It was a three thousand dollar mistake that could have been avoided with a simple cardboard template and a scrap of logic. A floor is a performance surface, not a piece of wallpaper. If you treat it like a decoration, it will fail you the moment the seasons change. The physics of laminate flooring require movement, and if you do not account for that around a toilet, you are just installing future mold and structural failure.
The myth of the waterproof bathroom floor
Cutting laminate around a toilet requires a 1/4 inch expansion gap, a custom cardboard template, and a jigsaw with a fine-tooth blade. You must trace the base accurately to ensure the floor floats freely. Failing to leave this gap or seal the edge with 100 percent silicone leads to moisture intrusion and inevitable floor failure. Most people believe that because the box says waterproof, the floor is invincible. This is a dangerous lie. The surface might be waterproof, but the core is typically high-density fiberboard, which is essentially compressed sawdust and resin. When water hits a cut edge, it travels through capillary action into the heart of the plank. The fibers swell at a molecular level, the resin bonds break, and the decorative layer peels away like a bad sunburn. You are not just cutting a shape; you are managing the structural integrity of a composite material that wants to expand and contract with every flush and shower.
The geometry of a perfect toilet cut
You cannot eyeball a curve on a twelve-inch plank and expect it to fit a vitreous china base. The base of a toilet is rarely a perfect circle. It is often an irregular ovoid shaped by the cooling process in the kiln. To get a gap-free look that still allows for movement, you must create a template. I use heavy butcher paper or the cardboard from the laminate boxes. You lay the paper against the toilet flange and the surrounding planks, then use a compass or a simple block of wood to scribe the exact contour. This scribe accounts for the 1/4 inch expansion gap required by every major manufacturer. Without this gap, the floor has nowhere to go when the humidity rises. It will push against the toilet, lift off the subfloor, and create a hollow clicking sound that will drive you mad every time you walk across the room. The gap is the lungs of the floor. Let it breathe.
| Laminate Component | Technical Specification | Impact on Bathroom Installation |
|---|---|---|
| Core Material | High-Density Fiberboard (HDF) | Absorbs moisture if edges are not sealed |
| Wear Layer | AC4 or AC5 Rating | Resists scratches from cleaning chemicals |
| Expansion Gap | 1/4 Inch Minimum | Prevents buckling during humidity shifts |
| Sealing Agent | 100 Percent Silicone | Provides flexible waterproof barrier at edges |
The subfloor preparation everyone ignores
Before the first cut is even considered, the subfloor must be scrutinized. If your concrete or plywood is not flat within 3/16 of an inch over a 10-foot span, your laminate joints will fail. I spent three days grinding concrete on a job last month just so the floor would not click like a castanet. When you are working around a toilet, the subfloor is often compromised by old leaks. If the wood around the flange is soft, your laminate will flex, the locking mechanisms will snap, and the grout lines on the adjacent tile or the seams of the laminate will open up. You must ensure the flange is sitting at the correct height, usually 1/4 inch above the finished floor. If the flange is too low, you will have leaks. If it is too high, the toilet will rock and crack your new floor. This is not about aesthetics. This is about structural engineering. A floor is only as good as the subfloor beneath it.
“A floor is only as good as the subfloor beneath it; deflection is the enemy of every joint.” – Master Flooring Axiom
Mastering the jigsaw for curved cuts
When you finally put blade to board, the tool choice is paramount. You need a jigsaw with a down-stroke blade. Standard blades cut on the up-stroke, which will shred the melamine wear layer of the laminate and leave you with a jagged, ugly edge. A down-stroke blade pushes the teeth into the decorative surface, resulting in a clean, crisp line. You must run the saw at a medium speed. If you go too fast, the friction melts the resin in the HDF core and gums up the blade. If you go too slow, the blade vibrates and can chip the surface. Hold the jigsaw base firm against the plank. Any wobble will result in a beveled cut that makes the expansion gap uneven. I always cut the plank from the back side if I am using an up-stroke blade, but for bathroom curves, a dedicated laminate blade is the only way to go. You are aiming for a precision that mirrors the porcelain, even though a trim piece or caulk will eventually cover it.
The 1/4 inch gap that saves your investment
There is a common misconception that a tight fit is a sign of a good installer. In the world of floating floors, a tight fit is a sign of an amateur. Laminate is a hydroscopic material. It reacts to the moisture in the air. In a bathroom, where showers create high-humidity events, the planks will grow in width and length. If the plank is wedged tight against the toilet base, the pressure has nowhere to go but up. This causes peaking at the seams. You want a consistent gap around the entire perimeter of the toilet. This gap is not a mistake; it is a design requirement. You will later fill this gap with a flexible material, but for now, the gap must be clean and empty. Do not allow sawdust or debris to fill it, as even a few pebbles of grit can act as a bridge that transfers pressure and causes the floor to bind.
- Remove the toilet entirely rather than trying to cut around it while installed.
- Create a cardboard template using the scribing method for 100 percent accuracy.
- Use a fine-tooth down-stroke jigsaw blade to prevent chipping the wear layer.
- Maintain a consistent 1/4 inch expansion gap from the porcelain base.
- Clean the subfloor and check for levelness within 1/8 inch around the flange.
- Apply a bead of 100 percent silicone to the gap to prevent water from reaching the core.
The chemistry of sealing the perimeter
Once the floor is laid and the toilet is ready to be reset, the sealing process begins. You do not use standard painters caulk. You must use 100 percent silicone. Silicone is hydrophobic and remains flexible for decades. As the floor moves, the silicone stretches and compresses without breaking the bond. Acrylic caulk will dry out, crack, and pull away from the laminate, creating a path for water to reach the HDF core. You apply the silicone into the expansion gap, making sure it touches both the edge of the laminate and the subfloor. This creates a bathtub-like seal. When someone splashes water out of the tub or the toilet sweats in the summer, the moisture stays on top of the silicone rather than diving into the vulnerable cut edges of your floor. This is the difference between a floor that lasts twenty years and one that smells like a swamp after two. I have seen guys skip this step because they were in a hurry. They are the same guys who change their phone numbers every six months to avoid warranty calls.
“The National Wood Flooring Association (NWFA) states that moisture testing is not optional; it is the foundation of every successful installation.” – NWFA Technical Guidelines
Why humidity is the silent killer of laminate
In regions like Houston or the coastal South, the humidity is a constant battle. In these environments, you must acclimate your laminate for at least 72 hours in the room where it will be installed. You do not leave it in the garage. You do not leave it in the hallway. You put it in the bathroom. The planks need to reach an equilibrium with the local atmosphere. If you install cold, dry planks into a humid bathroom, they will expand immediately and buckle within forty-eight hours. Conversely, in the dry heat of Phoenix, the planks will shrink. If you do not account for this, your 1/4 inch gap might grow to a 1/2 inch gap, leaving a visible void that no amount of silicone can hide. You are a scientist as much as a carpenter. You are measuring the invisible forces of water vapor and thermal expansion every time you make a cut. Respect the material, or the material will humiliate you. Cutting around a toilet is the ultimate test of this respect. It requires patience, the right tools, and an understanding that the most important parts of the job are the ones you will never see once the toilet is bolted back down.