
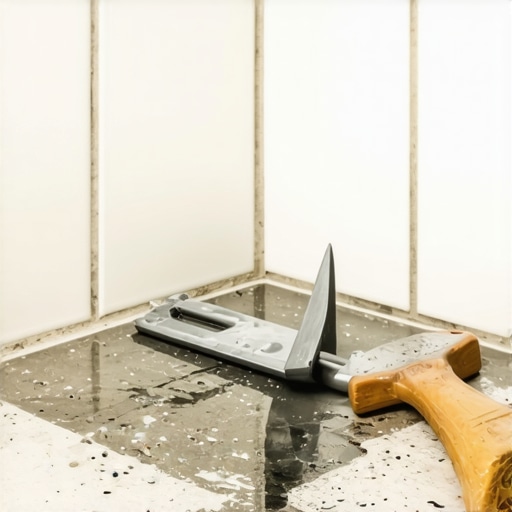
The physics of the corner tile failure
A loose tile in a shower corner typically fails because of structural movement, moisture infiltration, or improper thin set coverage. The corner is the convergence point of two planes, making it a high stress zone where deflection and thermal expansion frequently break the mechanical bond between the tile and the substrate.
I spent three days grinding concrete on a job last month just so the floor wouldn’t click like a castanet. That experience reminds me exactly why people struggle with a single loose tile in a shower corner. Most guys skip the leveling compound and they definitely skip the proper waterproofing. They think the underlayment or the thick bed of mortar will hide the dip. It won’t. I have seen countless shower installations where a single tile pops because the installer treated the corner as a static point rather than a dynamic joint. In one case, a $20,000 marble shower began to fail within six months because the installer used a rigid grout in the vertical change of plane instead of a 100 percent silicone sealant. That mistake allowed moisture to seep behind the tile, saturating the backer board and causing the thin set to lose its grip. When you are dealing with a shower, you are dealing with a microscopic battlefield. Water is the universal solvent, and it will find the smallest path of resistance through your grout lines. Hardwood floors and laminate installations can handle a bit of environmental shift, but a shower corner is unforgiving. If that tile moves, the waterproof envelope is breached. You are not just fixing a cosmetic issue; you are preventing a structural rot situation that could cost thousands in subfloor replacement.
“A floor is only as good as the subfloor beneath it; deflection is the enemy of every joint.” – Master Flooring Axiom
Why your subfloor is lying to you
Subfloor deflection is the primary culprit behind loose tiles because the underlying structure lacks the rigidity to support the weight of the tile assembly without bending. Even if the floor feels solid to your feet, the microscopic flex exceeds the L/360 standard required for ceramic and stone.
When we talk about the physics of a shower, we have to look at the joist spacing and the thickness of the subfloor material. A common mistake is assuming that a standard 3/4 inch subfloor is enough for tile. It usually isn’t. If the joists are spaced 16 inches on center, you still need to account for the deflection of the plywood between those joists. When that plywood dips, even by a fraction of a millimeter, the brittle bond of the mortar snaps. Unlike laminate which can float or hardwood floors that have a bit of internal give, tile is a rigid system. The corner is particularly vulnerable because it is often where the wall studs meet the floor joists. If the house settles or if the humidity levels in the crawlspace fluctuate, those two planes move in different directions. This shear force is what pops that corner tile loose. You must ensure the substrate is clean and free of contaminants like soap scum or old adhesive before you even think about reapplying mortar. The bond is a chemical reaction, and any organic material in the way will ruin it. We see this often in older homes where the original installation used organic mastic instead of a Portland cement based thin set. Mastic eventually re emulsifies when exposed to moisture, turning back into a sticky paste that offers no structural support. This is why your tile feels like it is floating or clicking when you step near it.
The chemical reality of modified thin set
Modified thin set uses liquid latex or powdered polymers to increase bond strength and flexibility within the mortar bed. This chemical enhancement allows the tile to resist the stresses of thermal expansion and minor vibrations that would otherwise crack a standard non modified dry set mortar.
Understanding the chemistry of your adhesive is the difference between a permanent fix and a temporary patch. Modern mortars are engineered at the molecular level. When you mix a polymer modified thin set, you are creating a matrix of Calcium Silicate Hydrate crystals. These crystals grow into the pores of the tile and the backer board, locking them together in a mechanical grip. If you use a cheap, unmodified mortar in a corner that sees heavy water use, the bond will eventually fail. The moisture content in a shower is constant, and if the mortar isn’t designed to withstand saturation, it will degrade. I always recommend an ANSI A118.4 compliant mortar for shower repairs. It has the shear strength needed to hold that tile in place against the vertical pull of the wall. When you are applying the new mortar, you need to ensure 95 percent coverage. This means no voids. Voids in the mortar bed are just pockets where water can collect. When water sits in those pockets, it creates hydrostatic pressure every time you step on the floor or when the shower heats up. That pressure eventually pushes the tile right off the floor. You want to use a notched trowel to create ridges, then collapse those ridges to form a solid, air free bond. It is a precise process that requires more than just a glob of glue.
| Material Type | Janka Hardness / Strength | Water Resistance | Acclimation Time |
|---|---|---|---|
| Ceramic Tile | Very High | Excellent | None |
| Hardwood Floors | 1360 (White Oak) | Poor | 7 to 14 Days |
| Laminate | High (AC4/AC5) | Moderate | 48 Hours |
| Modified Thin Set | >450 psi Shear | High | 24 Hours (Cure) |
The 1/8 inch that ruins everything
Expansion gaps and joint spacing are required by TCNA standards to accommodate the natural movement of building materials. If a tile is installed tight against a wall or another tile without a proper 1/8 inch gap, the resulting pressure will cause the tile to tent or pop.
I have seen so many DIYers shove a tile right into the corner without leaving room for a joint. They think it looks cleaner. What they are actually doing is building a ticking time bomb. Every material in your home expands and contracts with temperature changes. When the hot water hits the cold tile, the tile expands. If there is no gap at the perimeter, that energy has nowhere to go but up. The tile will buckle. You must leave that 1/8 inch gap at the change of plane. This gap should never be filled with hard grout. It must be filled with a flexible sealant, typically a color matched 100 percent silicone. Grout is a cementitious product; it is rigid. When the wall moves and the floor stays still, the grout will crack and fall out. Once the grout is gone, water gets in. Once water gets in, the bond fails. It is a cycle of destruction that starts with a tiny mistake in spacing. You should also check the surrounding grout lines. If the grout is cracked in other areas, it is a sign that the entire floor is experiencing too much deflection. You might be fixing one tile today, but you will be fixing five more next year if you don’t address the underlying movement. High quality installations require patience and a strict adherence to the spacing requirements set out by the Tile Council of North America.
“Movement joints are not optional; they are a functional requirement for any tiled surface exceeding eight feet in any direction.” – TCNA Handbook EJ171
Step by step guide to the repair
To fix a loose tile, you must first remove the old grout and mortar, clean the substrate to a pristine state, apply a polymer modified thin set, and finish with a flexible silicone sealant in the corner joints. This process ensures a mechanical and chemical bond that resists future moisture damage.
- Remove the loose tile carefully using a flat bar or a stiff putty knife to avoid chipping adjacent tiles.
- Rake out all old grout from the surrounding joints using a carbide tipped grout saw or a multi tool with a diamond blade.
- Scrape away the old mortar from the floor or wall substrate until it is flat and smooth; the new bond depends on this surface.
- Vacuum the area thoroughly to remove all dust and debris that could act as a bond breaker.
- Wipe the area with isopropyl alcohol to remove soap scum and oils that accumulate in showers.
- Mix a small batch of polymer modified thin set to a peanut butter consistency.
- Apply the thin set to the back of the tile (back buttering) to ensure 100 percent coverage.
- Press the tile firmly into place, wiggling it slightly to collapse the mortar ridges.
- Check that the tile is level with the surrounding floor and remove any squeeze out from the joints.
- Wait 24 hours for the mortar to cure before applying grout to the flat joints and silicone to the corner.
When you are finished, don’t rush the process. Most people want to use their shower immediately, but the hydration of the cement takes time. If you get that new mortar wet before it has fully cured, you will weaken the bond. The moisture will interfere with the chemical cross linking of the polymers, and you will find yourself back at the starting line within a month. Treat the repair with the same respect you would a full installation. While people often worry about the aesthetics of grout color matching, the structural integrity is what keeps your home safe from mold and water damage. A single loose tile is a symptom. Your job is to treat the cause. Whether it is a flexing subfloor or a lack of expansion joints, identifying the root cause is the only way to ensure the fix lasts for the next 25 years. I have seen the damage that a ignored shower leak can do. It doesn’t just stop at the tile; it travels through the subfloor, into the joists, and eventually affects the ceiling below. Take the time to do it right, use the right chemistry, and respect the physics of the corner.