
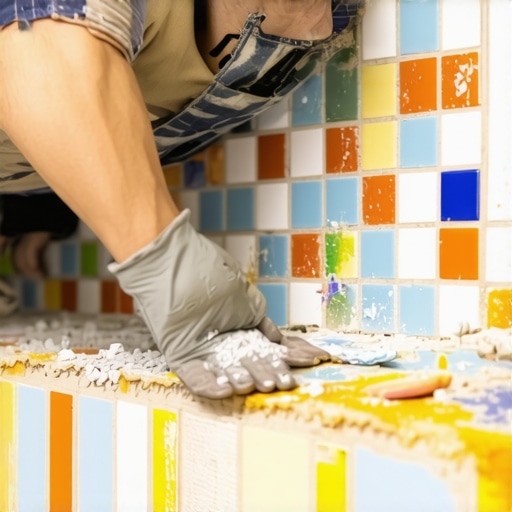
Mosaic tiles are unforgiving because their small surface area mirrors every dip in the substrate beneath them. To ensure a mess-free grout job, you must start with a floor or wall that is perfectly flat to within one-eighth of an inch over ten feet. Most guys skip the leveling compound. They think the underlayment will hide the dip. It won’t. I spent three days grinding concrete on a job last month just so the floor wouldn’t click like a castanet. If the subfloor is not rigid, the grout will crack before it even dries. This is the physics of deflection. Mosaic sheets act like a fabric, and if the fabric is laid over a mountain range, your grout joints will vary in depth, making the cleanup an absolute nightmare. You cannot fix a bad subfloor with grout. You fix it with a grinder and a level. I have seen too many installers try to float a floor using nothing but hope and a bag of thin-set. It never works. The grout ends up smeared across the tile surface because the installer is trying to fill voids that should not exist in the first place.
The subfloor secret that precedes every successful mosaic install
Subfloor preparation for mosaic tile requires a substrate deflection rating of L/360 or better to prevent grout joint failure. This means the floor must not bend under the weight of traffic. When dealing with showers or transitions to hardwood floors, the transition point is where most installers fail. A rigid subfloor ensures that the grout stays in the joints and does not end up as a dusty mess on the tile surface. I always tell my apprentices that the prep takes twice as long as the install. If you ignore the concrete slab or the plywood sheeting, you are building a house on sand. You need to verify that the moisture content of the subfloor is within acceptable limits using a pin-less moisture meter. If the slab is sweating, the grout will never bond correctly. It will remain soft and turn into a sludge when you try to wipe it down. This is why professional installers obsess over the chemistry of the bond. We are not just making things look pretty. We are engineering a wear surface that has to withstand thousands of pounds of pressure over its lifetime. Mosaic tiles have so many joints that any movement in the subfloor is magnified a hundred times. You will see hairline cracks within a week if you skip the decoupling membrane. I prefer a high-quality sheet membrane that provides a flat surface for the mosaic sheets to land on.
“A floor is only as good as the subfloor beneath it; deflection is the enemy of every joint.” – Master Flooring Axiom
Why mosaic sheets demand a surgical approach to thin-set
Managing thin-set squeeze-through is the only way to prevent a grout mess during the final stages of a mosaic installation. You must use a small V-notch trowel, typically 3/16 inch, to ensure that the mortar bed is thin enough to prevent overflow into the grout channels. If the mortar fills the joints, there is no room for the grout to live. This leads to a messy cleanup. I have spent hours picking dried mortar out of tiny mosaic joints because some hack used a 3/8 inch square notch trowel. It is a waste of time and it compromises the integrity of the floor. When you press the sheet into the mortar, you should use a rubber grout float to beat it in evenly. Do not use your hands. Your hands create uneven pressure points. The float distributes the load and keeps the tiles on a single plane. This plane is essential for a clean grout job. If one tile is higher than the next, the grout float will skip over the low spot and dump excess material there. Then you have to dig it out. It is a vicious cycle of wasted material and frustration. I smell the oak dust from the hardwood floors in the next room and I know that if I mess this up, the transition between the tile and the wood will look like garbage. The height must be exact. No exceptions.
The chemical physics of grout selection in wet environments
Choosing between sanded, unsanded, or high-performance grout depends entirely on the width of the mosaic joints and the moisture exposure. Most mosaics have joints narrower than 1/8 inch, which technically calls for unsanded grout. However, modern high-performance grouts use sub-aggregate particles that allow them to fit into tight joints while providing the strength of a sanded product. This is where the chemistry comes in. You need a grout that resists water absorption, especially in showers. While most people want the thickest underlayment, too much cushion actually causes the locking mechanisms on LVP to snap under pressure, and the same logic applies to tile. You want a dense, rigid bond. If the grout is too porous, it will suck up dirty wash water and leave a hazy film that is impossible to remove without acid. I always lean toward a polymer-modified grout. It creates a chemical bond that is far superior to standard Portland cement. When you mix it, you must follow the slaking instructions to the letter. Let it sit for ten minutes. This allows the polymers to fully hydrate. If you skip this, the grout will be brittle and messy to apply. It will feel like wet sand instead of a smooth paste. Smooth paste stays in the joint. Wet sand goes everywhere. It is the difference between a pro job and a DIY disaster.
| Grout Type | Polymer Bond | Stain Resistance | Ideal Gap Width |
|---|---|---|---|
| Sanded | Low | Moderate | Greater than 1/8 inch |
| Un-sanded | Low | Low | Less than 1/8 inch |
| High Performance | High | High | All widths |
| Epoxy | Chemical | Superior | Industrial |
The physics of the float and the 45 degree rule
The secret to a clean mosaic grout job is the angle of the rubber float relative to the tile joints. You must always move the float at a 45-degree angle to the grid of the tiles to prevent the edge of the float from digging out the fresh grout. If you pull the float parallel to the lines, the rubber will dip into the joint and pull the material back out. This creates an uneven surface and forces you to re-apply, which leads to more mess. You need to pack the joints tight. I mean really shove the grout in there. Air pockets are the enemy. An air pocket in a grout joint is a structural failure waiting to happen. It will collect water in a shower and eventually cause the grout to crumble. I watch guys lightly skim the surface and think they are done. They aren’t. You have to work the material into the full depth of the tile. Once the joints are full, use the float to scrape off as much excess as possible. The more you remove with the float, the less you have to wash off with the sponge. Washing is where most people ruin their floors. They use too much water. Water is a solvent. If you drown the grout while it is trying to set, you wash away the color pigments and the polymers. You end up with a blotchy, weak joint that looks like a rainy day in a coal mine. Use a damp sponge, not a wet one. If you can squeeze a single drop of water out of the sponge, it is too wet.
A checklist for pre-grout inspection
- Verify substrate deflection is L/360 or better.
- Scrub out thin-set squeeze-through from joints using a stiff brush.
- Check moisture content of the wall or subfloor with a meter.
- Mix grout to a peanut butter consistency without adding extra water.
- Allow grout to slake for 10 minutes before the final stir.
- Ensure the room temperature is between 60 and 80 degrees Fahrenheit.
The ghost in the expansion gap and why it matters
Every tile installation must have a perimeter expansion gap filled with 100 percent silicone sealant rather than hard grout. This gap allows the structure of the house to move without putting pressure on the tile field. If you grout all the way to the wall, the floor will eventually buckle or the grout will crack at the edges. This is basic physics. Wood moves, concrete moves, and your house breathes. If you lock the tile in place, something has to give. Usually, it is the grout joints in the middle of the floor. They will pop out like popcorn. I see this all the time in houses with laminate or hardwood floors that meet a tile entryway. The installer forgets the expansion joint, and by the next season, the whole floor is cupping. You have to leave that 1/4 inch gap. Cover it with baseboards or a shoe molding. For showers, every change of plane, like where the wall meets the floor, must be caulked. Grout will crack in those corners every single time. It is not a matter of if, but when. Use a color-matched silicone. It stays flexible and keeps the water where it belongs. This is the mark of a Master Floor Installer. We think about what the floor will look like in five years, not just when we walk out the door. The mess you avoid today is the structural failure you prevent tomorrow.
“Grout is the fuse of the flooring system; if the system is under stress, the grout is the first thing to break.” – Tile Council of North America Standard
Why most people use too much water during the wash phase
Excess water during the grout cleanup phase dilutes the cementitious bond and causes color shading issues across the tile surface. The wash phase should be a surgical strike. You want to remove the haze without disturbing the grout in the joints. I use a two-bucket system. One bucket is for the initial dirty rinse, and the second is for clean water. This keeps the sponge as clean as possible. You should only need two or three passes. If you are still scrubbing after the fourth pass, you left too much grout on the tile with your float. The first pass should be a circular motion to break the surface tension of the haze. The second pass should be a single, smooth stroke to pull the moisture off. If you see white streaks, that is the grout drying on the surface. Don’t panic. Let it dry to a haze, then buff it off with a dry microfiber cloth. This is the cleanest way to finish a mosaic. Do not keep adding water. You are just making soup at that point. I have seen guys turn a beautiful marble mosaic into a muddy swamp because they thought they needed to scrub it like a dirty dish. It is a delicate balance of chemistry and timing. If you wait too long, the grout turns to stone. If you go too early, you pull it out of the joints. You have to feel the resistance of the material. It should be firm to the touch, like a pencil eraser, before you start the final wash.
Final curing times and the lie of the fast set
While many grout packages claim a four-hour walk-on time, a full chemical cure takes twenty-eight days to reach maximum hardness. You should keep traffic off the new mosaic for at least twenty-four hours. For showers, do not turn on the water for at least seventy-two hours. The grout needs time to breathe and the moisture needs to evaporate. If you seal it too early, you trap moisture inside the joints, which leads to mold and mildew growth. I don’t care what the bottle of sealer says. Wait at least a week before applying any sealer. This allows the grout to fully hydrate and reach its intended color. If you seal it while it is still damp, the sealer will turn cloudy and you will have a mess that requires a chemical stripper to fix. I hate callbacks. I do the job right the first time so I never have to see the floor again. When you respect the chemistry of the materials and the physics of the subfloor, the grout job becomes a simple task instead of a nightmare. Mosaic tile is a test of patience. If you rush it, the floor will tell on you. Every uneven joint and every smeared bit of haze will be visible under the bathroom lights. Take your time. Grind the floor. Check the moisture. Mix the grout correctly. That is the only trick you need.