
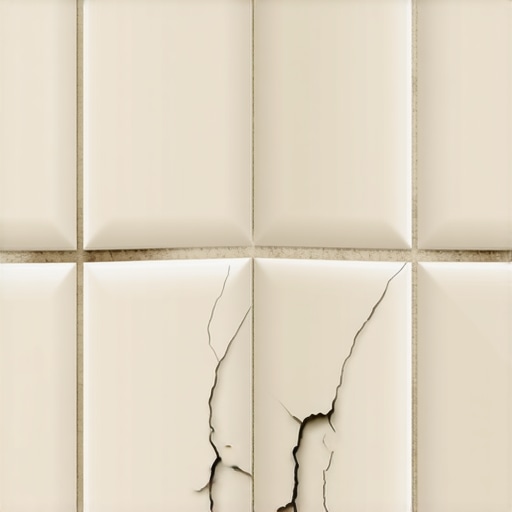
Most guys skip the leveling compound. They think the underlayment will hide the dip. It won’t. I spent three days grinding concrete on a job last month just so the floor wouldn’t click like a castanet. That is the reality of professional flooring. If you see cracks in your grout lines, specifically in the corners or along the perimeter, you are looking at a structural failure, not a cosmetic one. The industry calls it deflection. I call it a lazy installation. When the subfloor moves, the rigid grout has nowhere to go but to pieces. I have seen fifteen thousand dollar projects ruined because a contractor forgot that wood and tile have a toxic relationship when moisture gets involved. You can buy the most expensive Italian porcelain in the world, but if your joists are bouncing, that tile is just a very expensive jigsaw puzzle waiting to happen.
The structural movement that destroys grout joints
Grout cracks occur because of subfloor deflection, lack of movement joints, and improper adhesive coverage. When the structural support beneath the tile flexes beyond the L/360 standard, the rigid cementitious bond of the grout snaps. This structural failure often results from undersized floor joists or thin subfloor plywood. The physics of the situation are simple. Tile is brittle. Grout is brittle. Wood is flexible. If you do not decouple those materials or ensure the wood is rigid enough to support the weight, the grout will fail every single time. I have walked into hundreds of bathrooms where the homeowner is blaming the grout brand when they should be blaming the two by eight joists spanning sixteen feet. It will buckle. It will crack. It will fail. You cannot fight the laws of structural engineering with a bucket of premixed grout from a big box store.
“A floor is only as good as the subfloor beneath it; deflection is the enemy of every joint.” – Master Flooring Axiom
The chemistry of hydration and why it matters
Proper grout curing requires a specific chemical hydration process that fails if the water evaporates too quickly. If your installer used a highly porous tile without dampening the edges, the tile sucked the moisture out of the grout before it could form a crystalline bond. This leads to soft, powdery grout that flakes out. Most people do not realize that grout does not just dry. It cures. This is a chemical reaction between portland cement and water. If that reaction is interrupted by heat, airflow, or porous substrates, the structural integrity of the joint is compromised. I see this often in dry climates like Phoenix or Las Vegas where the ambient air strips the moisture from the mix. You end up with a surface that looks fine for a week but turns to dust the first time you run a vacuum over it. You need to understand the mil thickness of your application and the evaporation rate of your environment.
Why your shower corners need silicone not cement
Changes in plane require flexible sealants like 100 percent silicone because different surfaces expand and contract at different rates. When a floor meets a wall, or two walls meet in a corner, it is called a change of plane. Hard grout in these areas will always crack because the walls move independently of the floor. This is a fundamental rule of the Tile Council of North America. You must use a color matched caulk that stays flexible. Most builders ignore this because it is faster to just smear grout everywhere. Then, six months later, when the house settles or the seasons change, the homeowner sees a vertical crack. It is not a mystery. It is a failure to respect the expansion gap. If you want a shower that lasts twenty years, you stop the grout short of the corner and fill that gap with high grade silicone. It is the only way to accommodate the micro movements of the home structure.
| Grout Type | Flexibility Rating | Best Use Case | Moisture Resistance |
|---|---|---|---|
| Sanded Grout | Low | Large joints over 1/8 inch | Medium |
| Unsanded Grout | Very Low | Narrow wall joints | Low |
| Epoxy Grout | High | High traffic and wet areas | Maximum |
| High Performance Cement | Medium | Residential floors | High |
The ghost in the expansion gap
Expansion gaps at the perimeter of a room allow the entire flooring assembly to breathe without putting pressure on the grout. If your tile is installed tight against the baseboards or the drywall, the entire floor acts like a giant piston when the humidity rises. In a humid region like Houston, hardwood floors and subfloors will swell. If there is no gap at the edges, that pressure is transferred directly into the tile field. The grout is the weakest link. It will crush and pop out of the joints. I always leave at least a quarter inch gap at the perimeter. This gap is hidden by the baseboard or shoe molding. It is an invisible safety valve. Without it, the physics of expansion will destroy your installation. You have to give the materials room to live. A floor is a living, moving thing, even if it feels solid under your boots.
Why your subfloor is lying to you
Standard three quarter inch plywood is rarely enough for a large format tile installation without an additional underlayment layer. Most people look at their subfloor and think it is solid. They are wrong. They are looking at the surface, not the span. I use a laser level to find the dips that the naked eye misses. If there is a dip of more than an eighth of an inch over ten feet, your grout will crack. The tile will bridge that dip, creating a hollow spot. When you step on that tile, it flexes. That tiny movement is enough to break the bond of the grout. I spend more time with floor patch and a grinding wheel than I do with a grout float. That is the difference between a floor that lasts five years and a floor that lasts fifty. You have to fix the foundation before you even think about the finish. If the subfloor is not flat, the finished floor is doomed.
“Tile installations shall be designed to allow for movement where such movement is anticipated within the structure.” – TCNA Handbook for Ceramic Glass and Stone Tile Installation
The 1/8 inch that ruins everything
Narrow grout joints increase the risk of failure because there is less material to absorb the stresses of movement. Everyone wants those tiny, almost invisible grout lines. They look great in magazines. They are a nightmare in the real world. If your grout joint is too narrow, the grout cannot get deep enough into the joint to stay put. It sits on the surface like a thin ribbon. As soon as the floor moves, that ribbon snaps. For most floor tiles, a sixteenth of an inch is the absolute minimum, but I prefer an eighth. It gives the grout enough body to hold its ground. It also allows for slight variations in the tile size. No tile is perfectly square. A wider joint hides those imperfections. A narrow joint highlights them and fails faster. You have to choose between a magazine photo and a functional floor.
- Check subfloor deflection for L/360 or L/720 ratings before starting.
- Verify moisture content of wood subfloors is within 2 percent of the tile underlayment.
- Use a decoupling membrane for any installation over a wood subfloor.
- Ensure 95 percent mortar coverage for all wet area tile installations.
- Allow grout to cure for at least 72 hours before heavy traffic or cleaning.
- Match the grout type to the joint width to prevent shrinkage cracks.
The microscopic reality of bond failure
When you look at grout through a magnifying glass, it is a dense forest of interlocking crystals. These crystals wrap around the edges of the tile and the surface of the thinset. If the tile is dusty, the crystals cannot grab hold. They just sit on a layer of fine debris. This is why I wipe down every tile before it goes on the floor. Most guys are too busy to do that. They pull a tile out of the box and slap it down. That dust is a bond breaker. It creates a microscopic gap that allows water to seep in and movement to occur. Over time, that tiny gap becomes a visible crack. It is about the chemistry of the bond. If you do not have a clean surface, you do not have a floor. You have a collection of loose stones. This is the zooming logic of a master installer. You look at the things the homeowner never sees. You care about the dust because the dust is what kills the grout. I have spent decades learning that the smallest details are the ones that cause the biggest headaches. If you want a floor that does not crack, you have to be obsessed with the things that happen at the molecular level. It is not just about the color. It is about the science of the surface.