
I spent three days grinding concrete on a job last month just so the floor wouldn’t click like a castanet. The homeowners thought the underlayment would hide the dip. It won’t. Most guys skip the leveling compound because they want to get to the pretty part of the job. They think the foam or the cork will absorb the variance. That is a lie that leads to broken locking mechanisms and hollow sounds that haunt a house for decades. I had to explain to them that a floor is an engineered system, not a rug. If the substrate is out of tolerance by even 3/16 of an inch over a 10 foot span, you are building a failure. I smelled like concrete dust and WD-40 for a week, but that floor is now as flat as a pool table. That is the difference between a floor that lasts and a floor that becomes a liability.
The blue tape secret for perfect hardwood layouts
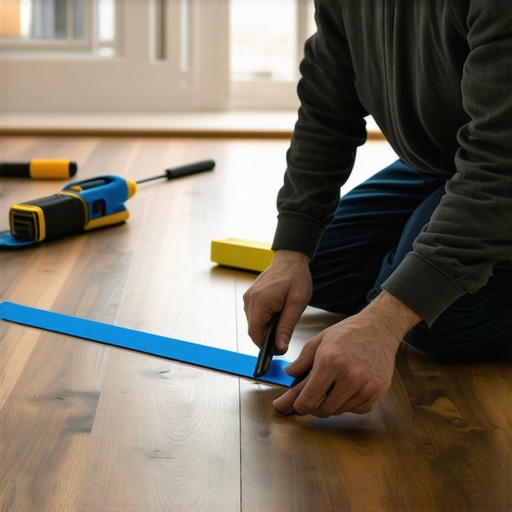
The blue tape layout method involves using painters tape to mark the exact positioning of boards across the entire floor plan before a single nail is driven. This technique allows installers to visualize transitions, avoid thin slivers of wood at the walls, and ensure the floor is perfectly square. You do not start at the longest wall and hope for the best. You pull a string line. You find the center of the room. You use the 3-4-5 triangle method to establish a perfectly perpendicular grid. Blue tape acts as your architectural guide. It shows you exactly where the boards will land near the kitchen island or where the transition to the grout lines in the bathroom will occur. If you see a half inch sliver at the far wall on your tape layout, you shift your starting row by two inches. It is basic geometry applied to natural materials. This prevents the awkward look of narrow boards that scream amateur hour.
The 1/8 inch that ruins everything
Subfloor flatness is the single most important factor in the longevity of any hardwood or laminate installation. A deviation of 1/8 inch over a 6 foot radius can cause vertical movement that eventually snaps the tongue and groove joints under the weight of foot traffic. When you walk across a floor and hear a click or a pop, you are hearing the sound of friction. That friction is the wood or the laminate core rubbing against itself because it has no support from the subfloor. This is not just an annoying sound. It is the sound of your investment dying. Over time, that movement will cause the finish to crack at the seams. In extreme cases, the boards will begin to separate. I see it all the time in new builds where the framing has settled and the installer was too lazy to pull out a straightedge. You must address the dips with self-leveling underlayment or the humps with a sander. There are no shortcuts here. High spots in the subfloor act like a fulcrum. Every time you step on one side, the other side lifts. This cyclic loading is the enemy of structural integrity.
“A floor is only as good as the subfloor beneath it; deflection is the enemy of every joint.” – Master Flooring Axiom
Why your subfloor is lying to you
Plywood and OSB subfloors often appear flat to the naked eye while harboring significant moisture imbalances or structural deflection that will ruin a hardwood floor. A moisture meter is the only tool that tells the truth about whether a subfloor is ready for installation. You cannot trust a visual inspection. You need to know the Moisture Content (MC) of the subfloor and the flooring itself. If the difference between the two is more than 4 percent for strip flooring or 2 percent for wide plank, you are headed for a disaster called cupping. Cupping happens when the bottom of the board absorbs more moisture than the top, causing the edges to rise. It looks like a potato chip. I have walked into homes where $15,000 worth of walnut was ruined because the installer didn’t check the crawlspace humidity. The subfloor acts as a bridge. If that bridge is damp, the wood will find that water. It is basic biology. Wood is hygroscopic. It breathes. It moves. If you do not control the environment, the environment will control your floor.
The invisible moisture trap under your feet
Moisture vapor transmission from concrete slabs is a silent killer of hardwood floors and can even compromise laminate if a proper 6-mil poly barrier is not utilized. Concrete is a sponge that never truly stops moving water from the earth into your home. Even if a slab feels dry, it is constantly off-gassing. This is why we use calcium chloride tests or relative humidity probes drilled into the slab. If you are installing hardwood floors over concrete, you need a vapor retarder that meets the Class I or Class II specifications. For laminate, that 6-mil plastic is the only thing standing between your floor and a mold colony. In areas near showers or laundry rooms, this risk is doubled. You have to think about the hydrostatic pressure. If the water has nowhere to go, it will push against the bottom of your flooring. This leads to delamination in engineered products and total rot in solids. I always tell clients that the most expensive part of the floor is the part they will never see. That moisture barrier is what allows the wood to survive the seasons.
The chemistry of the bond
The chemical composition of flooring adhesives determines the floor’s ability to withstand environmental shifts and heavy loads without losing its grip on the substrate. Modern silane-modified polymer adhesives provide a flexible yet incredibly strong bond that allows for natural wood movement. Old school glues were rigid. When the wood expanded, the glue would either snap or pull the top layer of the plywood right off. Now, we use adhesives that act like a shock absorber. This is particularly important for wide-plank engineered floors. You need a glue that can handle the shear forces. We are talking about the molecular level. The adhesive has to bite into the pores of the wood and the pores of the concrete simultaneously. If you use a cheap, water-based adhesive on a solid wood floor, you are just asking for the wood to swell and the bond to fail. It is a chemical reaction. You have to respect the open time of the glue. If you let it skin over, you might as well be laying the floor on top of dry paper. High quality adhesives also provide an integrated moisture barrier, which is a massive win for speed, but you have to apply it with the correct notched trowel to ensure 100 percent coverage.
| Material Type | Janka Hardness | Acclimation Time | Max Moisture Delta |
|---|---|---|---|
| Red Oak | 1290 | 7-10 Days | 4 Percent |
| White Oak | 1360 | 7-14 Days | 4 Percent |
| Black Walnut | 1010 | 10-14 Days | 2 Percent |
| Hickory | 1820 | 14+ Days | 2 Percent |
| Laminate | N/A | 48 Hours | N/A |
Hardwood versus laminate in high humidity
Hardwood floors are traditional and valuable but extremely sensitive to humidity fluctuations, whereas laminate offers better dimensional stability at the cost of being irreparable once water penetrates the core. Choosing between them requires an honest assessment of your home’s climate control capabilities. If you live in a place like Houston, a solid 3/4 inch oak floor is a massive risk. The humidity will make those boards grow until they hit the walls and buckle. In those environments, engineered wood with a cross-ply core is a much smarter engineering choice. Laminate has its place, especially in basements or high-traffic areas, but it is a temporary floor. Once the edges of laminate get wet, the MDF core swells and it will never go back down. You cannot sand it. You cannot fix it. Hardwood, on the other hand, can be refinished five or six times over a century. It is the difference between a lifetime asset and a disposable product. When you are looking at transitions to tile or showers, you have to ensure the grout lines do not trap water against the wood edge. A proper transition strip or a silicone-based caulk that matches the grout color is necessary to prevent wicking.
“Substrate preparation is the most critical step in any installation.” – TCNA Handbook Principles
A checklist for a lifetime floor
A successful flooring installation requires a strict sequence of checks including moisture testing, subfloor leveling, material acclimation, and layout planning before the first row is secured. Skipping any of these steps will result in a floor that fails prematurely. You have to be a stickler for the rules. The NWFA has these standards for a reason. They were written in the blood of contractors who had to pay for $20,000 rip-outs. You need to verify the environment. You need to check the equipment. You need to ensure the homeowner understands that wood is a living material. Here is the reality of the trade.
- Verify subfloor flatness is within 1/8 inch over 6 feet using a professional straightedge.
- Check moisture content of both the subfloor and the flooring material in at least 20 locations per 1,000 square feet.
- Acclimate the wood in the room where it will be installed with the HVAC system running at normal living conditions.
- Ensure a minimum 1/2 inch expansion gap around the entire perimeter of the room to allow for seasonal movement.
- Use a 6-mil polyethylene vapor barrier over all concrete substrates regardless of the floor type.
- Stagger the end joints of the boards by at least 6 inches to ensure structural strength and visual appeal.
- Avoid H-joints and stair-stepping patterns which create weak points in the floor’s locking system.
Following this protocol is the only way to guarantee a floor that doesn’t just look good today, but remains structural and silent for the next forty years. Don’t be the person who thinks a bit of underlayment is a magic fix. It isn’t. The magic is in the prep work. The magic is in the blue tape and the moisture meter. If you get those right, the rest of the job is just putting a puzzle together.