
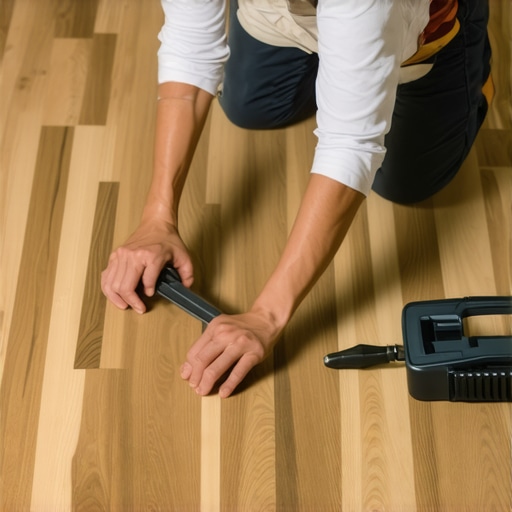
I once walked into a house where a $15,000 wide-plank walnut floor was cupping so bad it looked like a potato chip because the installer didn’t check the crawlspace humidity. It was a absolute disaster. The gaps between the planks were wide enough to drop a nickel through, and the homeowner had tried to smear generic wood filler into every crack. It looked like someone had tried to fix a Swiss watch with a bucket of spackle. Wood filler is not a structural component. It is a cosmetic bandage that fails the moment the atmospheric pressure shifts. When wood breathes, it expands and contracts. Filler does neither. It just cracks, turns into dust, and gets sucked up by your vacuum cleaner, leaving the gap looking worse than before.
The ghost in the expansion gap
Hiding wide gaps in hardwood floors requires shimming with matching wood slivers or installing flexible natural fibers like jute rope to accommodate seasonal movement. Wood filler lacks the elastic modulus to handle the cellular expansion of oak or walnut. You must understand that wood is hygroscopic, meaning it constantly exchanges water molecules with the surrounding air. In a humid environment, the wood cells swell. In a dry winter, they shrink. If you fill that void with a hard, brittle material, something has to give. Usually, it is the bond between the filler and the wood fiber, resulting in unsightly debris and an exposed gap that attracts dirt and moisture.
To fix these gaps correctly, you have to look at the anatomy of the floor. Each plank is a series of longitudinal tubes called tracheids and vessels. These tubes transport water in the living tree and continue to react to moisture even after the tree has been milled and nailed to your subfloor. When you see a gap larger than one eighth of an inch, you are looking at a failure of acclimation or a structural shift in the subfloor. A master installer knows that the solution must be as flexible or as structural as the wood itself. This is why we turn to slivering, a technique often called a Dutchman repair, where we utilize the physics of the wood grain to bridge the void.
“Wood flooring will perform best when the interior environment is controlled to stay within a relative humidity range of 30 to 50 percent.” – NWFA Technical Publication
The 1/8 inch that ruins everything
Gaps exceeding one eighth of an inch require mechanical intervention rather than chemical fillers to maintain the integrity of the walking surface. This threshold is where the structural stability of the tongue and groove joint begins to diminish. When gaps reach this size, the tongue is no longer fully seated within the groove of the adjacent board, which can lead to vertical deflection and squeaking. The sound of a floor clicking like a castanet is usually the sound of a gap that was ignored. In regions like Houston where the humidity is oppressive, boards might stay tight all year, but in the dry air of Phoenix or a heated home in Chicago, those gaps will open up like a canyon.
The first step in any repair is assessing the moisture content with a pin-type meter. You need to know if the gap is seasonal or permanent. If the wood is currently at six percent moisture content and you have a wide gap, it might close when the humidity rises to ten percent in the spring. If you fill it while it is dry, the wood will expand and crush the filler or, worse, cause the boards to cup or buckle when they run out of room. This is why we call the expansion gap at the perimeter of the room the most important part of the installation. Without it, the floor has nowhere to go but up.
The rope method for historic planks
Using natural fiber rope like jute or hemp provides a traditional and flexible solution for hiding wide gaps in older, site-finished hardwood floors. This technique dates back centuries to ship building where oakum was used to seal the hulls of wooden vessels. In a home, the rope acts as a backer that accepts a stain or a flexible sealant. You choose a rope diameter slightly larger than the gap. You then soak the rope in a mixture of wood stain that matches your floor. Once dry, you tap the rope into the gap using a blunt chisel and a mallet. This creates a textured, period-accurate look that moves with the house.
The chemistry of this repair is beautiful. The natural fibers of the hemp have their own internal voids that can be compressed without losing structural integrity. Unlike wood filler which is a solid mass, the rope is a weave. When the planks expand, the weave tightens. When they contract, the rope stays seated. It hides the dark, dusty void of the subfloor while providing a visual bridge that looks like it belongs in a 1920s craftsman bungalow. It is the antithesis of the plastic, fake look of modern acrylic fillers. For wide gaps in pine or Douglas fir floors, this is the gold standard.
Slivering as a structural solution
The Dutchman repair or slivering involves gluing thin wedges of matching wood species into the gap to create a permanent and invisible repair. This is the most labor-intensive method but yields the highest quality results. You start by finding scrap pieces of the exact same wood species, ideally from the same milling run if you have leftovers. You use a table saw or a sharp hand plane to create long, tapered slivers that are slightly wider than the gap. You then apply a high-quality PVA glue, such as Titebond II, to the sides of the sliver, ensuring you do not glue the sliver to the subfloor. This allows the boards to move as a unit.
The physics of the bond is critical. You are creating a wood-to-wood bond that, if done correctly, is stronger than the wood itself. After the glue has cured, you use a flush-cut saw or a razor-sharp paring chisel to remove the excess wood. Then, you carefully sand the area by hand and touch up the finish. Because the grain of the sliver matches the grain of the floor, the repair disappears. This is how you fix a floor that was poorly installed without ripping up the whole room. It respects the material and the craft. It is a slow process, but it is the only way to achieve a zero-threshold look in a high-end architectural space.
Why your subfloor is lying to you
Subfloor deflection and moisture vapor transmission are the hidden culprits behind wide gaps that reappear even after professional repair. If your subfloor is made of cheap, builder-grade OSB that has seen too much rain during construction, it may have lost its fastener-holding power. The nails or cleats holding your hardwood in place may be backing out, allowing the planks to drift apart. No amount of rope or slivers will fix a floor that is floating away from its foundation. You must also consider the vapor pressure from the crawlspace. If there is no vapor barrier, the bottom of the plank stays wet while the top stays dry, causing a permanent state of stress in the wood cells.
| Species | Janka Hardness | Stability Rating |
|---|---|---|
| Ipe | 3680 | Very Low |
| Hickory | 1820 | Moderate |
| Hard Maple | 1450 | Low |
| White Oak | 1360 | High |
| Red Oak | 1290 | High |
| Black Walnut | 1010 | Moderate |
As seen in the table, species like White Oak are prized not just for their look but for their stability. A high stability rating means the wood moves less with humidity changes, making it less likely to develop the wide gaps that drive homeowners crazy. If you are dealing with a species like Hickory, you must be twice as careful with acclimation because that wood wants to move. It is a stubborn material that requires a master’s touch and a perfectly controlled environment.
“A floor is only as good as the subfloor beneath it; deflection is the enemy of every joint.” – Master Flooring Axiom
The checklist for a successful gap repair
- Measure the gap at three different points to find the widest section.
- Use a moisture meter to verify the planks are at an equilibrium moisture content between 6 and 9 percent.
- Clean the gap thoroughly with a vacuum and a thin dental pick to remove old filler and debris.
- Select a repair method based on the age of the floor and the width of the void.
- Test your stain or finish on a scrap piece before applying it to the floor.
- Ensure the room humidity is stabilized at 45 percent for at least 72 hours before starting.
The chemistry of flexible sealants
Modern siliconized acrylic sealants designed specifically for wood floors offer a middle ground between the rigidity of wood filler and the complexity of slivering. These products are engineered with high solids content and specific polymers that allow for 25 percent movement. They are not the same as the caulk you use in a shower. These are flooring-grade compounds that can be sanded and finished. The trick is the application. You must avoid three-sided adhesion. If the sealant sticks to the bottom of the gap (the subfloor), it will tear when the boards move. We use a thin piece of foam backer rod or even a strip of waxed paper at the bottom of the gap to ensure the sealant only bonds to the sides of the planks.
When the sealant is applied, it must be tooled correctly to match the profile of the wood. Too much and it looks like a plastic bead. Too little and it leaves a shadow line. This is where the artistry comes in. You are essentially painting with chemistry. While most people want the thickest underlayment to hide imperfections, too much cushion actually causes the locking mechanisms on LVP or the tongue and groove on hardwood to snap under pressure because the floor is bouncing too much. The same logic applies to gap repairs. The repair must have the right density to support the weight of a person walking over it without cracking the surrounding finish. It is a delicate balance of physics and aesthetics that defines the work of a master architect of the floor.