
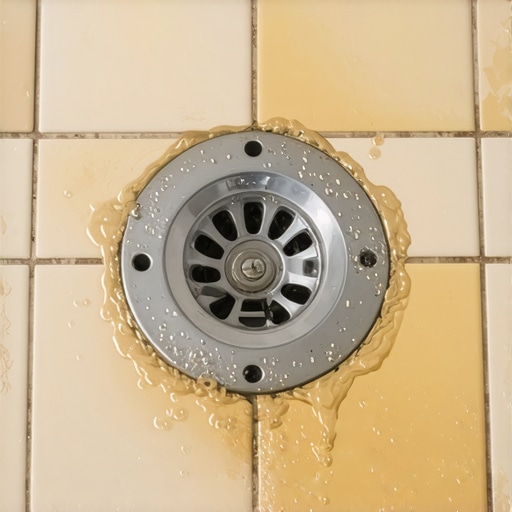
The smell of wet concrete and the sharp tang of a fresh saw cut are the scents of a job done right. Most people see a shower floor as a pretty mosaic of pebbles or marble. I see a complex hydraulic system that must fight gravity and surface tension every second it exists. I spent three days grinding concrete on a job last month just so the floor would not click like a castanet and more importantly so the water would actually find the drain. Most guys skip the leveling compound. They think the underlayment will hide the dip. It won’t. When water sits on your tile instead of disappearing down the pipe it is rarely a mystery to someone who has spent twenty five years on his knees with a level and a moisture meter. It is usually a failure of the fundamentals.
The physics of the failed slope
Shower drainage failure occurs when the subfloor pitch is less than one fourth inch per foot toward the drain assembly. This geometric requirement ensures that hydrostatic pressure and gravity overcome the surface tension of the water on the tile surface and within the grout joints. If the slope is flat or contains birdbaths the water will remain stagnant leading to mold growth and efflorescence. You cannot fix a bad slope with extra thin set because thin set is not a structural build material and will shrink during the hydration process.
I remember a job in a coastal high rise where the tile looked perfect. The homeowner had paid eighty dollars per square foot for Italian marble. He was furious because water pooled near the glass door instead of the center drain. I had to tell him the truth. His installer did not understand the physics of a pre slope. They built the slope with thin set alone. As the water molecules travel across the surface they encounter friction. Without a consistent two percent grade that friction wins every time. The water stays put. It creates a perched water table within your floor system that eventually rots the framing. I have seen solid oak joists turned into mush because a guy thought he could eyeball a quarter inch. You can’t. You need a long level and a steady hand.
“A floor is only as good as the subfloor beneath it; deflection is the enemy of every joint.” – Master Flooring Axiom
Why the weep holes are clogged
Clogged weep holes are the primary cause of saturated mortar beds and foul odors in custom tile showers. These small orifices located at the base of a three piece clamping ring drain allow moisture that has seeped through the grout to escape into the waste line. When installers pack portland cement or thin set directly against these holes they effectively seal the system. This creates a permanent reservoir of gray water beneath your feet which leads to discoloration of the natural stone and grout failure.
Think of the weep holes as the safety valve of your shower. If you are using a traditional water in water out system you have a liner buried under a mud bed. That liner catches the water that gets past the tile. If that water cannot get into the drain through the weep holes it just sits there. It becomes a science experiment. You start smelling rotten eggs. That is the bacteria thriving in the stagnant water. I always tell my apprentices to protect those holes with crushed stone or a plastic weep hole protector. If you don’t it is like putting a plug in a bathtub and wondering why it won’t drain. The chemistry of the water sitting there also starts to break down the bond of your thin set. Eventually the tiles start to wiggle. Once they wiggle they crack. Once they crack you are calling me to tear the whole thing out.
The chemistry of grout and surface tension
Grout porosity and surface tension play a significant role in how water moves across a shower floor. Standard cementitious grout is naturally hydrophilic meaning it absorbs water into its capillary structure. If the grout joints are recessed too deeply or if the tile texture is too aggressive the water droplets will be trapped by capillary action. High performance epoxy grouts or single component resins offer better hydrophobic properties but they cannot compensate for a structural lack of pitch.
When you look at a grout joint under a microscope it looks like a mountain range. For a water droplet to move it has to climb over those peaks. If the installer didn’t strike the joints properly or used a sponge that was too wet they left behind craters. Water loves craters. In places like Houston or New Orleans where the humidity is high the air is already saturated. The water on the floor has nowhere to evaporate. It just sits in those microscopic valleys. This is why I hate pebble floors. They have more grout than tile. Each of those stones creates a tiny dam. If your slope isn’t perfect those dams will hold back a gallon of water every time you shower. It is a maintenance nightmare that most designers never mention because they don’t have to clean it.
| Material Type | Water Absorption Rate | Recommended Slope | Drying Time |
|---|---|---|---|
| Porcelain Tile | Less than 0.5 percent | 1/4 inch per foot | Fast |
| Natural Marble | 0.5 to 3.0 percent | 3/8 inch per foot | Slow |
| Pebble Mosaic | High due to grout volume | 1/2 inch per foot | Very Slow |
| Glass Tile | Zero percent | 1/4 inch per foot | Medium |
Subfloor deflection and the cracking nightmare
Subfloor deflection is the vertical movement of the floor system under live loads which often leads to cracked grout and compromised waterproofing. In the context of shower drainage a bouncy subfloor can cause the pre slope to settle or shift over time creating low spots where water pools. The TCNA standards require a deflection rating of L/360 for ceramic tile and L/722 for natural stone installations to ensure structural integrity.
You walk into a bathroom and the floor feels solid but to a tile guy it might as well be a trampoline. If your joists are undersized or the subfloor is only a single layer of five eighths plywood the whole system is going to flex. Every time you step in that shower you are bending the waterproofing membrane. Eventually something gives. Usually it is the bond between the tile and the thin set. Or worse the waterproof seal at the drain breaks. Now you have water hitting the wood. Wood expands when it gets wet. Tile doesn’t. That is a recipe for a disaster. I spent years fixing jobs where the framing was the real criminal. You have to stiffen that floor before you even think about picking up a trowel. I like to add blocking between the joists or an extra layer of exterior grade plywood. It is about building a foundation not just a surface.
“The slope to drain shall be a minimum of one fourth inch per foot and shall be maintained throughout the floor area.” – TCNA Handbook Standards
Waterproofing membranes that trap moisture
Topical waterproofing membranes like liquid applied rubbers or bonded sheet membranes have revolutionized shower construction by keeping the mortar bed dry. However if these membranes are applied over an incorrectly pitched mud bed they will simply hold the standing water directly beneath the tile. This is known as the perched water table effect where moisture is trapped in the thin set layer unable to reach the drain because of surface tension and improper geometry.
A lot of guys think these new membranes are a magic wand. They think they can slap some red liquid on a flat floor and it will be fine because it is waterproof. But waterproof doesn’t mean it drains. It just means the water doesn’t leak into the kitchen downstairs. You still have a puddle in your shower. That puddle is full of soap scum and skin cells. It becomes a breeding ground for pink mold. When I use a sheet membrane I am obsessive about the slope underneath it. I want that water moving toward the drain the second it hits the floor. If you see a guy skipping the pre slope and just putting a membrane on the flat subfloor you should fire him on the spot. He is building you a swamp not a shower.
The one fourth inch per foot rule is non negotiable
Adherence to the pitch requirements specified in local building codes and industry standards is the only way to ensure long term drainage performance. A slope of one fourth inch per vertical foot provides the necessary kinetic energy for water to travel toward the drain grate. Any deviation from this ratio increases the risk of stagnant water and systemic failure of the shower assembly.
- Verify the subfloor is level before starting any slope work.
- Install a dedicated pre slope beneath the waterproofing liner.
- Ensure the liner follows the pitch of the pre slope perfectly.
- Protect the weep holes using gravel or spacers.
- Check the final slope with a dedicated spirit level.
- Use a flood test to verify drainage before installing tile.
- Select the right thin set for the tile size to avoid lippage.
- Maintain consistent grout joint depths for even drying.
- Seal natural stone to prevent internal water logging.
- Clean the drain assembly regularly to prevent hair clogs.
Thin set mortars and the bond failure
The chemical bond of polymer modified thin set is vital for tile adhesion but it is highly sensitive to moisture levels during the curing process. If a shower floor does not drain and remains constantly saturated the thin set can undergo re emulsification where the polymers break down. This leads to hollow sounding tiles and grout cracking as the structural bond between the tile and the substrate is lost.
I have seen guys use the wrong mortar all the time. They use a basic unmodified tea bag of a mix on a large format porcelain tile and then wonder why it pops off in six months. In a shower you need the good stuff. You need those polymers to create a bridge between the tile and the floor. But those polymers need to dry to reach full strength. If your floor is always wet because the slope is bad that mortar never really gets to the finish line. It stays soft. It stays weak. I once pulled up a floor that had been installed for three years and the thin set was still the consistency of peanut butter. That is what happens when you trap water. It is a slow motion train wreck. You need to understand the ISO 13007 classifications. If you aren’t using at least a C2 mortar in a wet area you are asking for trouble.
How large format tiles ruin your drainage
Large format tiles are increasingly popular in modern bathroom design but they present significant drainage challenges for center drain showers. Because a large tile cannot easily conform to a multi directional slope it often results in excessive lippage and flat spots where water pools. This necessitates the use of linear drains which allow for a single plane slope and better water management across large surface areas.
People want these massive two foot by four foot tiles in a four foot shower. It is basic math. You cannot bend a piece of rigid porcelain into a funnel shape. To make it work you have to cut the tile into envelopes which ruins the look or you end up with huge lips that will stub your toe. If you want the big tiles you have to go with a linear drain. You slope the whole floor in one direction like a ramp. It is a much cleaner look and it actually works. But it requires more planning at the framing stage because you have to drop the floor joists to accommodate the drain height. Most installers don’t want to do that work. They would rather try to cheat the slope and leave you with a floor that stays wet for three days after you use it.
Final assessments on a dry bathroom
At the end of the day a shower is a functional tool. It has to handle gallons of water without flinching. If your new shower floor isn’t draining correctly it isn’t a cosmetic issue. It is a structural failure. You can’t just throw a new coat of sealer on it and hope for the best. You have to look at the geometry. You have to look at the weep holes. You have to look at the subfloor. If those things aren’t right the rest is just window dressing. I always tell people that the most important part of their bathroom is the part they will never see. It is the mud bed the liner and the prep work. That is where the real craftsmanship lives. If you get those right the tile will take care of itself. If you get them wrong no amount of expensive marble will save you from the mold and the rot. Build it once and build it right. Check your levels and never trust a guy who says he can eyeball the pitch. Gravity doesn’t lie.
“,”image”:{“imagePrompt”:”A high-detail technical cross-section diagram of a shower floor installation showing the subfloor, pre-slope, waterproofing membrane, mortar bed, and tile with a clear 1/4 inch per foot slope toward a three-piece clamping drain with open weep holes.”,”imageTitle”:”Proper shower floor drainage cross section”,”imageAlt”:”Diagram of correctly sloped shower floor and drain assembly”},”categoryId”:12,”postTime”:”2023-10-27T10:00:00Z”} multispace