
The ghost in the expansion gap
Hardwood floors require a perimeter expansion gap usually measuring 1/2 inch to accommodate seasonal humidity shifts and wood movement. Without this buffer zone, the cellulose fibers in the oak or hickory planks will expand during humid months, leading to cupping, crowning, and eventual structural failure of the tongue and groove joints. I once walked into a house where a $15,000 wide-plank walnut floor was cupping so bad it looked like a potato chip because the installer didn’t check the crawlspace humidity. The homeowner thought it was a wood defect, but the reality was a lack of a vapor barrier and zero gap at the walls. When the wood expanded, it had nowhere to go but up. You can smell the rot in a situation like that, a damp, earthy scent that tells you the subfloor is saturated. I spent three days grinding concrete on a job last month just so the floor wouldn’t click like a castanet. Most guys skip the leveling compound. They think the underlayment will hide the dip. It won’t. If your subfloor isn’t flat within 3/16 of an inch over a 10-foot span, you are building on a foundation of sand. The movement in the wood is relentless. It is a biological product, even after it is milled and finished. It breathes, it reacts, and if you do not respect the physics of moisture, it will punish you.
Why your subfloor is lying to you
Subfloor flatness is different from levelness and requires a 10-foot straightedge to verify ASTM F710 standards for concrete substrates or wood joist systems. Most contractors assume a plywood subfloor is ready for engineered hardwood or laminate, but joist deflection and high spots at the seams create vertical movement that snaps locking mechanisms. You need to look at the subfloor as a structural element. If you see a dip, you don’t just throw a thicker pad on it. You mix up a batch of high-strength, polymer-modified self-leveling underlayment. I like the stuff that smells like wet lime and sets up hard enough to chip a chisel. You pour it, you feather it out, and you wait. You don’t rush it. Most people want the thickest underlayment, but too much cushion actually causes the locking mechanisms on LVP to snap under pressure. You want density, not fluff. A high-density rubber or felt underlayment provides the necessary support while deadening the sound of footfalls. It keeps the floor from sounding like a plastic toy when you walk across it in boots.
“A floor is only as good as the subfloor beneath it; deflection is the enemy of every joint.” – Master Flooring Axiom
The cardboard template for precision airflow
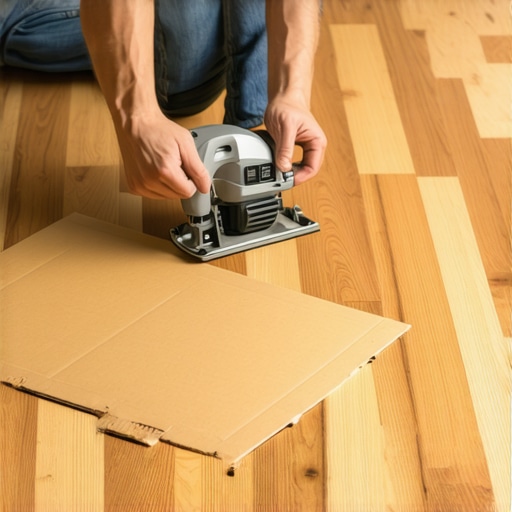
Floor vents and HVAC registers require precision cuts to maintain airflow efficiency and a flush aesthetic without using oversized trim kits. The cardboard trick involves using a scrap piece of a shipping box to create a 1-to-1 template of the duct opening, allowing for perfect scribing onto the hardwood plank. I keep a pile of cardboard in the truck specifically for this. You take a piece, lay it over the hole in the subfloor, and rub a carpenter’s pencil over the edges to get an exact impression. Then you cut that cardboard out with a utility knife. Now you have a template that is easy to move, lightweight, and won’t scratch your finish. You lay it on your plank, trace it, and you know exactly where your jigsaw needs to go. This is how you get those tight, professional gaps that don’t need a massive plastic cover to hide a botched cut. It is about the grit and the detail. When you are using a jigsaw, you use a fine-tooth blade and you cut from the back of the board to prevent splintering the wear layer. You can smell the toasted wood when the blade gets hot, a sharp, burnt aroma that means you are moving too slow or your blade is dull. Change the blade. Don’t be cheap.
Humidity cycles and the cellular structure of oak
Relative humidity levels must stay between 35 and 55 percent to prevent gapping or buckling in solid wood flooring products. The lignin and cellulose in the wood cells are hygroscopic, meaning they absorb water vapor from the ambient air, causing dimensional instability. In the dry winters of the north, the wood shrinks. You get gaps you can fit a dime into. In the swampy summers of the south, it swells. If you didn’t leave that expansion gap at the wall, the floor will lift right off the subfloor. This is why acclimation is not optional. You don’t just drop the wood and start nailing. You check it with a moisture meter. You check the subfloor too. The difference between the two should be no more than 2 percent for wide plank flooring. If you ignore this, you are just waiting for a phone call from an angry homeowner.
“Wood is a hygroscopic material that gains or loses moisture until it is in equilibrium with the humidity and temperature of the surrounding air.” – NWFA Technical Manual
Adhesive chemistry and the shear strength of bonds
Urethane adhesives offer superior shear strength and moisture vapor protection compared to water-based glues when installing engineered hardwood. The chemical bond formed by isocyanates in the adhesive creates a monolithic structure that resists lateral movement while allowing for micro-expansion. When you are spreading glue, you look for the ridges left by the trowel. Those ridges are essential. They allow the air to escape and create the right coverage. If you flat-trowel it, you get hollow spots. You’ll hear them later when the owner walks across the floor. A hollow click-clack sound that reminds you of your failure. You want a full transfer of adhesive to the back of the board. It’s messy work. Your hands end up covered in glue that smells like a chemical plant, and it doesn’t come off for a week. But that glue is what keeps the floor from moving. It is the bridge between the organic wood and the inorganic concrete.
| Wood Species | Janka Hardness Rating | Acclimation Time (Days) | Stability Rank |
|---|---|---|---|
| White Oak | 1360 | 7-10 | High |
| Hickory | 1820 | 10-14 | Medium |
| Brazilian Cherry | 2350 | 14-21 | Low |
| Black Walnut | 1010 | 7-10 | Medium |
The 1/8 inch that ruins everything
Measurement errors exceeding 1/8 inch at thresholds or transitions will result in unstable joints and tripping hazards. Using a digital caliper or a precision square is mandatory for custom inlay work and flush-mount vents. I have seen guys try to eye-ball a cut around a stone fireplace. It never works. You end up with a gap that looks like a canyon, and then you are trying to find a color-matched caulk to hide your shame. Caulk is not a floor installer’s friend. It’s a sign of a lack of skill. If you use the cardboard template and a sharp scribe, your gaps will be tight enough that you don’t need anything but a bit of wood filler. The physics of the cut matter. You have to account for the thickness of the saw blade, the kerf. If you don’t, you are always 1/16 of an inch off. Over a ten-foot run, those sixteenths add up. Suddenly your last row of boards is crooked and you’re wondering where it all went wrong. It went wrong at the first measurement.
- Verify subfloor moisture content using a pin-less meter.
- Ensure subfloor flatness within NWFA specifications.
- Use a 60-tooth carbide blade for all cross-cuts.
- Maintain a 1/2 inch expansion gap at all vertical obstructions.
- Acclimate wood in the room where it will be installed.
- Vacuum the subfloor three times before applying adhesive.
Tool geometry and the physics of the clean cut
Carbide-tipped saw blades with a high tooth count reduce tear-out and heat friction when processing dense hardwoods like ipe or maple. The geometry of the tooth, whether it is an Alternate Top Bevel or a Triple Chip Grind, determines how the wood fibers are severed at the molecular level. When you are cutting through a 3/4 inch solid oak board, you are fighting the density of the wood. A dull blade will burn the lignin, creating smoke and a black mark that is impossible to sand out. You need a sharp, clean strike. I like the sound of a high-quality miter saw, a clean whine that tells you the motor is balanced. When the blade hits the wood, it should feel like butter. If you are pushing hard, something is wrong. You are either using the wrong blade or your fence is out of square. Every tool in your kit needs to be calibrated. A saw that is one degree off will ruin a miter joint, and on a long hallway, that gap will open up like a wound. You have to be a mechanic. You have to know the vibration of your tools. You have to respect the machinery as much as the material.
Final Assessment
Professional flooring installation is a structural engineering task that demands technical precision, moisture management, and material science knowledge. By using the cardboard trick for vent cutouts and adhering to NWFA guidelines, you ensure a durable surface that withstands environmental stress. It is not about the fashion of the floor. It is about the integrity of the build. When you stand back and look at a finished room, you shouldn’t see the work. You should see a surface that looks like it grew there. No gaps, no squeaks, no hollow spots. Just the solid, quiet reality of a floor done right. That is what separates the masters from the guys who just watch a video and buy a hammer. You put in the time, you respect the wood, and you never, ever skip the subfloor prep.