
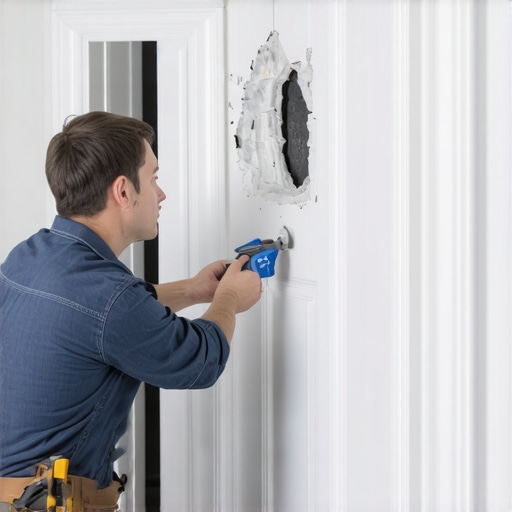
I spent three days grinding concrete on a job last month just so the floor wouldn’t click like a castanet. That job taught me that whether you are dealing with a concrete slab or a thin veneer of luan, the structure underneath is what dictates the success of the finish. Most guys skip the leveling compound and most guys skip the structural backing when they see a hole in a hollow core door. They think the underlayment or a bit of spackle will hide the dip. It won’t. I have seen fifteen thousand dollar wide plank walnut floors ruined because someone ignored the crawlspace humidity, and I have seen perfectly good doors thrown in the trash because an installer did not understand the physics of a hollow void. You have to treat a door repair with the same technical respect you give to hardwood floors or a precision tile layout in high moisture showers.
The engineering failure inside your door
Hollow core doors are essentially a structural sandwich composed of two thin skins, usually luan plywood or molded fiberboard, glued over a honeycomb cardboard lattice. When a hole occurs, the internal structural integrity is compromised, leaving no substrate for patching compounds to bond with. You cannot simply fill the void with putty because the weight will cause the patch to sag or fall into the door cavity. Repairing this requires the creation of an artificial backing plate using expanding polyurethane foam or backing mesh. This is similar to how we treat a subfloor with self-leveling underlayment to ensure a flat surface for laminate or hardwood floors. Without that solid foundation, the surface material has no chance of lasting more than a few months of seasonal expansion and contraction.
“A floor is only as good as the subfloor beneath it; deflection is the enemy of every joint.” – Master Flooring Axiom
The chemistry of expanding foam and wood filler
Expanding polyurethane foam serves as the new internal support for your door patch by providing a high-density core that mimics the original honeycomb lattice. You must use a minimal expansion foam to avoid bowing the door skins outward, which would create a permanent hump that no amount of sanding can fix. Once the foam cures, it provides a rigid substrate that accepts two-part wood filler or automotive grade body filler. These chemical fillers are superior to standard wood putty because they undergo a cross-linking chemical reaction that results in zero shrinkage. This is the same principle we use when choosing epoxy grout for showers to ensure that the material remains stable even when subjected to mechanical stress or high humidity. The bond strength of a two-part filler ensures that the patch becomes an integral part of the door rather than a superficial layer that will pop out the first time the door is slammed.
The 1/8 inch that ruins everything
Precision depth management is the difference between a professional repair and a DIY eyesore. You must recess the cured foam at least one eighth of an inch below the surface of the door skin to allow for a sufficient bond line of filler. If the filler is too thin, it will crack. If it is too thick, it may become brittle. I always tell my apprentices that the tolerance for a door patch is as tight as the flatness requirement for laminate flooring, which is typically one eighth of an inch over ten feet. When you are sanding the filler, you must use a hard sanding block to ensure you are not dipping into the softer patch material while the harder door skin remains high. This creates a planar surface that disappears once the primer and topcoat are applied. If you are working in a room with hardwood floors, pay attention to the dust collection, as the fine particles from catalyzed fillers can be difficult to remove from the grain of the wood.
Essential tools for structural door repair
To achieve a professional grade result on a hollow core door, you need a specific kit of materials that focuses on adhesion and dimensional stability. Do not reach for the joint compound or lightweight spackle. You need industrial strength components. Here is the checklist of what I keep in my van for these repairs.
- Low expansion polyurethane foam for the internal core
- Two-part polyester resin wood filler for the primary patch
- Utility knife with fresh blades for cleaning the hole edges
- Hard sanding block with eighty, one hundred twenty, and two hundred twenty grit paper
- High solids sandable primer to seal the repair and match the texture
- Microfiber tack cloths to remove every trace of dust before painting
Comparing materials for structural patching
Selecting the right chemical compound for your patch is as critical as selecting the right grout for a shower installation. Different materials have different elasticity modules and shrinkage rates. The following table breaks down the performance of common materials used in this process.
| Material Type | Shrinkage Rate | Structural Strength | Best Use Case |
|---|---|---|---|
| Standard Wood Putty | High | Very Low | Small nail holes only |
| Two-Part Resin | None | Very High | Large holes in hollow doors |
| Joint Compound | Medium | Brittle | Drywall repairs only |
| Expanding Foam | Minimal | Medium | Internal void support |
The ghost in the expansion gap
Thermal expansion and hygroscopic movement are the hidden forces that cause most door repairs to fail within the first year. A hollow core door will move differently than the filler material if the elasticity is not matched. This is why we leave expansion gaps around the perimeter of hardwood floors and laminate. The door skin will swell in the high humidity of summer, especially if the door is located near showers where steam is prevalent. If your patching compound is too rigid, the bond line will fail. I always recommend sealing the entire door, including the top and bottom edges, after the repair is complete. This moisture barrier slows the vapor exchange and keeps the internal cavity dry, preventing the cardboard core from degrading. Mastering moisture is the hallmark of a true flooring architect and a master carpenter alike.
“Deflection is not just a floor problem; it is a surface problem that destroys the finish of any material.” – Master Flooring Axiom
The final sand and refinish protocol
Surface preparation is eighty percent of the job when you want a seamless finish. After the two-part filler has cured, you must sand it flush with the surrounding veneer. I start with eighty grit to knock down the high spots, then move to one hundred twenty to refine the shape. The final pass with two hundred twenty grit should make the transition between the wood skin and the patch impossible to feel with your fingertips. I use the same tactile test when I am checking the subfloor prep for a glue-down hardwood installation. If you can feel it, you will see it. Once the surface is smooth, apply a high-solids primer. This sealer prevents the patch from absorbing paint at a different rate than the rest of the door, which would result in a dull spot known as flashing. In rooms with complex lighting or laminate flooring that reflects light upward, these imperfections are amplified. Take the time to feather the edges and the repair will be invisible. It will be as solid as a well-set tile in a grout bed, and it will withstand the daily rigors of a busy household without cracking or failing. This is how you build structural longevity into every square inch of the home.