
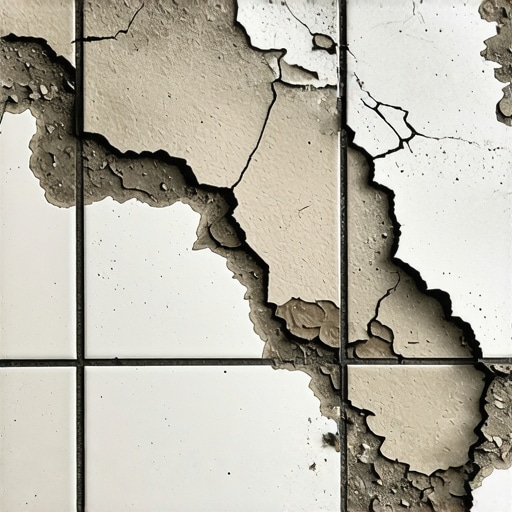
Most guys skip the leveling compound. They think the underlayment will hide the dip. It won’t. I spent three days grinding concrete on a job last month just so the floor wouldn’t click like a castanet. That client had spent three thousand dollars on premium porcelain only to have the previous contractor slap it down over a subfloor that looked like a topographical map of the Ozarks. I had to explain that the thin-set is an adhesive, not a filler. If the slab has a half-inch hump, your tile is going to pivot like a seesaw until the bond snaps. It is a structural engineering failure, not a cosmetic one. I have seen it a thousand times, and it always starts with laziness in the prep phase.
The 1/8 inch that ruins everything
Loose bathroom tiles originate from excessive deflection, poor adhesive transfer, or subfloor moisture saturation. If a subfloor moves more than L/360 of the span, the ceramic tile or stone will crack because it cannot flex. Modified thin-set requires a mechanical bond to a clean, stable surface to prevent debonding.
When you step on a tile and feel that slight sickening movement, you are witnessing the death of a bond. That movement is usually the result of a subfloor that was never rated for the weight of the assembly. I look at the joists before I ever look at the tile. If you have two-by-eight joists spanning sixteen feet, I do not care how much grout you shove in the cracks. The physics of gravity and wood fiber mean that floor is going to bounce. You need to stiffen the structure with blocking or a second layer of plywood. Tile is rigid. It has zero memory. Once the bond is broken by a flexing subfloor, it will never re-attach itself. You are left with a hollow sound that echoes through the room every time you walk to the sink. This is why the TCNA (Tile Council of North America) has strict rules about deflection. They know that a floor is a system, not a stack of independent materials.
“A floor is only as good as the subfloor beneath it; deflection is the enemy of every joint.” – Master Flooring Axiom
Why your subfloor is lying to you
Subfloor instability is often hidden by old adhesive residue, improper fastener spacing, or delaminated plywood layers. A level surface is not the same as a flat surface. Self-leveling underlayment must be used to ensure the floor plane meets the one-eighth inch over ten feet industry standard for large format tile.
I have walked onto jobs where the homeowner says the floor is flat. I pull out my ten-foot straightedge and show them the gaps. Plywood is a natural product. It expands and contracts based on the humidity in your crawlspace. If you do not have a vapor barrier down there, that wood is drinking moisture. It swells, it crowns, and it pushes against the tile from below. Most installers just use a quarter-inch notch trowel and hope for the best. That is a recipe for failure. You need eighty percent coverage in dry areas and ninety-five percent coverage in wet areas like showers. If you pull up a loose tile and see neat little ridges of dried thin-set that haven’t been flattened, the installer failed to ‘collapse the ridges.’ They didn’t back-butter the tile. The chemistry of the bond never had a chance because there was no contact between the mortar and the tile body. It is basic physics. You cannot stick something to air.
The ghost in the expansion gap
Expansion gaps are mandatory around the perimeter of every room to allow for thermal expansion and seasonal humidity shifts. Without a quarter-inch gap, the flooring material will press against the drywall and sole plate, causing buckling, tenting, or joint failure in laminate and hardwood floors.
People hate the look of a gap. They want the floor to run tight against the baseboard. That is a death wish for a floor. Wood and vinyl are dynamic. They move. In the summer, when the humidity hits eighty percent, those planks are going to grow. If they have nowhere to go, they will go up. I have seen laminate floors pop up six inches off the subfloor because some ‘handyman’ wedged them tight against the wall. It is the same with tile. While tile doesn’t expand like wood, the house itself moves. The soil shifts, the wood framing dries out, and the whole structure breathes. If you don’t have movement joints in a large tile run, the grout will crack and the tiles will tent. I use color-matched 100 percent silicone in the corners and at the baseboards. Silicone is flexible. Grout is rigid. Use grout in the corners and it will crack within three months. That is not a guess. It is a certainty.
| Material Type | Janka Hardness | Deflection Limit | Moisture Tolerance |
|---|---|---|---|
| Solid White Oak | 1360 | L/360 | Low |
| Engineered Maple | 1450 | L/450 | Medium |
| Porcelain Tile | N/A | L/720 | High |
| LVP (Vinyl) | N/A | L/240 | Extreme |
Chemistry of the bond
Thin-set mortar chemistry relies on polymer additives to create flexible bonds between non-porous porcelain and the substrate. Unmodified mortar lacks the tensile strength to hold onto modern dense tiles, leading to sheer failure. Proper slaking time is required to fully hydrate the chemical catalysts in the mix.
Most guys mix their thin-set with a drill on high speed. They are whipping air into the bucket. They are ruining the mix before it even hits the floor. You have to mix it slow. Then you have to let it sit, what we call ‘slaking.’ This allows the water to fully penetrate the polymers. If you skip this, the mortar will be brittle. It will look fine for a week, but the first time someone drops a heavy pot or the house settles, the bond will shatter. I also see people using ‘mastic’ in showers. Mastic is basically organic glue. It is food for mold. When it gets wet, it turns back into glue. Your tiles will literally slide off the wall. You must use a cement-based mortar in wet environments. The chemistry doesn’t lie. You cannot use a water-soluble adhesive in a place where people spray water every morning. It is common sense, but common sense is rare on a construction site.
“Ensure that the substrate is free of all bond breakers such as dust, oil, or sealers before application.” – TCNA Handbook for Ceramic Tile Installation
The moisture monster in the crawlspace
Hydrostatic pressure and vapor transmission from concrete slabs will destroy hardwood floors and laminate from the bottom up. Calcium chloride tests or relative humidity probes must be used to measure the moisture content of the subfloor before any installation begins.
I once walked into a house where a $15,000 wide-plank walnut floor was cupping so bad it looked like a potato chip because the installer didn’t check the crawlspace humidity. The wood was dry when it came out of the box, but the subfloor was a sponge. The bottom of the wood absorbed the water and expanded, while the top stayed dry. That differential is what causes the cup. You can sand it flat, but then it will crown when the seasons change. The floor is ruined. You have to address the moisture before you even think about the wood. This is why I love moisture meters. I don’t care if you think the floor feels dry. What does the meter say? If the subfloor is more than four percent wetter than the hardwood, you are not laying that floor. You wait. You run a dehumidifier. You fix the drainage outside. You do the job right or you don’t do it at all.
Checklist for a Stable Floor
- Verify joist spacing and subfloor thickness against TCNA or NWFA standards.
- Measure moisture content in both the flooring material and the substrate.
- Grind down high spots and fill low spots to achieve 1/8 inch flatness over 10 feet.
- Use the correct trowel size to ensure 90 percent plus adhesive coverage.
- Maintain a 1/4 inch expansion gap at all vertical obstructions.
- Check the ‘open time’ of your adhesive to avoid skinning over.
Deflection and the physics of failure
Vertical deflection in a floor system is the primary cause of cracked grout and loose tiles in residential bathrooms. A subfloor made of single-layer plywood often lacks the stiffness required to support the dead load of mortar and stone, necessitating a second layer of underlayment.
If you have grout coming out in chunks, your floor is moving. It is like a bridge. If the bridge sways too much, the asphalt on top cracks. Most people think grout is like cement and it should hold everything together. Grout has almost no structural strength. It is a filler. If the tiles on either side of the grout joint move independently because the plywood is flexing between the joists, that grout is going to turn to powder. I tell people to look at their floor like a drum. If it sounds hollow, you have air. If it feels springy, you have deflection. Both will kill your tile. I often install uncoupling membranes. These are plastic mats with a grid. They allow the subfloor to move horizontally without shearing the tile off. But even a membrane won’t save you from a subfloor that is bouncing like a trampoline. You have to fix the skeleton of the house first. Only then can you have a floor that lasts fifty years. Most installers are in a hurry to get paid and leave. I am in a hurry to make sure I never have to come back to fix a mistake. That is the difference between a floor that looks good and a floor that performs. Performance is about the things you cannot see once the baseboards are on.
{“@context”:”https://schema.org”,”@type”:”HowTo”,”name”:”How to Diagnose Loose Bathroom Tiles”,”step”:[{“@type”:”HowToStep”,”text”:”Tap the tile with a mallet to check for hollow sounds indicating debonding.”},{“@type”:”HowToStep”,”text”:”Check grout lines for cracking or powdering which signals floor deflection.”},{“@type”:”HowToStep”,”text”:”Measure moisture levels in the subfloor using a pin or pinless meter.”},{“@type”:”HowToStep”,”text”:”Inspect the perimeter for proper expansion gaps at the walls.”}]}