
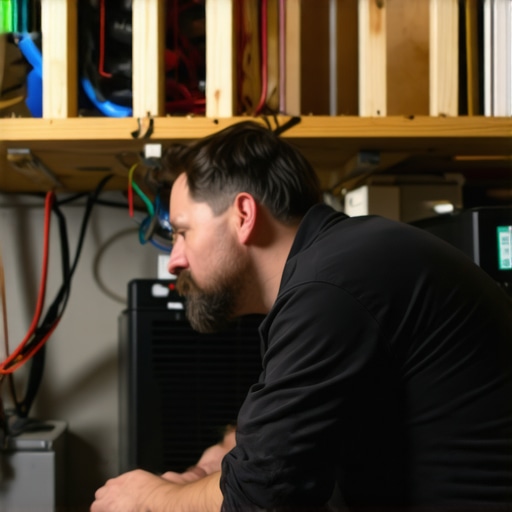
I once walked into a house where a $15,000 wide-plank walnut floor was cupping so bad it looked like a potato chip because the installer didn’t check the crawlspace humidity. It was a tragedy of engineering, not aesthetics. The homeowner was crying, the contractor was pointing fingers, and the floor was literally lifting the baseboards off the wall. That floor was a total loss. We had to rip it all out, down to the joists, because the wood had expanded so forcefully it crushed its own cellular structure. This is what happens when you treat a floor like a rug instead of a living, breathing structural component. I have spent twenty-five years on my knees with a moisture meter and a level, and I can tell you that the battle for a flat floor is won or lost in the dark, damp belly of the house.
The invisible tide beneath your feet
Crawlspace humidity represents a constant upward pressure of water vapor that migrates from the soil through the subfloor and into your hardwood planks. This process, known as vapor drive, occurs because moisture always moves from an area of high concentration to an area of low concentration, specifically seeking the conditioned air of your living space. If your crawlspace is a swamp, your floor is the sponge. [IMAGE_PLACEHOLDER_1] Wood is a hygroscopic material. This means it has a biological imperative to reach equilibrium with its environment. When the air in your crawlspace is at 80 percent relative humidity and your living room is at 40 percent, you are essentially running a slow-motion steam room against the bottom of your floorboards. The bottom of the plank swells as it absorbs those water molecules while the top of the plank, exposed to your air conditioning, stays dry or even shrinks. This differential is what forces the wood to curl. It is not a suggestion. It is physics. You can sand it flat, but you are just treating the symptom while the disease continues to rot your investment from the bottom up.
Physics of the potato chip effect
Hardwood cupping is the physical manifestation of a moisture imbalance where the bottom of the board is significantly wetter than the top surface. This imbalance causes the wood cells on the underside to expand in width, while the top cells remain stable, forcing the edges of the board to rise higher than the center. Most people think their floors are ruined the moment they see a slight wave. That is not always true. If you catch it early and fix the source, the wood can sometimes lay back down. However, if the moisture stays high for too long, the wood fibers undergo what we call a compression set. The wood expands so much that it crushes itself against the neighboring boards. Even when it dries out, the cells are permanently deformed, and you will be left with massive gaps once the swelling subsides. You have to understand that solid hardwood floors are basically a collection of straws. They move water through capillary action. When those straws get saturated from the bottom, the structural integrity of the entire installation is compromised. This is why I always tell my clients that their crawlspace is the most important part of their interior design.
“A floor is only as good as the subfloor beneath it; deflection is the enemy of every joint.” – Master Flooring Axiom
Measuring the invisible with precision
You cannot manage what you do not measure, and relying on your gut feeling about humidity is a recipe for a failed installation. Professional floor installers use pinless and pin-type moisture meters to determine the Moisture Content (MC) of the wood and the subfloor before a single nail is driven. A healthy hardwood floor should typically sit between 6 and 9 percent moisture content. If the subfloor is more than 2 percent to 4 percent wetter than the hardwood being installed, you are asking for a disaster. I have seen guys install 5-inch wide white oak over a subfloor that was at 14 percent moisture. Within two weeks, every joint was peaking. You also need a thermo-hygrometer in the crawlspace. This device tracks relative humidity and dew point over time. If your crawlspace is consistently above 60 percent humidity, you are in the danger zone for mold growth and wood rot. I do not care how good your finish is. No polyurethane on earth can stop the slow, rhythmic pulse of vapor pressure coming from a dirt floor crawlspace. It is like trying to hold back the ocean with a screen door.
The failure of the six mil poly
Standard six mil polyethylene plastic is often insufficient for long-term moisture management because it is easily punctured and frequently installed with gaps at the seams. For a truly professional grade solution, you need a high-performance vapor retarder that is at least 10 to 20 mils thick, reinforced with a polyester scrim to prevent tearing during crawlspace maintenance. The old-school way was to just throw some plastic down and call it a day. That is lazy. A real vapor barrier must be overlapped by at least twelve inches and sealed with high-quality waterproof tape. It should also be run up the foundation walls and fastened with masonry anchors and mastic. You are creating a sealed capsule. Any gap in that plastic is a highway for moisture. Think of it like the grout in your showers. If the grout is cracked, the water gets behind the tile and destroys the backer board. In a crawlspace, the earth is the water source, and your subfloor is the backer board. If you do not seal it perfectly, the vapor will find the path of least resistance and head straight for your expensive hardwood floors.
Why your HVAC is a double edged sword
Air conditioning units lower the temperature of the floor above the crawlspace, which can inadvertently drop the subfloor temperature below the dew point of the humid air underneath. This creates condensation on the underside of your subfloor, literally raining on your joists and the bottom of your flooring boards. This is especially common in the humid Southeast. You crank the AC to 68 degrees because it is 95 degrees outside. The subfloor becomes a cold plate. The warm, wet air in the crawlspace hits that cold plate and turns into liquid water. This is why some people see cupping in the middle of summer when they think their house is dry. They are creating a micro-climate of destruction. You have to treat the house as a single system. If you are going to keep the upstairs cool, you must keep the downstairs dry. This often requires a dedicated crawlspace dehumidifier. A standard basement dehumidifier will not cut it. You need a unit designed for the low-clearance, high-stress environment of a crawlspace that can move hundreds of cubic feet of air per minute and drain automatically via a condensate pump.
Hardwood resilience and technical specifications
The stability of a floor depends heavily on its construction and how it reacts to environmental changes in the subfloor. Not all floors are created equal when it comes to moisture resistance. Solid hardwood is the most vulnerable because it is a single, uniform piece of wood that expands and contracts across its entire thickness. Engineered floors are better because they use cross-ply construction to counteract that movement, but even they have limits. If the plywood core of an engineered floor gets saturated, the glues can delaminate and the top wear layer can buckle or peel. Even laminate flooring, which many people think is indestructible, will swell at the joints if vapor pressure is too high. Once that HDF core absorbs water, it never goes back to its original size. You get what we call ‘peaking’ where the edges of the laminate planks push against each other and rise up. It looks terrible and it feels even worse underfoot.
| Material Type | Construction | Moisture Tolerance | Movement Profile |
|---|---|---|---|
| Solid White Oak | Single Plank | Low | High Expansion |
| Engineered Oak | Cross-Ply | Moderate | Dimensional Stability |
| Laminate | HDF Core | Low to Moderate | Joint Swelling |
| Porcelain Tile | Fused Clay | High | Static |
The encapsulation trap
Encapsulating a crawlspace is the gold standard for floor protection, but it must be done correctly or you risk trapping moisture against your floor joists. Encapsulation involves sealing all vents, covering the floor and walls with a heavy vapor barrier, and conditioning the air inside. If you seal a crawlspace that already has a moisture problem without addressing drainage or adding a dehumidifier, you have created a humidor for mold. I have seen joists so soft you could push a screwdriver through them because someone sealed the vents but ignored a leaking pipe or a high water table. You must ensure that the exterior grading of the house is pulling water away from the foundation. If your gutters are dumped right at the corner of the house, no amount of plastic in the crawlspace will save your hardwood floors. Water is persistent. It will find a way in. You have to be more persistent than the water.
“Wood flooring will perform best when the environment is controlled within a relative humidity range of 30 to 50 percent.” – NWFA Technical Guidelines
The secret of the perimeter gap
Expansion gaps are the insurance policy for your floor, providing a necessary buffer for when the wood inevitably moves despite your best efforts. I see so many DIY installers and cut-rate contractors jam the wood tight against the drywall or the baseboards. This is a fatal mistake. You need at least a half-inch of space around the entire perimeter. If the floor starts to swell due to a temporary humidity spike and it has nowhere to go, it will either cup or it will pop the nails and lift the entire floor off the subfloor. This is why we use baseboards and shoe molding. They are not just for looks. They are there to hide the gap that allows your house to breathe. I have seen floors buckle so hard they actually pushed the exterior walls of a house out of alignment. That is the power of wood expansion. It is a slow-motion hydraulic press. Do not ignore the expansion gap. It is the only thing standing between a minor seasonal shift and a total structural failure.
A checklist for floor longevity
Maintaining a stable environment is a lifelong commitment that requires regular inspection and proactive maintenance of the home envelope. You cannot just install a floor and forget about it for twenty years. You need to be a steward of your home’s humidity. Here is the reality check for anyone who wants their hardwood to last for generations:
- Inspect the crawlspace every six months for standing water or fallen insulation.
- Change the filters on your crawlspace dehumidifier according to the manufacturer schedule.
- Check the exterior grading to ensure water is flowing away from the foundation.
- Monitor your indoor humidity levels with a digital hygrometer on every floor.
- Verify that your dryer vent and bathroom fans are actually exhausting to the outside.
- Maintain your HVAC system to prevent condensate leaks into the subfloor.
- Watch for changes in the way your doors swing, as this is an early sign of wood movement.
If you follow these steps, your floors will stay flat. If you ignore them, you are just waiting for the next big rainstorm to ruin your house. It is that simple. I have spent my life fixing the mistakes of people who thought they could outsmart nature. You can’t. You can only work with it. Respect the physics of the wood, respect the chemistry of the subfloor, and keep your crawlspace dry. Your feet and your wallet will thank you. [ARTICLE_SCHEMA_JSON]