
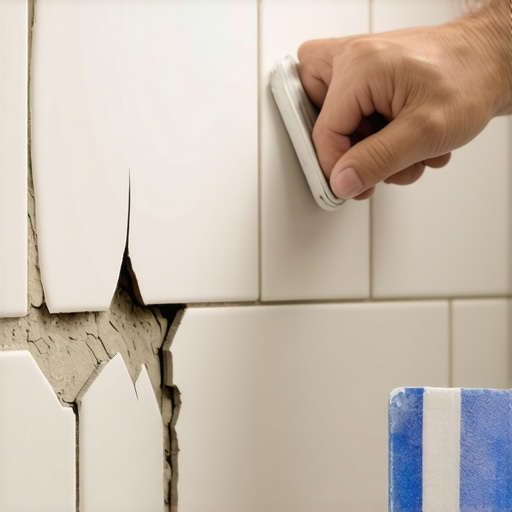
I once walked into a luxury bathroom where the homeowner had spent six thousand dollars on hand-painted Italian marble only to have the entire back wall fall off like a shelf of books in an earthquake. They thought they could save money by hiring a handyman who used premixed mastic on a shower wall. I spent three days grinding the petrified adhesive off the concrete board just so the new tile wouldn’t click like a castanet. This is the reality of modern flooring. People see a pretty surface but they ignore the structural engineering happening behind the scenes. When a tile pops, it is a catastrophic failure of the molecular bond between the substrate and the ceramic. It is not an accident. It is physics. You cannot cheat the chemistry of Portland cement and expect a wet environment to respect your choices. We are going to look at why your shower is falling apart and how to fix the bond before you end up with a mold colony behind your vanity.
The structural lie of a wet wall
Shower tile failure is caused by substrate deflection, improper thin-set coverage, and moisture migration through the grout joints. If the wall studs or cement backer board move more than the TCNA L/360 standard, the rigid tile will shear away from the adhesive. This is a mechanical breakdown of the bonding agent. Many installers ignore the reality that wood expands and stone does not. When your house settles or the humidity shifts, that wall is moving. If you do not have a movement joint or the right polymer-modified mortar, the tile becomes a casualty of war. I see this in every zip code where builders rush the drying time of the subfloor. They put down hardwood floors in the hallway and then transition to a shower where the walls are essentially wet cardboard. You cannot expect a rigid system to survive on a flexible base.
The chemistry of a failed bond
Thin-set mortar creates a crystalline bridge between the back of the tile and the cementitious substrate through a process called hydration. If the water in the mix is sucked out too fast by a porous wall, the crystals never form. This results in a soft, chalky bond that will eventually fail under the weight of the tile. This is why we talk about wetting the substrate or using a primer. If you are using a large format tile, the challenge doubles. You need a medium bed mortar that can support the weight without shrinking. Shrinkage is the silent killer. As the mortar dries, it pulls. If it pulls too hard and the tile is not fully embedded, it creates air pockets. Those pockets collect moisture. That moisture eventually turns into a wedge that pops the tile off the wall. It is a slow-motion car crash that starts the moment the bucket is mixed.
“A floor is only as good as the subfloor beneath it; deflection is the enemy of every joint.” – Master Flooring Axiom
The ghost in the expansion gap
Movement joints are required by TCNA EJ171 but are almost always ignored by amateur installers who think grout is a structural glue. Grout is a filler, nothing more. It has almost zero compressive strength in the face of thermal expansion. If you tile into a corner and fill that corner with grout instead of 100 percent silicone sealant, the tile has nowhere to go. It will push against the adjacent wall until the pressure exceeds the bond strength of the thin-set. Then you hear the pop. It usually happens at three in the morning when the house cools down. It sounds like a gunshot. People think their house is haunted. It is not a ghost. It is just your tile trying to find a place to breathe because you locked it in a cage of rigid grout. This is the same reason laminate floors buckle when people forget to leave a gap at the baseboard. Physics does not care about your aesthetic.
Why your thin-set is failing the chemistry test
ANSI A118.4 and A118.15 standards define the shear strength required for porcelain tile to remain bonded to a vertical surface. Standard unmodified mortar is not enough for modern porcelain because porcelain has an absorption rate of less than 0.5 percent. It is basically glass. If you use a cheap bag of mud from a big-box store, you are asking for a failure. The polymers in the high-end bags act like microscopic suction cups. They grab onto the tile and the wall. Without those polymers, the mortar is just sand and cement. It cannot grip the glass-like surface of a high-quality tile. I have seen guys try to use mastic in a shower because it is easier to spread. Mastic is organic. It is food for mold. In a wet environment, mastic re-emulsifies. It turns back into glue and lets go. If you see yellow goop behind a fallen tile, you have a disaster on your hands.
| Mortar Classification | Polymer Content | Best Application | Drying Time |
|---|---|---|---|
| ANSI A118.1 | None | Concrete subfloors only | 24 Hours |
| ANSI A118.4 | Standard | Most ceramic installations | 12-24 Hours |
| ANSI A118.15 | High | Submerged or heavy glass | 24 Hours |
| ISO C2TE | Enhanced | Large format wall tile | 12 Hours |
The 1/8 inch that ruins everything
Notch trowel size is the most misunderstood tool in the flooring architect’s arsenal because it determines the coverage area of the adhesive. If you use a 1/4 inch trowel for a 12×24 tile, you are going to have a 30 percent coverage rate at best. The TCNA requires 95 percent coverage in wet areas. You should be back-buttering every single piece of stone or porcelain. If you pull a tile off the wall and you see the ridges of the trowel still standing, you failed. Those ridges should be collapsed into a solid bed of mud. Air gaps behind the tile are reservoirs for water. When that water sits there, it degrades the alkali resistance of the fiberglass mesh in your backer board or weakens the bond of the mortar. You need a solid, monolithic structure. Anything less is just a temporary decoration waiting to fall.
The truth about waterproof membranes
Waterproofing membranes like Schluter-Kerdi or Laticrete Hydro Ban are designed to protect the structure, but they can also cause bonding issues if the mortar is incompatible. Some membranes require unmodified mortar because they need the moisture to escape through the grout joints to cure. If you use a high-polymer mortar between two non-porous surfaces like a membrane and a porcelain tile, the moisture gets trapped. It can stay wet for weeks. If you stress that tile before the center is dry, it will pop. This is why engineered flooring and hardwood floors require specific acclimation times. Tile is no different. It has a cure cycle. You cannot rush the evaporation of water from a sealed sandwich. I tell people to wait at least 72 hours before grouting if they used a liquid-applied membrane. If you grout too early, you lock the moisture in and the bond never reaches full strength.
The corrective surgery for popping tiles
Fixing a loose tile requires mechanical removal of the old thin-set and a complete re-evaluation of the substrate integrity. You cannot just glue it back on. You have to be a surgeon. Here is the process for a professional fix.
- Remove the loose tile and use a hammer and chisel to scrape the wall back to the original substrate.
- Inspect the backer board for moisture damage or soft spots that indicate a leak.
- Vacuum all dust and debris to ensure a clean mechanical bond for the new mortar.
- Apply a high-quality polymer-modified thin-set to both the wall and the back of the tile using the flat side of the trowel.
- Press the tile firmly into place and wiggle it to collapse the mortar ridges.
- Check the depth with a straight edge to ensure it is flush with the surrounding wall.
- Wait 24 hours before applying a matching grout and then seal the perimeter with silicone.
Grout is not a structural adhesive
Grout is often blamed for cracking when the real culprit is movement or insufficient coverage. If the grout is falling out, the tile is moving. If the tile is moving, the thin-set has failed. You cannot fix a popping tile by shoving more grout into the crack. That is like putting a band-aid on a broken leg. The compressive strength of grout is designed to handle the edges of the tile, not the weight of the wall. When you see efflorescence, that white powdery stuff, it means water is moving through your wall and bringing minerals to the surface. This is a sign that your waterproofing is failing or your thin-set is being washed away. In high-end installations, we use epoxy grout because it is waterproof and chemical resistant, but even epoxy will crack if the subfloor or wall studs are flexing beyond their limits.
“A floor is only as good as the subfloor beneath it; deflection is the enemy of every joint.” – Master Flooring Axiom
The ghost in the expansion gap
Environmental factors play a massive role in the longevity of a shower. If you live in a place with extreme humidity swings, your house is breathing. That breathing creates shear stress on every tiled surface. Professional installers know that you have to account for this. We use uncoupling membranes on floors to separate the tile from the subfloor movement. On walls, we rely on expansion joints. If you see a crack running diagonally across your shower, that is a foundation crack reflecting through the tile. There is no thin-set in the world that can stop a house from moving. You have to build the shower to be independent of the frame. This is the difference between a floor that lasts five years and one that lasts fifty. Stop thinking about the color of the tile and start thinking about the tensile strength of the mud bed.