
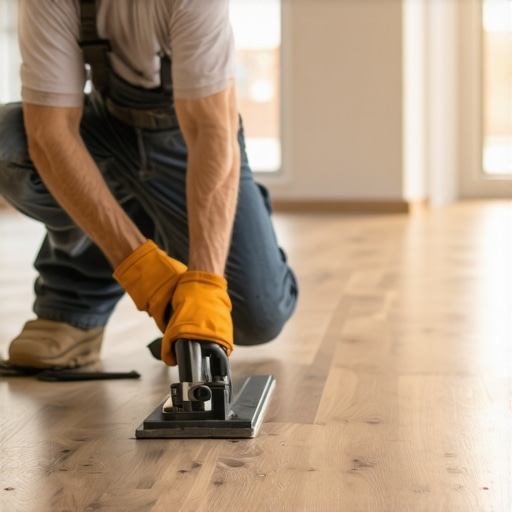
I once walked into a house where a $15,000 wide-plank walnut floor was cupping so bad it looked like a potato chip because the installer didn’t check the crawlspace humidity. The homeowner was in tears, the contractor was ghosting her, and the boards were literally screaming as they pulled away from the subfloor. It smelled like damp earth and expensive failure. That is the reality of this business when you treat wood like a decorative rug instead of a living, breathing structural element. I have spent twenty-five years on my knees with the scent of WD-40 and oak dust in my lungs, and if there is one thing I have learned, it is that precision is the only thing that separates a master from a hack. Most guys think they need a thousand dollars in lasers to get a perfect fit around a stone hearth or a complex door casing. They are wrong. The most important tool in my kit cost me exactly twelve dollars, and it has saved my knees from thousands of unnecessary trips to the table saw.
The ghost in the expansion gap
Hardwood floors require a precise expansion gap because wood is a hygroscopic material that naturally expands and contracts with changes in atmospheric humidity. A 1/2 inch perimeter gap is the standard for most solid installations, ensuring that the cellular structure of the wood has room to breathe without causing buckling or crown warping during seasonal shifts. If you lock the floor against a fixed object, the internal pressure will eventually find a weak point, often manifesting as a failure in the tongue and groove joint or a permanent deformation of the plank itself. I have seen guys try to ignore this rule, thinking the baseboard will hide their sins, but the laws of physics do not care about your trim schedule. When the humidity hits eighty percent in the summer, those planks are going to move. If they have nowhere to go, they go up.
“A floor is only as good as the subfloor beneath it; deflection is the enemy of every joint.” – Master Flooring Axiom
Why your subfloor is lying to you
Subfloor flatness is the most ignored variable in modern flooring installations, yet it is the primary cause of long-term structural failure and audible clicking. A subfloor must be flat within 1/8 inch over a 10-foot radius to support the tensile strength of hardwood floors or the locking mechanisms of laminate. If there is a dip in the plywood or a hump in the concrete, the floor will deflect every time someone walks over it, leading to fatigue in the adhesive bond or the snapping of the plastic click-lock joints in cheaper materials. You cannot fix a bad subfloor with thicker underlayment. In fact, adding too much cushion under a floor often makes the problem worse by allowing more vertical movement. I spent three days grinding concrete on a job last month just so the floor wouldn’t click like a castanet. It was miserable, dusty work, but it was the only way to ensure the integrity of the installation. Most installers skip this step because it is hard. Those are the same installers whose phone numbers change every six months.
The 1/8 inch that ruins everything
Precision scribing around complex architectural features is where the twelve dollar contour gauge becomes a life-saver for your body and your profit margins. This simple tool allows you to duplicate the exact shape of a fireplace, a rounded door jamb, or a custom transition without the repetitive trial and error that kills an installer’s knees. By capturing the geometric profile of the obstruction in a single motion, you eliminate the need to stand up, walk to the saw, trim a bit, walk back, and kneel down to check the fit five different times. In a large room with multiple obstacles, this tool can reduce your physical strain by forty percent. It is not just about speed. It is about the molecular tightness of the joint. When you have a gap-free transition between your wood and a stone hearth, you are preventing moisture from entering the end-grain of the wood, which is where the most significant capillary action and swelling occurs. This is particularly important when the floor meets wet areas like showers or tiled entryways where grout might be present.
| Wood Species | Janka Hardness (lbf) | Stability Rating | Acclimation Time |
|---|---|---|---|
| White Oak | 1360 | High | 7 to 10 Days |
| Brazilian Cherry | 2350 | Medium | 14 Days |
| Black Walnut | 1010 | Moderate | 10 to 14 Days |
| Engineered Maple | 1450 | Very High | 3 to 5 Days |
The thermal expansion of laminate
Laminate flooring behaves differently than solid wood because it is composed of high-density fiberboard (HDF) which reacts to temperature as much as it does to moisture. While hardwood floors mainly expand across the grain, laminate expands in all directions, requiring a dedicated expansion space around every vertical obstruction including cabinets and pipes. Many homeowners make the mistake of thinking waterproof laminate can be installed like tile. It cannot. If you pin a laminate floor under a heavy kitchen island, you have effectively created a static anchor point that will cause the floor to pull apart at the seams elsewhere in the room. The wear layer mil thickness of a laminate floor tells you about its scratch resistance, but it tells you nothing about its dimensional stability. That stability comes from the core density and the quality of the locking profile. If your subfloor has even a slight deviation, the HDF core will eventually shear, and no amount of grout or filler will save it.
Chemistry of the chemical bond
Modified silane adhesives represent the pinnacle of modern flooring chemistry, offering a moisture-cured bond that remains flexible for decades. Unlike old-school solvent-based glues that become brittle and snap, silane-terminated polymers allow for the natural micro-movements of hardwood floors without losing their grip on the subfloor. This elasticity is what prevents the floor from sounding hollow and reduces the transmission of impact noise to the rooms below. When we talk about the physics of subfloors, we have to talk about the vapor transmission rate of the slab. Even a dry-looking concrete floor is constantly exhaling water vapor. If you don’t use an adhesive with a built-in moisture barrier, that vapor will collect under the wood, saturate the bottom of the planks, and lead to cupping. I have seen entire museum floors fail because the architect didn’t account for the alkalinity of the concrete affecting the glue’s chemical chain. It is not just about sticking things together. It is about managing the interface between two different materials.
“Moisture is the primary catalyst for structural failure in timber-based assemblies; ignore the meter at your own peril.” – NWFA Technical Guidelines
Managing transitions near showers and grout
The junction between hardwood and wet surfaces like showers requires a level of detail that most residential installers simply refuse to provide. When wood meets grout or tile, you are joining a material that is dimensionally stable with one that is hydro-sensitive. You cannot simply butt the wood against the tile and caulk it. You need a silicone-based flexible sealant that matches the grout color, allowing the wood to expand toward the tile without cracking the grout line. If moisture from the showers seeps into that transition, it will travel under the wood for several feet, causing rot and mold growth that you won’t see until the floor starts to go soft. This is why I always advocate for a zero-threshold transition that uses a hidden aluminum L-channel. It looks cleaner than a bulky T-molding and provides a mechanical stop for the wood while protecting the edge of the tile. It takes an extra hour to set it up right, but it saves you a callback five years later when the homeowner decides to actually use their bathroom.
- Check subfloor moisture with a pinned and pinless meter.
- Verify flatness to 1/8 inch over 10 feet using a straightedge.
- Acclimate wood in the room where it will be installed for at least 7 days.
- Vacuum the subfloor three times to ensure no grit interferes with the bond.
- Use a contour gauge for all scribed cuts to minimize standing and kneeling.
- Apply a high-quality moisture barrier if installing over concrete.
- Maintain a consistent 1/2 inch expansion gap around all perimeters.
The scribing secret that saves your joints
Scribing is a lost art that defines the difference between a floor that looks like it was dropped in and a floor that looks like it grew there. When you use a contour gauge, you are essentially taking a physical snapshot of an irregular surface and translating it to the wood plank. This eliminates the unsightly gaps that many installers try to fill with wood putty or grout. Putty is a temporary fix. It will eventually dry out, shrink, and fall out, leaving a dark void that collects dirt and moisture. A perfectly scribed cut, on the other hand, maintains the architectural integrity of the room. It shows that you respect the physics of the material and the aesthetics of the space. Every time you have to get up from your knees to fix a bad cut, you are wasting energy and precision. By using the right tool, you stay in the flow of the installation, keeping your eyes on the alignment of the rows and the stagger of the end-joints. This is how you build a floor that lasts a century instead of a decade.
The structural integrity of the subfloor
The deflection of the joist system is the final frontier of flooring analysis. If your joists are spaced too far apart or have too much span, the entire floor system will flex beyond the tolerance of the hardwood. This is measured by the L/360 standard, meaning the floor should not deflect more than the length of the span divided by 360. If you install a heavy hardwood floor over a bouncy subfloor, the mechanical fasteners will eventually work themselves loose, leading to the squeaks and groans that haunt old houses. You can’t fix this with a $12 tool, but you can diagnose it before you lay a single board. I always check the joist sizing in the basement before I start a job. If the house is built like a trampoline, I tell the homeowner we need to add blocking or a second layer of plywood. They usually complain about the cost until I explain that a floor is only as stable as the foundation it rests upon. It is better to have an honest conversation about structural engineering today than a legal conversation about a failed floor tomorrow.
{“@context”:”https://schema.org”,”@type”:”Article”,”headline”:”The $12 Knee-Saver Tool Every Hardwood Installer Actually Needs”,”author”:{“@type”:”Person”,”name”:”Master Floor Installer”},”description”:”An expert guide to hardwood flooring installation, focusing on subfloor preparation, moisture management, and the essential tools for architectural precision.”,”articleBody”:”I once walked into a house where a $15,000 wide-plank walnut floor was cupping so bad…”}