
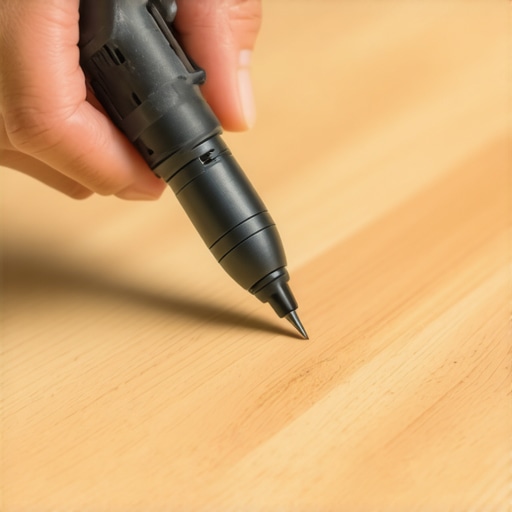
I once walked into a house where a $15,000 wide-plank walnut floor was cupping so bad it looked like a potato chip because the installer didn’t check the crawlspace humidity. It broke my heart. I had to tell the owner that his beautiful floor was basically a $15,000 bonfire. While that was a structural catastrophe, most homeowners face a smaller, daily heartbreak. It is the white line of a scuff across a dark finish. You see it every time the sun hits the floor. You think you need to sand the whole room. You do not. A fifteen dollar investment can save your sanity if you understand the chemistry of the wood finish and the physics of the scratch itself. My boots have tracked enough sawdust to know that the secret is not in the price of the pen but in the preparation of the surface.
The microscopic anatomy of a hardwood floor scratch
Hardwood floor scratches occur when an object harder than the polyurethane finish or aluminum oxide wear layer deforms the surface. This mechanical failure creates a white line because the light refracts off the jagged edges of the torn finish rather than passing through to the pigmented wood grain below. A poly pen or stain marker works by filling these microscopic voids with a compatible resin and dye that restores the refractive index of the floor. When you run a heavy piece of furniture across the room, you are not just making a mark. You are crushing the cellulose structure of the wood. Hardwood is a living, breathing material. It consists of lignin and cellulose fibers that act like a bundle of straws. When a chair leg gouges the surface, it collapses those straws. The $15 fix works because it uses a solvent base to bite into the surrounding finish and bond the new pigment to the exposed wood fibers. It is a chemical weld on a tiny scale. I have seen guys try to use permanent markers, but those have a purple or blue undertone that looks like a bruised thumb under LED lighting. You need a pen specifically formulated with oil-based or water-borne resins that match the sheen of your floor.
Why humidity and moisture levels dictate repair success
Moisture content in hardwood flooring must remain between six and nine percent for the wood to stay stable during a surface repair. If the relative humidity in your home is too high, the wood fibers will be swollen, which prevents the stain pen from penetrating the wood grain effectively. This is why acclimation is the most important word in my vocabulary. Before you even touch that scuff, you need to know if your floor is expanding or contracting. In the swampy humidity of Houston, solid wood is a death wish; you need engineered cores. In those environments, a scratch can actually act as an entry point for moisture, leading to localized peeling of the finish. The dry heat of Phoenix will shrink your baseboards until they show a gap, and it will also make your wood finish brittle. A brittle finish chips rather than scuffs. When you use a poly pen in a dry climate, the solvent evaporates faster, so you have to work in smaller sections. I always keep a moisture meter in my pocket because the air tells one story, but the subfloor tells the truth.
“A floor is only as good as the subfloor beneath it; deflection is the enemy of every joint.” – Master Flooring Axiom
The technical metrics of wood hardness and resilience
Janka hardness ratings measure the force required to embed a 0.444 inch steel ball into a wood species to half its diameter. This metric determines how easily your hardwood floors will scuff or dent under the pressure of high heels or pet claws. Understanding your floor’s position on this scale helps you set realistic expectations for a fifteen dollar repair. If you have a soft wood like Black Walnut, the damage is likely deeper than the finish. If you have Brazilian Cherry, the scratch is probably just a surface-level abrasion in the aluminum oxide. The harder the wood, the more difficult it is for the stain to penetrate. You might need to leave the pen’s pigment on the surface for a few extra seconds to let it bond. I’ve spent twenty five years watching people treat Pine floors like they were White Oak. You cannot do that. Pine is soft. It will dent if you look at it wrong. The table below shows the common species I see on the job and how they handle the daily grind.
| Wood Species | Janka Rating (Lbf) | Density (Kg/m3) | Common Use Case |
|---|---|---|---|
| White Oak | 1360 | 770 | High traffic kitchens |
| Black Walnut | 1010 | 640 | Luxury bedrooms |
| Hard Maple | 1450 | 740 | Modern living rooms |
| Brazilian Cherry | 2350 | 910 | Commercial spaces |
| Red Oak | 1290 | 700 | Standard residential |
The precise ritual of the poly pen application
Applying a stain pen requires a clean surface free of wax, oil, or floor polish to ensure the chemical bond is permanent. Most homeowners fail because they have a layer of silicone-based cleaner on their floors that acts as a bond breaker. You have to strip the area with a pH-neutral cleaner or a light wipe of mineral spirits before you start. I see people just start coloring like they are in kindergarten. That is how you get a blotchy mess. You have to be surgical. You are a technician, not an artist. The pen is a tool for restoration. It is not a magic wand. You have to match the undertone, not just the primary color. Wood has secondary colors of red, gold, or gray. If you put a red-toned oak pen on a gray-toned floor, it will stand out like a neon sign. I always tell my apprentices to test the pen inside a closet first. If it looks wrong there, it will look worse in the middle of the foyer. The chemistry of the pen involves a binder that holds the pigment in place once the carrier solvent evaporates. If you don’t wipe the excess, that binder creates a shiny spot that doesn’t match the rest of the floor.
- Identify the wood species and the specific color of the stain.
- Clean the scratch with a soft cloth and a specialized floor cleaner.
- Shake the pen for at least sixty seconds to mix the pigments.
- Depress the felt tip on a piece of cardboard until the liquid flows.
- Draw along the length of the scratch without crossing over the edges.
- Buff the area immediately with a clean, lint-free rag.
- Allow the resin to cure for at least twelve hours before walking on it.
Why your subfloor is lying to you
Subfloor levelness affects the longevity of hardwood repairs because deflection causes the floorboards to rub against each other and create new scuffs. If your floor clicks or squeaks, the subfloor is uneven. No amount of polyurethane pens will fix a floor that moves. Most guys skip the leveling compound. They think the underlayment will hide the dip. It won’t. I spent three days grinding concrete on a job last month just so the floor wouldn’t click like a castanet. When the floor moves, the finish cracks at the tongue and groove. This releases finish dust, which looks like a white powder. People mistake this for a scratch. It is actually a structural failure. You can use the pen to hide the white line, but it will come back until you fix the subfloor deflection. You need to check the joist spacing and the plywood thickness. If you are over concrete, you need a moisture barrier. I have seen laminate and engineered wood buckle because someone forgot a simple sheet of six mil poly. The physics of the house don’t care about your budget.
“Moisture vapor emission rate must not exceed three pounds per one thousand square feet over twenty four hours.” – Installation Standard
The ghost in the expansion gap
Expansion gaps are the quarter inch spaces left at the perimeter of a room to allow hardwood to breathe as humidity changes. If you lock your floor under a heavy kitchen island or push the boards tight against the drywall, the floor will buckle. This pressure creates stress fractures in the top coat. Those fractures look like long, thin scratches. A poly pen can hide them, but the pressure will eventually cause the finish to flake off. Homeowners always ask why their waterproof vinyl is buckling. Usually, it’s because they locked it under a heavy kitchen island, killing the floor’s ability to breathe. Wood is an organic polymer. It wants to move. You have to let it. When you are doing a repair, look at the edges of the room. If the floor is tight against the wall, you have a bigger problem than a scuff. You need to pull the baseboards and trim the wood back. Only then will your surface repairs hold. The internal tension of a floor can reach hundreds of pounds per square inch. That is enough to snap the locking mechanisms on even the most expensive laminate floors.
The truth about waterproof flooring and showers
Waterproof flooring in bathrooms and showers is often a marketing myth because water can still penetrate the seams and rot the subfloor. While the LVP or laminate itself might be non-porous, the perimeter and the grout lines are vulnerable. If you are repairing a scuff near a shower, you need to be certain that no moisture is trapped under the boards. I have seen mold colonies growing under click-lock floors because the owner thought waterproof meant he didn’t need a bath mat. When you use a touch up pen near water sources, the seal must be perfect. Any gap in the finish allows capillary action to pull water into the HDF core or the wood fibers. This causes peaking at the edges. Once the edges peak, they become high points that get scuffed even faster. It is a vicious cycle. You have to treat the wet areas with more respect than a dry bedroom. Use a silicone sealant at the transitions to ensure water stays on top of the floor where it can be wiped away. The integrity of the installation is more important than the aesthetic of the surface.
Choosing the right resin for the job
Solvent based pens provide a stronger bond to pre-finished floors, while water-based markers are better for site-finished floors with a low-VOC topcoat. The industry has shifted toward water-borne finishes because they don’t yellow over time, but they can be harder to repair. A solvent pen might melt the edges of a water-based finish if you aren’t careful. It is all about compatibility. If you have a matte finish, you cannot use a glossy pen. The sheen level is determined by flattening agents like silica added to the polyurethane. When you apply a repair, you are adding a new layer of resin. If that resin has a different refractive index, the repair will be visible from an angle. This is the halo effect. To avoid it, you have to feather the edges of your repair. I use a dry finger to lightly tap the edges of the wet stain. This breaks up the surface tension and blends the new color into the old. It takes practice. I’ve spent years on my knees getting this right. You won’t get it perfect the first time, but a $15 pen is a lot cheaper than a $5,000 refinish. Respect the wood, understand the chemistry, and keep your subfloor dry. That is how you maintain a professional grade floor for a lifetime.