
Most guys skip the leveling compound. They think the underlayment will hide the dip. It won’t. I spent three days grinding concrete on a job last month just so the floor wouldn’t click like a castanet. That job was for a homeowner who thought a thin layer of foam would compensate for a foundation that looked like the rolling hills of Kentucky. When it comes to a shower pan sinking into the subfloor, you aren’t just looking at a cosmetic blemish. You are looking at a structural failure that is likely rotting out your floor joists and inviting mold into your walls. I have seen fifteen thousand dollar wide-plank walnut floors cupping like potato chips because the installer ignored the humidity in the crawlspace, but a sinking shower is worse. It is a slow motion wreck that ends with your feet through the ceiling of the kitchen below.
The hidden physics of a shower pan
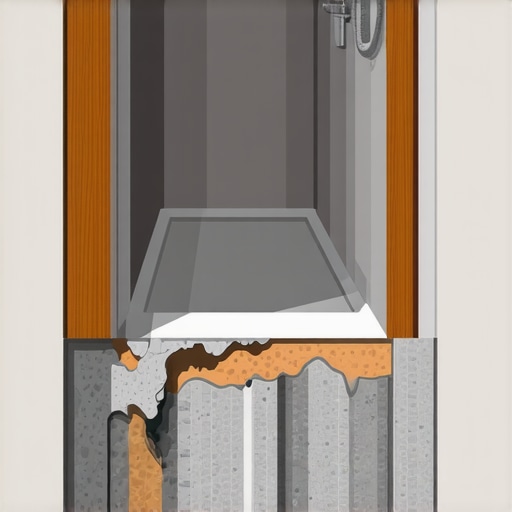
A sinking shower pan occurs when the structural support beneath the basin fails to handle the static and dynamic loads of water and occupants. This is typically caused by improper joist spacing, rot in the plywood substrate, or an incorrectly installed mortar bed that has pulverized under pressure. You have to understand the weight at play here. A standard mortar bed, or mud bed, is a mixture of Portland cement and sand. It weighs roughly twelve pounds per square foot per inch of thickness. Add a two hundred pound person and forty gallons of water, and you are putting massive stress on a three quarter inch sheet of OSB. If that subfloor has been softened by a slow leak in the grout or a failed drain seal, it loses its structural integrity. The wood fibers separate. The lignin that holds the wood together dissolves in the presence of constant moisture. At that point, the subfloor acts more like a wet sponge than a building material.
Why your subfloor is lying to you
Subfloors often appear solid on the surface while the core of the plywood has completely delaminated due to trapped moisture. High humidity or direct leaks cause the veneer layers to swell and pull apart, which creates a hollow pocket that allows the shower pan to dip. I have walked onto jobs where the homeowner insisted the floor was fine because they didn’t see a hole. Then I put a moisture meter to it. If that wood is reading over sixteen percent, you have a problem. If it is over twenty percent, you have a forest growing in your bathroom. This is why I am a stickler for the National Wood Flooring Association standards even when I am working with tile. The subfloor is the foundation of everything. If you are installing hardwood floors in the adjacent bedroom, that sinking shower is eventually going to migrate moisture into your expensive oak. The wood will draw that water through capillary action, and suddenly your bedroom floor is buckling because you didn’t fix a drain leak.
“A floor is only as good as the subfloor beneath it; deflection is the enemy of every joint.” – Master Flooring Axiom
The ghost in the expansion gap
An expansion gap is a mandatory perimeter space left around the edges of a floor to allow for the natural movement of materials due to temperature and humidity changes. Without this gap, the floor pressure can transfer to the shower pan and cause it to shift or sink. People think that waterproof laminate or luxury vinyl plank can be jammed tight against a shower curb. It cannot. If you do that, the entire floor system becomes a giant lever. When the house settles or the humidity rises, that floor expands. If it has nowhere to go, it pushes against the shower pan. I have seen shower pans crack right down the middle because the laminate in the hallway was installed without a transition strip, putting hundreds of pounds of lateral pressure on the basin. You need that quarter inch gap. Cover it with a bead of high grade silicone, not grout. Grout does not flex. Silicone does. This is basic engineering that most DIY guys miss because they want it to look pretty on day one without thinking about day four hundred.
Grout failure as a warning sign
Cracked or missing grout lines around the base of a shower are the first clinical symptoms of a sinking pan or a flexing subfloor. When the pan moves even a fraction of a millimeter, the rigid grout bond breaks, which allows more water to infiltrate the subfloor below. Grout is not a structural adhesive. It is a mineral filler. It has almost zero tensile strength. If you see a crack in the corner where the wall meets the floor, that is the house telling you that the pan is moving. If you just smear more grout over it, you are putting a band-aid on a gunshot wound. You are actually making it worse by trapping water behind the new layer. You need to pull a few tiles and see if the thinset is still bonded to the backer board. If the thinset has turned back into a powder, you have a moisture problem that is eating your house from the inside out.
Technical specifications for floor stability
| Material Type | Typical Weight (PSF) | Moisture Tolerance | Max Deflection Ratio |
|---|---|---|---|
| Plywood (3/4″) | 2.2 lbs | Medium | L/360 |
| Cement Board | 3.0 lbs | High | L/720 |
| Mortar Bed (2″) | 24.0 lbs | High | L/720 |
| Hardwood Floors | 3.0 lbs | Low | L/480 |
To ensure your shower stays put, follow this diagnostic checklist:
- Check the joist span and ensure it meets L/720 deflection limits for stone or heavy tile.
- Verify that the subfloor is at least 1-1/8 inch total thickness if using large format tile.
- Inspect the drain assembly for a clamping ring that is actually tight against the liner.
- Use a level to check for dips greater than 1/8 inch over a ten foot span.
- Ensure the waterproofing membrane extends at least six inches up the wall studs.
The chemistry of the bond
Modified thinset mortar uses powdered polymers to create a chemical bridge between the tile and the substrate, which provides the flexibility needed to resist minor vibrations. If the wrong mortar is used, the shower pan will eventually break free and begin to settle. We are talking about molecular architecture here. When you mix a high quality thinset, the water triggers a hydration reaction in the Portland cement. This creates acicular crystals that grow into the microscopic nooks and crannies of the tile. The polymers in the mix act like tiny rubber bands. They allow the floor to breathe and move without snapping those crystals. If you use a cheap, unmodified thinset on a plywood subfloor, you are asking for a failure. The wood will suck the water out of the mortar before it can hydrate, leaving you with a brittle, chalky mess that will collapse the first time you step on it. I don’t care what the bag says about being multi-purpose. In a wet environment, you want the expensive stuff. You want the highest polymer content you can find.
“Subfloor preparation is not a suggestion; it is the fundamental requirement for all surface longevity.” – TCNA Technical Manual
The final word on structural integrity
Fixing a sinking shower pan is never about the pan itself. It is about what is happening underneath. If you ignore the deflection in your joists or the rot in your plywood, no amount of expensive tile or high end grout will save you. You have to be the architect of the entire system. Rip it down to the studs if you have to. Level that concrete. Replace that damp OSB with exterior grade plywood. Seal it with a liquid membrane that can bridge cracks. Flooring is a performance surface. If you treat it like a sticker you just slap on a wall, it will fail you. Take the time to measure the moisture. Take the time to check the level. If you don’t have the time to do it right, you definitely don’t have the time or the money to do it twice. Keep your sawdust dry and your levels true.