
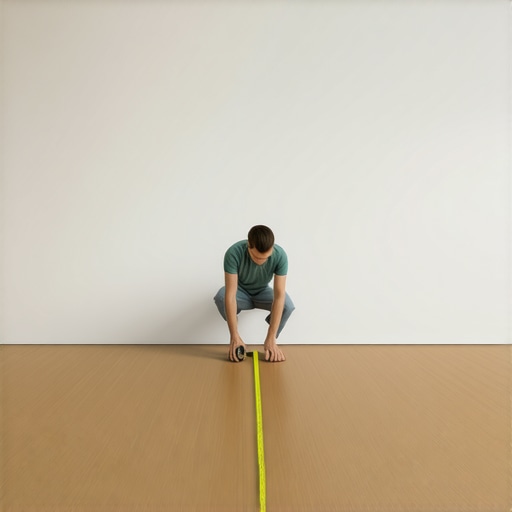
Mastering the geometry of a room requires more than a cheap laser level and a hope for the best. You need to understand the physics of the space. Finding the center is about balancing the visual weight of hardwood floors or the alignment of grout in showers to ensure structural integrity and aesthetic symmetry. Most guys skip the leveling compound. They think the underlayment will hide the dip. It won’t. I spent three days grinding concrete on a job last month just so the floor wouldn’t click like a castanet because the center point was off and the layout forced a joint over a high spot. That is the reality of the trade. If you do not respect the math of the subfloor, the subfloor will eventually break your spirit. I have seen fifteen thousand dollar wide plank walnut floors cup like potato chips because the installer was too lazy to check the moisture or find the actual center of the room. They just started at one wall and hoped for the best. Hope is not a tool you keep in your truck. You keep a tape measure, a chalk line, and a brain that understands geometric physics.
The math of the floor starts in the center
Finding the center of an odd room involves calculating the geometric mean of the longest and shortest axes to establish a primary control line. In irregular spaces, the center is not a single point but a balanced axis that prevents narrow slivers of material at the perimeter. This process ensures that hardwood floors and laminate planks are distributed evenly. You start by measuring the two longest parallel walls. You mark the midpoint of each. You snap a line. Then you find the perpendicular midpoint. But in a room with alcoves or bump outs, that center point shifts. You have to account for the visual weight of the largest area. If you center a floor on a small hallway that opens into a massive Great Room, the Great Room will look like it was an afterthought. You always center on the dominant rectangle of the space.
“A floor is only as good as the subfloor beneath it; deflection is the enemy of every joint.” – Master Flooring Axiom
Why your subfloor is lying to you
Subfloors often appear flat to the naked eye but harbor micro-deviations and undulations that can ruin a laminate or hardwood installation. Using a ten foot straightedge is the only way to verify the planarity of the surface before you even think about your center point. Most people think they can just throw down some foam underlayment and it will absorb the bumps. That is a lie. Underlayment is for sound dampening and minor moisture protection, not for structural correction. If your subfloor has a dip of more than three sixteenths of an inch over ten feet, your locking mechanisms will eventually snap. The air gap under the plank creates a trampoline effect. Every time you step on it, the tongue and groove rub together. Eventually, the friction wins. The wood fibers or plastic polymers fatigue and the joint fails. You spend your weekends listening to a floor that squeaks because you were too cheap to pour some self-leveling underlayment.
The geometry of an odd room
Odd rooms with L-shaped configurations or diagonal walls require a bounding box approach to find the center for hardwood floors. You must treat the room as a series of interlocking rectangles and find the center of the primary mass first. This prevents the floor from looking crooked when it transitions into the smaller areas. When you are dealing with grout lines in a bathroom or kitchen, the center is even more critical. You do not want a full tile on one side and a two inch sliver on the other. It looks amateur. You find your center, then you dry lay your tiles. If the edge pieces are less than half the width of a full tile, you shift your center line by half a tile. This is basic geometry that most weekend warriors ignore because they are in a rush to get to the finish line.
| Material Type | Janka Hardness | Moisture Limit | Expansion Gap Required |
|---|---|---|---|
| White Oak | 1360 lbf | 6 to 9 percent | 3/4 inch |
| Engineered Maple | 1450 lbf | 7 to 11 percent | 1/2 inch |
| Luxury Vinyl Plank | N/A | 85 percent RH | 1/4 inch |
| Laminate HDF Core | N/A | 12 percent | 3/8 inch |
Hardwood floors and the expansion gap mystery
Hardwood floors are hygroscopic organisms that breathe, expand, and contract based on the ambient relative humidity of the room. Failing to provide a proper perimeter expansion gap is the leading cause of floor failure in residential construction. Wood is made of cellulose and lignin. When the humidity rises, the cellulose cells soak up water and swell. If the wood hits a wall and has nowhere to go, it will either buckle upward or crush its own fibers. I have seen floors put so much pressure on a drywall partition that they actually cracked the studs. You need a minimum of three quarters of an inch around the entire perimeter. You cover that with your baseboard and shoe molding. If you are in a high humidity area like Houston or Miami, you might even need more. Never tight fit a floor. It is a death sentence for the wood.
Grout lines and the visual trap
The cementitious chemistry of grout makes it prone to cracking if the thin-set mortar beneath the tile is not applied with a notched trowel to ensure 100 percent coverage. When you find the center of a room for tile, you are also setting the stage for your grout lines. These lines are architectural arrows. If they are crooked, the whole room feels off kilter. In showers, this is even more vital because the grout lines must align with the pitch of the floor toward the drain. If your center point is off by even an eighth of an inch, your drain will look like it is floating toward a corner. You also have to consider the pigment density of the grout. Cheap grout has inconsistent color. You want a high polymer modified grout that resists staining and cracking. And for the love of everything holy, do not use a standard sponge with too much water. You will wash the pigment right out of the joint and leave it brittle.
Showers and the slope of reality
Installing tile in showers requires a deep understanding of the TCNA Handbook standards for waterproofing and substrate deflection. The center of a shower is almost always the drain, not the walls. You work from the drain outward to ensure the geometric symmetry of the cut tiles. Most guys mess this up. They start at the back wall and work toward the door. Then they realize the drain is two inches off center and the tile cuts look like a jigsaw puzzle gone wrong. You also have to worry about the capillary action of water. If your grout or tile is not sealed, water will find its way into the substrate. This leads to mold, rot, and structural failure. A shower is a wet environment that requires mechanical precision. You need a pre-sloped pan or a perfectly mud-set bed with a quarter inch per foot slope toward the drain. No exceptions.
“Tile is a rigid surface on a moving planet; the center line is your only anchor to stability.” – Tile Council Perspective
Laminate and the click lock failure point
Modern laminate flooring relies on high-density fiberboard cores that are susceptible to hydrostatic pressure if the subfloor is not properly sealed. The click lock system is a marvel of engineering, but it is fragile. If you find the center of the room and start your layout, you must ensure that your first and last rows are not too thin. A narrow strip of laminate has no structural weight. It will pop out of the locking track the first time someone walks on it. You want your starting and ending rows to be at least three inches wide. This provides the mechanical leverage needed to keep the floor locked together. Also, stop calling it waterproof. It is water resistant. If you leave a puddle on a laminate floor, the moisture will eventually penetrate the seams and swell the HDF core. Once that happens, the floor is ruined. There is no fixing a swollen laminate edge. You replace it or you live with the lumps.
The 1/8 inch that ruins everything
Precision in flooring is measured in one eighth inch increments because that is the threshold where the human eye begins to detect visual asymmetry. If your center line is off by an eighth, your last row of hardwood floors will be visibly tapered. This is why the tape measure trick is so vital. You don’t just measure once. You measure from multiple corners to verify that the room is actually square. Spoilers. It is never square. Builders are in a hurry. Walls are bowed. Corners are eighty nine or ninety one degrees. You have to find a compromise center that masks these architectural flaws. This is where the artistry of the trade comes in. You are a mechanic and an illusionist. You are making a crooked room look straight through the clever placement of planks and grout lines.
Floor Installation Checklist
- Verify subfloor moisture content using a pinless meter.
- Check for floor planarity with a ten foot straightedge.
- Identify the dominant architectural rectangle of the room.
- Snap a primary chalk line through the geometric center.
- Dry lay the first three rows to check for perimeter slivers.
- Acclimate all wood products for at least 72 hours in the room.
- Set expansion spacers at every vertical obstruction.
- Double check the squareness using the 3-4-5 triangle method.
The tape measure trick for finding the exact center is essentially the arc method. You hook your tape on one corner and scribe an arc at the approximate center. You do the same from the opposite corner. Where the arcs intersect is your geometric center. It is a technique used by shipbuilders and master carpenters for centuries because it does not rely on the walls being perfectly straight. It relies on the fixed points of the corners. Once you have that center, you can layout hardwood floors, laminate, or showers with the confidence that the physics of the room are working with you, not against you. Don’t be the guy who wing it. Be the guy who knows the math. Your floors will last longer, and you won’t spend three days grinding concrete to fix a mistake that started with a single bad measurement.