
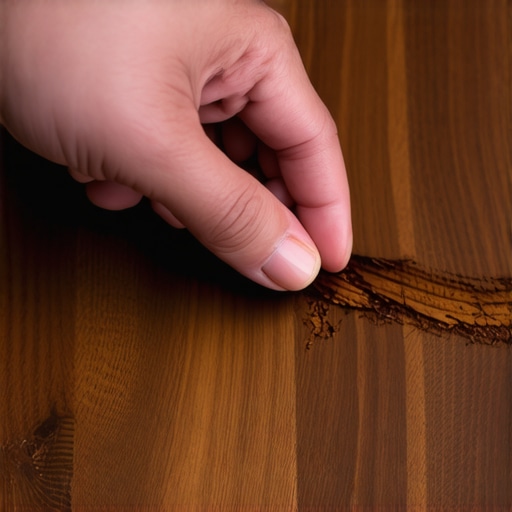
I once walked into a house where a $15,000 wide-plank walnut floor was cupping so bad it looked like a potato chip because the installer didn’t check the crawlspace humidity before nailing down the first board. The owner was frantic, trying to fix surface scratches with furniture polish while the entire structural integrity of the floor was failing from beneath. It taught me that while a simple walnut can hide a mark, it cannot save a floor from poor engineering. Real flooring work happens at the intersection of biology and physics. When you see a white scratch on a dark oak or walnut floor, you are seeing the displacement of wood fibers and the crushing of the finish. A raw walnut works because its meat contains roughly 65% unsaturated fats and oils that mimic the refractive index of many traditional floor finishes. This is not magic. It is chemistry. We are going to look at why this works, why it fails on laminate, and how your subfloor affects the way your finish holds up over time.
The physics of the walnut repair method
Repairing dark hardwood scratches with a walnut involves using the natural oils and pigments found in the nut meat to saturate damaged wood fibers and darken the exposed area. This method works best on surface-level abrasions where the wood finish has been compromised but the structural integrity of the plank remains intact. When you rub a peeled walnut against a scratch, the friction generates a minute amount of heat. This heat softens the oils, allowing them to penetrate the cellular structure of the wood. Unlike synthetic markers that sit on top of the surface, these organic lipids bond with the cellulose. The brown pigment of the walnut acts as a natural dye, darkening the light-colored wood exposed by the scratch to match the surrounding finish. It is a temporary cosmetic fix that relies on the hydrophobic properties of the oil to repel moisture and the fatty acids to fill the microscopic void left by the abrasion. Do not expect this to fix a deep gouge or a floor that has suffered water damage. It is for the small, annoying signs of life that appear on a well-used floor.
Why your dark wood shows every sin
Dark hardwood floors highlight scratches because of the high contrast between the stained surface and the lighter natural wood underneath. When a chair leg or a pet claw breaks the surface tension of the polyurethane or oil finish, it creates a jagged edge that reflects light differently than the flat, smooth surface. This is known as the refraction index of the scratch. In dark woods like mahogany, cherry, or stained oak, the interior wood is often significantly lighter than the pigment applied during finishing. Hardwood floors are biological materials that react to light and shadow. A scratch is essentially a tiny canyon that creates a shadow on one side and a highlight on the other. This visual discrepancy is what your eye catches. While laminate floors have a printed photographic layer under a clear wear layer, solid wood is an organic stack of lignin and cellulose. When you scratch wood, you are tearing those fibers apart. A walnut repair works by filling those torn fibers with oil, which changes how they reflect light, effectively making the scratch disappear into the dark background of the rest of the floor.
“A floor is only as good as the subfloor beneath it; deflection is the enemy of every joint.” – Master Flooring Axiom
The 1/8 inch that ruins everything
Subfloor levelness is the primary factor in determining how well a hardwood floor finish resists scratching and cracking over time. If your subfloor has a dip of more than 1/8 inch over a 10-foot radius, the planks will flex every time someone walks over them. This constant movement, known as vertical deflection, puts immense stress on the tongue-and-groove joints and the surface finish. Brittle finishes like high-gloss polyurethane will develop micro-cracks under this stress. These cracks eventually lead to flaking, which looks like a massive scratch but is actually a structural failure of the coating. I have seen guys spend days trying to rub walnuts into a floor that was clicking like a castanet because they skipped the self-leveling compound. If the floor moves, the finish breaks. No amount of walnut oil will fix a finish that is delaminating because the plywood underneath is bouncing. You must ensure the subfloor is flat, dry, and secure before you even think about the aesthetic repair of the surface. A stable floor is a scratch-resistant floor.
Comparing wood hardness and repair success
Not all woods react to the walnut trick the same way. The density of the wood, measured by the Janka Hardness Scale, determines how much oil the fibers can absorb. A softer wood like American Cherry will soak up walnut oil quickly, whereas a dense wood like Brazilian Ebony might reject it. The following table compares common flooring materials and their reaction to surface repairs.
| Wood Species | Janka Hardness | Oil Absorption | Repair Difficulty |
|---|---|---|---|
| American Walnut | 1,010 | High | Easy |
| Red Oak | 1,290 | Moderate | Medium |
| Hard Maple | 1,450 | Low | Difficult |
| Hickory | 1,820 | Very Low | Very Difficult |
| Laminate | N/A | None | Impossible |
The chemistry of organic oils versus synthetic finishes
Organic walnut oil provides a temporary bond with wood cellulose but cannot replace the protective qualities of a cross-linked polyurethane finish. Most modern floors are coated with a water-based or oil-based polyurethane that creates a plastic-like shield. When you use a walnut, you are applying a non-drying oil to a surface designed for hardened resins. Over time, the walnut oil will oxidize and dissipate. This is why the scratch eventually reappears after several cleanings. For a more permanent solution, professional installers use hardwax sticks or burn-in resins. These materials are engineered to have the same expansion and contraction rates as the wood. Unlike the grout used in tile showers or the rigid surface of laminate, hardwood is constantly moving. It expands in the summer and shrinks in the winter. A repair must be able to move with the floor. If you use a repair material that is too hard, it will pop out of the scratch within one season. The walnut is a great bridge because it is flexible, but it is not a substitute for a proper screen and recoat by a professional who knows how to handle high-solid finishes.
The moisture meter never lies
Moisture content in the wood and the air is the most common cause of finish failure and increased scratch sensitivity. Before you attempt any floor repair, you need to know the moisture levels. If a floor is too dry, the wood becomes brittle, and the finish can chip easily. If it is too humid, the wood swells, causing the finish to stretch and potentially lose its bond to the wood fibers. I always carry a pin-type moisture meter. I want to see a reading between 6% and 9% for most interior hardwood. If you are in a swampy area like Houston, your wood will naturally sit higher, but if you are in the dry desert of Phoenix, your wood might shrink until you see gaps in the baseboards. These environmental factors change how the wood accepts a walnut repair. In high humidity, the wood fibers are already saturated with water molecules, leaving little room for the walnut oil to penetrate. Always stabilize your home environment to 35% to 55% relative humidity before attempting fine finish work. This ensures the wood is in its neutral state.
“Wood is hygroscopic; it never stops reaching for equilibrium with its environment, regardless of the finish applied.” – NWFA Technical Manual
Step by step guide to the walnut repair protocol
To achieve the best results with this method, you cannot just throw a nut at the floor. You have to follow a specific process to ensure the oil bonds and the color matches. Use this checklist for your next repair job.
- Clean the scratch area with a damp micro-fiber cloth to remove dust and wax buildup.
- Select a fresh, raw walnut half. Do not use roasted or salted nuts as the salt will dehydrate the wood fibers.
- Peel the outer skin off the walnut meat to expose the oily interior.
- Rub the walnut along the length of the scratch using moderate pressure.
- Wait five minutes to allow the lipids to penetrate the wood grain.
- Buff the area with a soft, dry cloth to remove excess oil and blend the sheen.
- Avoid walking on the area for twenty minutes to let the oil settle.
When the walnut fails to heal the floor
Walnut repairs will fail on any surface that is not real wood, such as laminate, luxury vinyl plank, or ceramic tile. Laminate flooring is a composite of medium-density fiberboard with a plastic decorative layer. There are no wood fibers for the walnut oil to penetrate. If you rub a walnut on laminate, you will simply leave an oily smear on the surface that will attract dirt. Similarly, while grout in showers can be stained or repaired with specialized colorants, it is a cementitious product that does not respond to organic oils. If your hardwood scratch is so deep that you can see the subfloor or the gray of the plywood, a walnut is useless. At that point, you are looking at a structural gouge. This requires a wood filler or a full plank replacement. Real installers know that the walnut is a tool for the homeowner to use between professional maintenance cycles. It is not a way to avoid the eventual necessity of a professional sand and finish. If you have multiple deep scratches across a large area, the floor is telling you that the wear layer has been exhausted. It is time to stop playing with nuts and start thinking about a drum sander.
The future of wood floor maintenance
The industry is moving toward more durable finishes like aluminum oxide and UV-cured ceramics. These finishes are incredibly hard, which makes them scratch-resistant but also very difficult to repair once they do mark. The walnut trick is a throwback to the days of wax and oil-finished floors. On a modern, pre-finished floor with a high-taber wear layer, the walnut might struggle to find any raw wood to bond with. Always test a small, inconspicuous area first. If the oil just beads up and wipes away without changing the color of the scratch, your floor has a high-performance coating that requires a professional touch-up kit. Never use silicone-based sprays on your hardwood. They create a film that makes future refinishing impossible because the new finish will not bond to the silicone. Stick to the walnut for minor marks and call a pro when the wood starts to look thirsty. Respect the material, manage your humidity, and your floors will last a century.