
The hidden mechanics of a waterproof shower joint
Most guys skip the leveling compound. They think the underlayment will hide the dip. It won’t. I spent three days grinding concrete on a job last month just so the floor wouldn’t click like a castanet. That same level of obsession belongs in your shower. If you think a steady hand is enough to pull a perfect bead of silicone, you are kidding yourself. My hands smell like WD-40 and oak dust because I know that mechanical precision beats artistic flair every single time. A shower is a high-stress environment where physics and chemistry collide. Between the thermal expansion of the tile and the structural deflection of the subfloor, your grout is under constant assault. If you do not provide a flexible relief valve in the form of a perfect caulk joint, the system will fail. It is not a matter of if, but when.
The myth of the steady hand
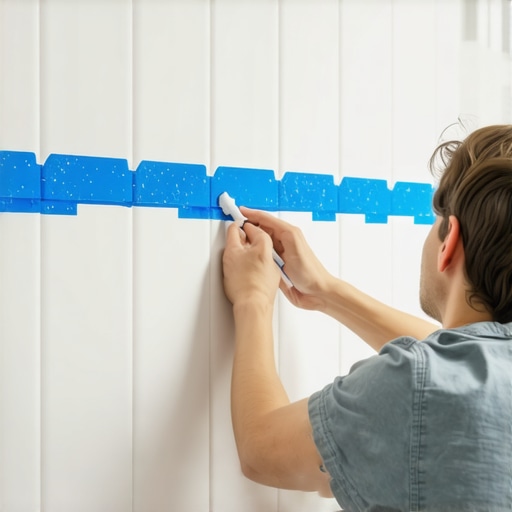
The painter’s tape trick for caulk lines involves masking off the area exactly 1/8 inch from the joint on both sides. This creates a mechanical boundary for the silicone, preventing the messy spread that ruins most DIY projects. By removing the tape while the sealant is still wet, you leave behind a perfectly straight, raised edge that bonds with the tile surface at a molecular level without unsightly smears.
When you are staring at a vertical corner in a custom shower, you aren’t just looking at a cosmetic transition. You are looking at a movement joint. The Tile Council of North America is very clear about this. Rigid grout cannot handle the plane changes where two walls meet or where the wall meets the floor. I have seen countless showers where the homeowner used grout in the corners only to find hairline cracks six months later. Those cracks are straws. They suck moisture behind the tile where it rots the backer board and creates a playground for mold. 100 percent silicone is the only answer here. It has the elongation properties required to stretch when the house settles in the winter and compress when the humidity of the Pacific Northwest summer hits. But silicone is a nightmare to work with. It sticks to everything it touches, including your fingers, the tile face, and the chrome fixtures. This is why the tape method is not a shortcut, it is a structural necessity for a clean install.
Why grout alone is a structural failure
Grout is a cementitious product designed for compression, not tension or shear forces. In a shower, the walls move independently of the floor pan. Using grout in these transitions leads to mechanical failure because the grout lacks the polymer density to flex. Silicone provides a waterproof, flexible bridge that maintains the integrity of the water management system under stress.
“According to the Tile Council of North America (TCNA) Handbook, movement joints are mandatory in all tile installations to accommodate the expansion and contraction of substrates.” – Master Flooring Axiom
If you look at grout under a microscope, it is a mountain range of pores. It is basically a hard sponge. Even with a sealer, it is not truly waterproof. Silicone, however, is a non-porous polymer. When we talk about the molecular zoom of a shower, we are looking at how the silicone atoms interlock with the silicate structures of the tile. To get that bond right, the surface must be surgically clean. I use denatured alcohol to strip every trace of dust or skin oil before I even think about reaching for my tape. If there is a single microscopic layer of dust, the silicone will undergo adhesive failure. It will look fine for a month, then it will start to peel away like a sunburned shoulder. That is how leaks start. That is how I end up getting called in to tear out a three-year-old shower because the subfloor has turned into oatmeal.
The 1/8 inch that ruins everything
Precision masking requires a gap of exactly 1/8 inch from the center of the joint. If the tape is too close, the caulk bead will be too thin to handle movement. If it is too far, the joint looks bulky and amateur. This specific distance allows for a triangular bead geometry that is the gold standard for long-term durability in high-moisture environments.
| Sealant Type | Adhesion Strength | Flexibility | Cure Time |
|---|---|---|---|
| 100% Silicone | High | 25% | 24 Hours |
| Siliconized Acrylic | Medium | 10% | 12 Hours |
| Polyurethane | Very High | 35% | 48 Hours |
We need to talk about the physics of the bead. A common mistake is to shove as much caulk into the gap as possible. This is wrong. You want a concave shape that allows the material to stretch. If the joint is too deep, the silicone bonds to the back of the gap as well as the sides, which is called three-point bonding. This is a disaster. When the walls move, the silicone is pulled in three directions at once and it snaps in the middle. By using a backer rod or ensuring the tape creates a specific width-to-depth ratio, we ensure the silicone only bonds to the two parallel surfaces. This allows it to function like a rubber band. This is the same logic I use when installing hardwood floors. You need that expansion gap at the perimeter. If you pack a hardwood floor tight against a wall, the first time the humidity spikes, the floor will buckle and lift three inches off the subfloor. The same forces are at play in your shower, just on a smaller, wetter scale.
The chemistry of the acetoxy cure
Professional grade silicone often utilizes an acetoxy cure system that releases acetic acid as it hardens. This is the vinegar smell you notice during installation. This chemical process is essential for creating the cross-linked polymer chains that make the sealant waterproof and heat resistant. Understanding this cure cycle is vital for the timing of tape removal to avoid jagged edges.
If you wait too long to pull the tape, the silicone begins to skin over. When you finally pull the blue strips, it will drag the drying sealant with it, leaving a messy, feathered edge that looks like a serrated knife. You have a window of about five to ten minutes depending on the temperature and humidity. In a dry climate like Phoenix, you have to move fast. In the damp air of Seattle, you have a bit more breathing room. This is where the artistry of the trade comes in. You have to feel the material. I always tool the joint with a gloved finger dipped in a mixture of water and Dawn dish soap. The soap breaks the surface tension and prevents the silicone from sticking to my glove, allowing me to create a smooth, glass-like finish before the cure cycle progresses too far.
Hardwood floors and the moisture migration problem
Installing showers correctly is just as important for the adjacent hardwood floors as it is for the bathroom itself. Moisture does not stay in the shower. It migrates through the air and through the subfloor. If a shower joint leaks, the water will travel along the plywood or OSB subfloor and eventually reach your expensive oak planks. This causes cupping, crowning, and finish failure far away from the source of the leak.
“A floor is only as good as the subfloor beneath it; deflection is the enemy of every joint.” – Master Flooring Axiom
I have walked into homes where the laminate in the hallway was peaking at the seams. The homeowner thought it was a bad product. It wasn’t. It was a leaking shower valve three rooms away. The water was being wicked through the subfloor like a candle wick. This is why I am so militant about the tape trick and the use of 100 percent silicone. We aren’t just making the shower look pretty. We are protecting the structural integrity of the entire house. Laminate is particularly vulnerable because it is essentially high-density fiberboard. Once that core gets wet, it expands and never goes back. It is ruined. A ten-dollar tube of silicone and a roll of painter’s tape could have saved a five-thousand-dollar floor.
The structural checklist for waterproof success
- Deep clean the tile and grout joints with denatured alcohol to remove all contaminants.
- Apply high-quality blue painter’s tape exactly 1/8 inch from the joint edge.
- Select 100 percent RTV silicone specifically rated for kitchen and bath use.
- Cut the caulk tube nozzle at a 45-degree angle to match the joint width.
- Apply a steady, continuous bead without stopping mid-run.
- Tool the joint immediately with a soapy finger or a dedicated caulking tool.
- Remove the tape at a 45-degree angle away from the joint while the sealant is wet.
- Allow a full 24-hour cure time before exposing the area to water.
The final step is the most difficult for homeowners: waiting. People want to use their new shower immediately. If you get that silicone wet before it has finished cross-linking, you will ruin the bond. The water will penetrate the microscopic gaps and the whole process will be for nothing. I tell my clients that if I catch them running the water before the 24-hour mark, I won’t warranty the job. It sounds harsh, but my reputation is built on floors and showers that last thirty years, not thirty days. You have to respect the chemistry of the materials. When you do it right, those lines will be as straight as a laser beam and as tough as a tire. That is the hallmark of a master installer. It is about the details that no one sees until they fail.