
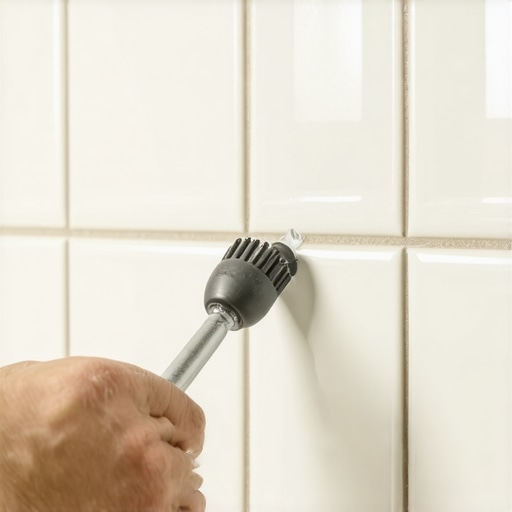
I once spent three days grinding concrete on a job last month just so the floor would not click like a castanet. The homeowner had tried to save money by doing the grout removal themselves. They used a heavy hammer and a cold chisel on a delicate porcelain mosaic. By the time I arrived, forty percent of the tiles were chipped or completely loose from the thin-set. It was a disaster that cost them three times the original estimate. This is the reality of floor restoration. A floor is a performance surface, not a decoration. If you treat it with anything less than structural respect, it will fail you. Removing grout is not about brute force. It is about understanding the mechanical bond between the cementitious filler and the ceramic edge. Most people think they are just scratching out dirt. You are actually performing a surgical extraction of a mineral bridge that has been cured for years. If you rush, the tile loses.
The physics of the cementitious bridge
Grout removal requires a deep understanding of the Mohs hardness scale and the mechanical bond between Portland cement and tile bisque. You must acknowledge that grout is a sacrificial layer designed to fill the void between rigid units. It is often composed of silica sand and cement. This makes it abrasive. When you apply friction to remove it, you risk scratching the protective glaze of your tile. The secret is managing the heat and vibration that travels through the grout line into the shoulder of the tile. If the vibration frequency matches the resonance of the tile bond, you will pop the tile right off the subfloor. This is why high-speed rotary tools are often more dangerous than oscillating ones. You need to focus on the grit of the blade rather than the speed of the motor. Modern grouts often contain polymers and latex modifiers that make them flexible but also more stubborn to remove. These chemical additives require a specific approach to avoid melting the plastic components into the tile edge. Use a steady hand. Keep the tool moving. Never linger in one spot.
“A floor is only as good as the subfloor beneath it; deflection is the enemy of every joint.” – Master Flooring Axiom
Tools that prioritize tile integrity
Selecting the correct tool for grout extraction depends on the width of the joint and the hardness of the tile material. For narrow joints in showers, a manual carbide-tipped rake is often the safest bet. It gives you total control over the pressure. For larger floor areas, an oscillating multi-tool with a diamond grit blade is the industry standard. Unlike a circular saw blade, the oscillating motion moves back and forth in a tiny arc. This prevents the tool from jumping out of the track and skidding across the face of your expensive marble or porcelain. If you are working in a region with high humidity like Houston, the grout might be softer due to persistent moisture absorption. In dry climates like Phoenix, that same grout will be brittle and prone to shattering into sharp shards. You need to adjust your pressure accordingly. I always keep a vacuum nozzle right at the point of contact. This prevents the dust from acting as an additional abrasive. The dust wins if you let it sit. It will find its way into the microscopic pores of the tile and stain it forever. Use a shop-vac with a HEPA filter. Your lungs will thank you. Your tiles will stay clean.
| Tool Type | Ideal Application | Risk Level | Speed Rating |
|---|---|---|---|
| Manual Carbide Rake | Vertical shower joints | Low | Slow |
| Oscillating Multi-tool | Main floor areas | Medium | Moderate |
| Reciprocating Saw | Demolition only | High | Fast |
| Rotary Dremel | Detail work | High | Moderate |
The hidden dangers of power tools
Power tools introduce thermal energy and mechanical vibration that can compromise the adhesive bond of the surrounding tiles. When you engage an oscillating blade at 20,000 oscillations per minute, you are creating friction that generates heat. This heat can cause the moisture trapped in the grout or the thin-set to vaporize. This creates micro-pressure within the porous bisque of the tile. If the tile is old, it might already have micro-fractures you cannot see. The vibration will find those cracks. It will expand them. This is how a small grout repair turns into a full floor replacement. Always start your cut in the center of the grout line. Do not touch the tile edge on the first pass. Create a relief channel. Once the center of the grout is gone, the tension is released. The remaining grout on the edges will often flake away with much less pressure. This is the professional way to do it. It takes longer but saves the tile. Most guys skip this. They go straight for the edge. They end up with a chipped floor. Do not be that guy. Take your time.
Softening the bond with chemical intervention
Chemical grout softeners or sulfamic acid solutions can reduce the structural integrity of the grout before mechanical removal begins. This is a controversial tip among some old-timers, but it works. If you are dealing with an epoxy grout, standard tools will struggle. Epoxy is essentially a plastic resin. It is tougher than the tile itself. You need heat or specific solvents to break it down. For standard cement-based grout, a mild acid solution can eat away at the calcium carbonate in the cement. This turns the hard bridge into a soft paste. You must be careful with natural stone like travertine or marble. The acid will etch the stone. It will ruin the finish. Always test a small hidden area first. If the tile is glazed ceramic, you are usually safe. Apply the solution. Let it sit for twenty minutes. Do not let it dry. The grout will then yield to a manual scraper like butter. It is a slow process but it protects the edges. I prefer this method for high-end residential jobs where the tile is irreplaceable. It is about finesse. It is about patience. It is about the result.
- Inspect all grout lines for cracks before starting to identify loose tiles.
- Wear a P100 respirator to block silica dust from entering your lungs.
- Tape off the edges of the tiles with heavy-duty painter tape for added protection.
- Always work from the center of the room outward to maintain a consistent rhythm.
- Keep a damp sponge nearby to wipe away dust and check your progress frequently.
The 1/8 inch rule for fresh installations
The depth of the grout removal must reach at least one eighth of an inch to ensure the new grout has enough surface area to bond. If you only scrape off the top layer, the new grout will not stick. It will flake off within weeks. This is called ghosting. You need to provide a deep channel for the new material to grab onto. Think of it like a mechanical lock. The sides of the tile are the anchor points. While most people want the thickest underlayment, too much cushion actually causes the locking mechanisms on LVP or the grout in tile to snap under pressure. The same logic applies to grout depth. If the channel is too shallow, the grout is weak. If it is deep enough, it becomes part of the floor structure. I use a depth gauge or a marked blade to ensure I am deep enough. I want to see the top of the thin-set. Once I see that, I know I have gone far enough. This is the only way to guarantee the repair lasts for twenty years instead of twenty days. Do the work once. Do it right. Follow the standards set by the Tile Council of North America. They know what they are talking about. I have seen their tests. They do not lie.
“Grout is intended to facilitate the transition between tiles while accommodating minor structural shifts.” – TCNA Handbook Excerpt
The invisible danger of tile vibration
Vibration during grout removal can cause the underlying thin-set to delaminate from the subfloor or the back of the tile. This is especially true if the original installer used the spot-bonding method. Spot-bonding leaves hollow cavities under the tile. When you hit a hollow tile with a power tool, it acts like a drum. The vibration is amplified. The bond breaks. You will hear it. It sounds like a dull thud instead of a sharp ring. If you find a hollow spot, stop immediately. You cannot remove the grout from a loose tile without breaking it. You have to pull the tile, clean it, and reset it. This is why I always tap the floor with a wooden handle before I start. I am listening for the hollows. It tells me where the danger is. It tells me where I need to be careful. A solid floor is a silent floor. If your floor is singing to you, you have a problem. Fix the bond before you fix the grout. It is the only way to ensure the structural integrity of the surface. Most homeowners ignore the sounds. They regret it later. Listen to the floor. It talks to you if you know how to hear it.
Preparing the empty joint for new life
Cleanliness is the final hurdle before the new grout can be successfully injected into the extracted channels. Once the old grout is gone, the work is not finished. You have a channel full of dust, debris, and old adhesive. If you grout over that, the new material will fail. I use a stiff nylon brush and a vacuum to clear every bit of grit. Then I wipe the joints with a microfiber cloth and denatured alcohol. This removes any oils or residues that might prevent a chemical bond. The alcohol evaporates quickly. It does not leave moisture behind. Moisture is the enemy of a good cure. If the subfloor is damp, the grout will turn white. This is called efflorescence. It is a mineral salt migration that ruins the look of the floor. It is a sign of poor moisture management. In basement installations, this is a constant battle. You need a dry environment. You need a clean track. Only then can you mix your new batch of high-performance grout. Mix it to the consistency of peanut butter. Not too wet. Not too dry. Just right for the job. Your floor will look new again. It will stay that way. That is the secret. It is not a trick. It is just hard work done correctly.