
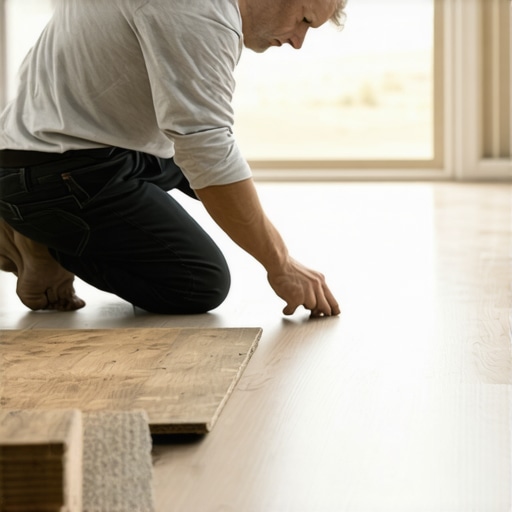
The subfloor secret that contractors wont tell you
Most guys skip the leveling compound. They think the underlayment will hide the dip. It won’t. I spent three days grinding concrete on a job last month just so the floor wouldn’t click like a castanet. That is the reality of a professional install. If you walk across a floor and hear a hollow, plastic thud, it is not the laminate’s fault. It is a failure of the layers beneath it. I have seen fifteen thousand dollar hardwood floors ruined by moisture, and I have seen three dollar laminate floors feel like solid oak because the installer understood the physics of compression. You cannot cheat the subfloor. You cannot hide a valley in the concrete with a thicker pad. You must build a foundation that mimics the density of a structural joist system. This is where the chemistry of your underlayment becomes the deciding factor between a floor that lasts twenty years and one that fails in twenty months.
The acoustic physics of high density underlayment
High density underlayment reduces the hollow sound of laminate by filling the microscopic air gaps between the flooring and the subfloor. This creates a solid mass that absorbs vibration rather than reflecting it back into the room as a high pitched click. Most homeowners make the mistake of buying the thickest foam they can find, thinking soft means quiet. It does not. A soft, airy foam acts like a drum skin. When you step on the laminate, the air inside the foam compresses and then snaps back. This creates that signature cheap laminate sound. If you want the feel of solid hardwood floors, you need a material with a high Sound Transmission Class or STC rating and an even higher Impact Insulation Class or IIC rating. We are talking about recycled felt or high density rubber. These materials are heavy. They are difficult to cut. They do not compress under the weight of a heavy oak cabinet. That resistance is what makes the floor feel solid under your boot. It stops the deflection of the tongue and groove joint, which is the number one cause of floor failure in modern homes.
“A floor is only as good as the subfloor beneath it, deflection is the enemy of every joint.” – Master Flooring Axiom
The deception of the expansion gap and perimeter logic
Proper underlayment installation requires a meticulous approach to the perimeter expansion gaps to ensure the floor floats as a single unit. If you pinch the underlayment against the drywall, you create a pivot point. This pivot point will eventually cause the locking mechanism of your laminate to snap. I have seen it a hundred times. People think the gap is just for the wood, but the underlayment needs room to breathe too. When we talk about laminate, we are talking about a product that is mostly sawdust and resin. It reacts to humidity. If your underlayment holds moisture against the bottom of that plank, the edges will curl. This is called cupping. To prevent this, you need a vapor barrier. Not just a piece of plastic, but a six mil poly film that is taped with moisture resistant seam tape. If you are installing over a crawlspace or a concrete slab, this is not optional. The concrete is a sponge. It pulls water from the earth and breathes it into your floor. Without a sealed barrier, your laminate will swell and the joints will peak. You will feel those sharp edges under your socks, and the illusion of real wood will be gone forever.
Comparison of underlayment materials for structural integrity
| Material Type | Density Rating | Sound Dampening | Moisture Resistance | Best Use Case |
|---|---|---|---|---|
| Standard Polyethylene Foam | Low | Poor | Moderate | Budget rentals only |
| Acoustic Felt | High | Excellent | Low (Needs Barrier) | Upstairs bedrooms |
| Natural Cork | Very High | Superior | High | High end installations |
| Recycled Rubber | Extreme | Best | Excellent | Main floor living areas |
The 1/8 inch rule that ruins everything
A subfloor must be flat within 1/8 inch over a 10 foot radius to prevent the laminate from bouncing and sounding hollow. This is the gold standard for any flooring professional. If you have a dip, the underlayment will span that dip like a bridge. When you walk over it, the bridge collapses. You hear a click. You feel a soft spot. Eventually, the plastic locking tab on the laminate plank will shear off. No amount of padding will fix a floor that is out of level. I use a straight edge and a bag of self leveling compound on every single job. It is messy and it takes time to dry, but it is the only way to get that solid feel. You want the floor to feel like it is part of the house, not a layer of plastic floating on top of it. This is especially important when transitioning to areas with grout and tile, like showers or kitchens. The height transition must be perfect. If the laminate is too bouncy, the transition strip will wiggle loose within six months.
The trap of excessive cushioning in luxury vinyl and laminate
While most people want the thickest underlayment, too much cushion actually causes the locking mechanisms on laminate and LVP to snap under pressure. This is the most common contrarian fact in the industry. More is not better. If the underlayment is more than 3mm thick and has a low density, it allows the floor to move too much. Think about a paperclip. If you bend it back and forth enough times, it breaks. The same thing happens to your floor joints. A thin, dense layer of cork or rubber provides just enough give to be comfortable but enough support to keep the joints locked tight. This is the difference between a floor that feels like a deck and a floor that feels like a trampoline. Real hardwood floors do not bounce because they are nailed or glued directly to the subfloor. To mimic that, you need a firm base. Anything else is just a temporary cover up that will lead to a costly teardown in the future.
“Subfloor preparation is 90 percent of the job, the visible floor is merely the final 10 percent of the labor.” – NWFA Technical Manual
Master flooring installation checklist for success
- Check moisture levels in the concrete slab using a calcium chloride test.
- Grind down any high spots and fill low spots with a high strength leveler.
- Vacuum the subfloor three times to ensure no grit is trapped under the pad.
- Install a 6 mil vapor barrier and overlap seams by at least six inches.
- Lay the underlayment perpendicular to the direction of the flooring planks.
- Leave a consistent 3/8 inch expansion gap around all vertical obstructions.
- Tape all underlayment seams with a foil or moisture resistant tape.
Thermal resistance and the warmth factor
The R-value of your underlayment determines how cold the laminate feels to the touch during winter months. Laminate is naturally colder than wood because of its density and top wear layer. If you are on a concrete slab in a cold climate, you need an underlayment with a higher R-value. Cork is the champion here. It has millions of tiny air cells that act as natural insulators. It keeps the heat in the room from escaping into the subfloor. This makes the floor feel warmer and more like natural oak. If you are installing over radiant heat, you have the opposite problem. You need an underlayment with a low R-value so the heat can pass through the floor and into the room. If you choose the wrong one, you are essentially insulating your heater from the room. Always check the manufacturer’s specifications for both the floor and the heating system before you buy your padding. It is a technical decision that affects your utility bills for the life of the home.
The final transition and the zero threshold goal
Achieving a seamless transition between laminate and other surfaces requires precise underlayment thickness matching. I hate bulky T-moldings. They look cheap and they are trip hazards. The goal of a master architect is a zero threshold transition. This means the laminate is the exact same height as the tile in the bathroom or the hardwood in the hallway. You achieve this by calculating the total stack height. You take the thickness of the plank and add the compressed thickness of the underlayment. If you are short by a few millimeters, you don’t use a thicker pad. You use a layer of luan or plywood under the underlayment. This maintains the structural integrity while achieving the aesthetic goal. This is how you make a three dollar floor look like it cost fifty dollars a square foot. It is about the math and the prep work. It is about respecting the physics of the materials. When you get the density and the levelness right, the sound and the feel will follow. You will have a floor that doesn’t just look like wood, but performs like it too.