
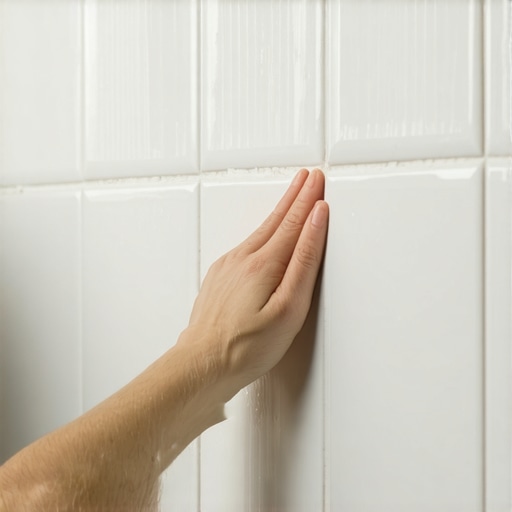
I spent three days grinding concrete on a job last month just so the floor would not click like a castanet. That job taught me that most guys skip the leveling compound because they think the underlayment will hide the dip. It will not. It is the same story with shower walls. You tap on a tile and hear that empty, drum-like thud. It is the sound of a failure waiting to happen. I have spent twenty-five years looking at what happens behind the ceramic. When a wall sounds hollow, it means the bond between the tile and the substrate has failed or was never there to begin with. You are hearing air where there should be a solid mechanical and chemical connection. It is not just an annoyance. It is a structural red flag. A shower is a high-moisture engine. If the tile is not fully embedded in the thin-set, water vapor will find those voids. Once moisture sits in a pocket behind your tile, it starts a cycle of mold growth and structural rot that can eat through your studs before you even see a crack in the grout. I do not care how expensive your Italian marble was. If the guy who installed it did not understand the physics of trowel ridges, you have a ticking time bomb in your bathroom.
The phantom behind the ceramic
A hollow sound in a shower wall indicates a void or delamination where the tile adhesive has failed to create a solid bond. This occurs due to improper trowel techniques, substrate movement, or moisture intrusion that degrades the thin-set. Fixes range from localized injection to full tear-outs. Every time you hear that tap-tap-hollow sound, you are listening to a gap in the coverage. The Tile Council of North America is very clear about this. For wet areas, you need ninety-five percent coverage. Most budget contractors slap a few globs of thin-set on the back of a tile and push it against the wall. This is called spot-bonding. It is a crime in the flooring world. When the mortar dries, those globs shrink slightly. Because there is no continuous bed of ridges, the tile sits on an island of cement surrounded by air. When you tap it, the vibration echoes through that air pocket. That air is where the trouble lives. It is a playground for anaerobic bacteria. It is also where the tile is weakest. If you lean against that tile while shaving or scrubbing, the lack of support behind the ceramic will cause it to crack. Then you have a real mess on your hands.
The chemistry of a failed bond
The chemical bond of modified thin-set requires precise hydration and environmental conditions to reach maximum shear strength. If the substrate is too dusty or the mortar dries too quickly, the cement crystals cannot knit into the tile. This results in a brittle connection that sounds hollow. We are talking about calcium silicate hydrate. That is the crystalline structure that forms when you mix water with portland cement. If you are working on a hot day or if your backer board is bone dry, the substrate will suck the water out of the thin-set before the crystals can grow into the pores of the tile. This is called a dry bond. It looks okay for a month. Then the house settles. The wood framing shifts by a hair. Because the bond is brittle and full of microscopic gaps, it snaps. Now you have a tile that is technically held in place by the grout lines but is floating off the wall. I always tell my apprentices to damp down the cement board with a sponge before they thin-set. It keeps the moisture where it belongs. If you do not manage the evaporation rate, the chemistry fails. You end up with a wall that sounds like a bongo drum. It is a mechanical failure of the highest order.
“A floor is only as good as the subfloor beneath it; deflection is the enemy of every joint.” – Master Flooring Axiom
Why your backer board is screaming
Substrate selection determines the longevity of the tile installation and the frequency of hollow spots. Using regular drywall or improperly fastened cement board leads to deflection which breaks the mortar bond over time. Moisture-stable substrates like foam panels or cementitious boards are mandatory for long-term performance. You cannot put tile on standard green board and expect it to last twenty years. The paper face of the drywall is a food source for mold. More importantly, it has zero structural integrity when it gets damp. Even if you use cement board, if you did not use the right screws every six inches, the board will flex. Every time the shower door slams or a heavy person leans on the wall, the board moves. Thin-set is rigid. It does not like to bend. When the board flexes and the tile does not, the bond breaks. That is when the hollow sound starts. I see guys using the wrong tape on the seams too. You need alkali-resistant mesh tape. If you use standard drywall tape, the cement in the thin-set will literally eat the tape alive. Then the seams open up, the wall moves, and your tile pops. It is a chain reaction of cheap materials and bad decisions.
The physics of the ninety-five percent coverage rule
Achieving ninety-five percent coverage requires directional troweling and collapsing the ridges to ensure no air pockets remain behind the tile. In wet environments, any air gap serves as a reservoir for moisture and a point of structural weakness. Proper technique involves combing the mortar in straight lines. You never want to see those swirl marks. When you trowel in circles, you trap air. When you press the tile down, those air pockets have nowhere to go. They stay there forever. If you trowel in straight lines, the air can escape as you collapse the ridges. It is basic fluid dynamics. I always pull a tile every now and then just to check. If I see ridges that are not flattened, I know I am not getting the bond I need. For large format tiles, you must back-butter. That means you apply a thin layer of mortar to the back of the tile itself before setting it into the combed bed on the wall. It is the only way to guarantee that the chemical crystals have a bridge to cross from the wall to the ceramic. Most guys are too lazy to do it. They want to get the job done and go home. But the hollow sound does not lie. It tells the story of every ridge you did not collapse.
| Material Property | Modified Thin-set | Unmodified Thin-set | Organic Mastic |
|---|---|---|---|
| Flexibility | High | Low | Moderate |
| Water Resistance | Excellent | Good | Poor |
| Bond Strength | High | Moderate | Low |
| Recommended Use | Wet Areas | Stable Floors | Dry Walls Only |
Moisture is a patient assassin
Water vapor travels through grout and works its way into the voids behind the tile through capillary action and vapor drive. Once moisture occupies a hollow space, it cannot evaporate easily, leading to the degradation of the adhesive and the substrate. This process is often invisible until the tile falls off. People think grout is waterproof. It is not. It is a hard sponge. Water goes right through it. If you have hollow spots, those spots fill with water every time you shower. Over months and years, that water sits there. It creates a micro-climate of rot. If you have a wood-framed wall, the moisture will eventually hit the studs. Then you are not just replacing tile. You are rebuilding the skeleton of your house. I have seen bathrooms where the tile was the only thing holding the wall up. The wood behind it had turned into compost. This is why a topical waterproofing membrane like Kerdi or RedGard is so important. It creates a secondary line of defense. But even then, if the tile is hollow, the grout will crack because the tile is moving. Once the grout cracks, the floodgates open. You cannot win a fight against water if your installation is full of holes.
The one eighth inch that ruins everything
Precision in leveling and alignment prevents the cumulative stress that leads to delamination and hollow sounds. Even a slight dip in the substrate creates a pivot point where the tile can lose contact with the mortar bed. Grinding high spots and filling lows is the only way to ensure a flat wall. If your wall studs are bowed, your tile will follow that bow. Or worse, the tile will try to span the gap and leave a huge void behind it. This is where the grinding comes in. I spend half my time with a straight edge and a sander. If the wall is off by an eighth of an inch over four feet, it is too much for a large tile to handle. The tile will bridge the low spot. That bridge is a hollow drum. You cannot just pack more thin-set in there either. Thin-set is meant to be thin. If you pile it on an inch thick, it will shrink and pull the tile away from the wall as it cures. You have to get the substrate flat first. There are no shortcuts. Every eighth of an inch matters when you are trying to build something that lasts decades.
- Tap every tile with a plastic tool to locate hollow echoes.
- Inspect grout lines for hairline cracks or missing chunks.
- Check the perimeter for proper silicone expansion joints.
- Assess the deflection of the wall by applying firm pressure.
- Verify that no organic mastic was used in the wet zone.
Hardwood floors and the splash zone
Hardwood floors and laminate have no place in a shower environment due to the extreme moisture levels and the high risk of catastrophic failure. While some homeowners want the aesthetic of wood in a bathroom, the physics of expansion and contraction makes these materials unsuitable for wet areas. I see people trying to use laminate in bathrooms because the box says it is waterproof. That is a lie. The surface might be waterproof, but the joints are not. The moment water gets into the core, it swells like a sponge. Hardwood is even worse. Wood is a living material. It breathes. In a bathroom, the humidity swings from thirty percent to ninety percent in ten minutes. The wood will cup and crown until it looks like a washboard. If you want the wood look, use wood-look porcelain tile. It gives you the aesthetic without the rot. Just make sure the installer knows how to set them. Those long planks are notorious for being bowed. If you do not use a leveling system, you will have lippage that will trip you every time you get out of the shower. And yes, those bowed planks will sound hollow if you do not back-butter them correctly.
“A floor is only as good as the subfloor beneath it; deflection is the enemy of every joint.” – Master Flooring Axiom
Why grout is not a structural hero
Grout serves as a filler for expansion gaps and a visual finish but provides no structural support to the tile bond. Relying on grout to hold a loose or hollow tile in place is a guaranteed path to failure. Proper installation requires the mortar to do the heavy lifting. I have seen people try to fix a hollow tile by rubbing more grout into the cracks. It is like putting a band-aid on a broken leg. Grout has very little shear strength. Its job is to manage the edges of the tile and allow for a tiny bit of movement. If the tile is already loose enough to sound hollow, the grout will just crumble out within weeks. You need to address the bond. Sometimes you can save a tile by drilling small holes and injecting a low-viscosity epoxy. But usually, a hollow sound means you need to pop that tile off and see what went wrong. Nine times out of ten, you will find a dry substrate or a spot-bonded mess. Do not trust the grout to save you. Trust the thin-set and the technique. The final inspection of any shower should involve a systematic tap test. If it sounds like a drum, it is not done. You have to respect the materials. If you do not, the water will eventually win. It always does.