
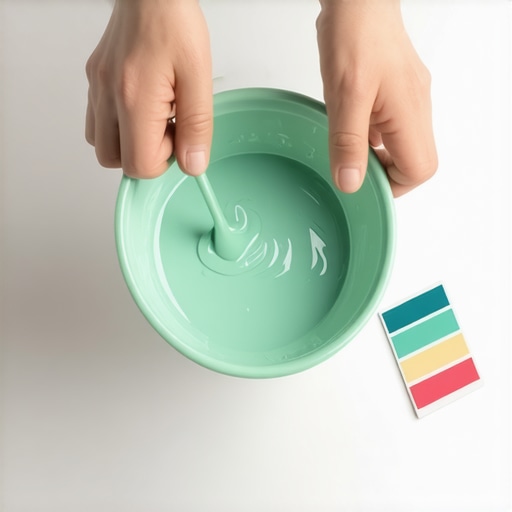
I spent three days grinding concrete on a job last month just so the floor wouldn’t click like a castanet. Most guys skip the leveling compound. They think the underlayment will hide the dip. It won’t. I have spent twenty five years on my knees with a moisture meter and a level and I can tell you that the smallest fraction of an inch will haunt you for the life of the installation. When it comes to grout, the margin for error is even slimmer. You see a color on a plastic stick in the showroom and think it will look the same in your showers or across your kitchen tile. It never does. The chemistry of hydration and the physics of light refraction ensure that what you see in the bucket is a lie. If you want a perfect match, you have to stop thinking like a decorator and start thinking like a materials scientist.
The invisible science of pigment migration
Grout color matching depends entirely on the hydration rate and the specific gravity of the pigments used in the mix. To achieve a perfect match, you must control the evaporation curve so the minerals do not leach out before the Portland cement achieves its final set. Grout is not just paint for the gaps between your tiles. It is a structural component that manages the lateral pressure and the microscopic movement of the floor assembly. When you mix grout, you are initiating a chemical reaction. If you add too much water, you dilute the polymer chains and the pigment particles float to the surface. This causes a phenomenon called efflorescence, where white minerals mask the actual color you paid for. This is why your dark charcoal grout often ends up looking like a dusty sidewalk after forty eight hours.
“A floor is only as good as the subfloor beneath it; deflection is the enemy of every joint.” – Master Flooring Axiom
The pulverized scrap method for perfect matches
The most effective DIY trick for matching custom grout colors involves pulverizing a spare piece of the actual tile to create a matching aggregate. By grinding a scrap of your porcelain or ceramic tile into a fine powder and mixing it with a neutral binder, you create a paste that share the exact refractive index as the tile itself. I keep a heavy duty mortar and pestle in my truck for this exact reason. You take that powder and blend it with a high performance unsanded base. This ensures that the light hitting the tile and the light hitting the grout joint bounce back at the same frequency. Most homeowners try to match colors by eye under the flickering fluorescent lights of a big box retailer. That is a recipe for disaster. You need to see the material under the actual Kelvin rating of the lights in your bathroom or kitchen.
Why your subfloor is lying to you
Subfloor deflection is the primary cause of grout failure and color shifts over the life of a tile installation. If the plywood or concrete beneath your feet moves even a millimeter, it creates micro cracks in the grout which trap dirt and change the perceived color of the joint. In the world of hardwood floors, we talk about the Janka scale, but in the tile world, we talk about the L over three hundred sixty standard. This means the floor should not bend more than the length of the span divided by three hundred sixty. If you put heavy tile and grout over a bouncy floor, that grout will crumble into dust within a year. No amount of custom color matching will save a floor that was built on a trampoline.
| Grout Type | Pigment Stability | Water Resistance | Best Use Case |
|---|---|---|---|
| Sanded Grout | Moderate | Low | Wide joints over 1/8 inch |
| Unsanded Grout | High | Moderate | Polished marble and thin joints |
| Epoxy Grout | Extreme | 100% | Showers and high traffic areas |
| High Performance Cement | Very High | High | Exterior and submerged tile |
The chemistry of the wet sponge
Over washing a grout joint during the cleanup phase is the most common way to ruin a custom color match. Every time you swipe a wet sponge over that fresh joint, you are pulling pigment out of the suspension and introducing excess moisture that weakens the crystalline structure of the cement. I have seen guys use a soaking wet sponge because they are lazy and want the tile to look clean immediately. They end up with a floor that has three different shades of grey because the water content varied from one side of the room to the other. You want a damp sponge, almost dry to the touch, and you only swipe it once. If you see water pooling in the joint, you have already failed. The mil thickness of the wear layer on laminate or the oil finish on hardwood floors is far more forgiving than the sensitive hydration window of a Portland cement grout.
- Always use distilled water for mixing to avoid mineral staining.
- Measure water with a graduated cylinder, not a bucket.
- Let the grout slake for ten minutes to allow the polymers to fully hydrate.
- Never mix a partial bag as the pigments are not distributed evenly in the dry state.
- Test the match on a sample board and let it dry for twenty four hours.
Hardwood floors and the expansion gap ghost
While tile relies on rigid grout joints, hardwood floors and laminate require a completely different approach to transitions and color. People often try to use grout or rigid caulk to fill the gap where a wood floor meets a tile shower. This is a fundamental engineering error. Wood is a hygroscopic material, meaning it breathes and moves with the humidity. If you trap it with rigid grout, the wood will either buckle or the grout will explode. I have seen wide plank walnut floors cup so badly they looked like potato chips because the installer did not leave a proper expansion gap at the perimeter. For these transitions, you need a high grade siliconized acrylic that matches your custom grout color but remains flexible enough to handle the seasonal movement of the wood. The 1/8 inch that ruins everything is usually the gap you forgot to leave.
“Wood moves. Concrete cracks. Grout fails. Only the installer who accounts for all three survives.” – Master Flooring Axiom
The 1/8 inch that ruins everything
Precision in the width of the grout joint is the only way to maintain color consistency across a large surface area. If your spacers are inconsistent, the volume of grout in each joint changes. Larger volumes of grout take longer to dry and often cure to a slightly darker shade than the thin joints. This is especially true in showers where the vertical joints dry faster than the floor joints due to gravity pulling the moisture down. You must ensure that the subfloor is perfectly level before the first tile is set. If the floor has dips, you will be forced to use more thin set under some tiles, which can leach moisture up into the grout and alter the final color. It is a domino effect of physics that starts with the concrete slab and ends with your dissatisfied eyes. The molecular bond of a modified thin set is powerful, but it cannot overcome a poor foundation. Stop looking at the color and start looking at the levelness of your world. Article Schema: { “@context”: “https://schema.org”, “@type”: “TechArticle”, “headline”: “The DIY Trick for Matching Custom Grout Colors”, “image”: “https://example.com/grout-matching.jpg”, “author”: “Master Flooring Architect”, “publisher”: { “@type”: “Organization”, “name”: “Flooring Pro Insights” }, “mainEntityOfPage”: “True”, “description”: “Expert guide on the chemistry and physics of matching grout colors, focusing on the pulverized scrap method and subfloor integrity.” }