
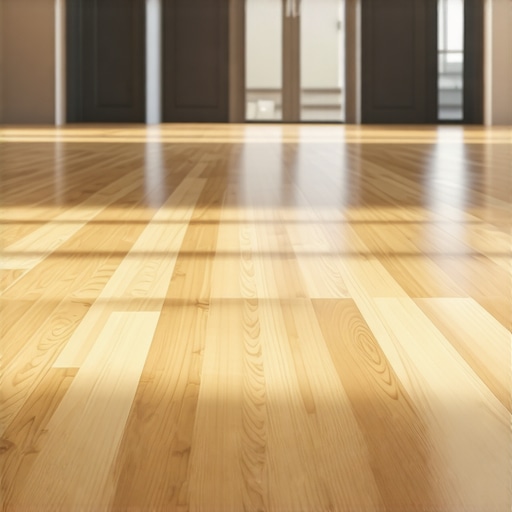
I smell like oak dust and the sharp sting of WD-40 most days. My hands are calloused from twenty-five years of swinging a mallet and dragging a level across thousands of square feet of subfloor. I view a floor as a high-performance structural machine, not a cosmetic decoration you pick out of a catalog. I once walked into a house where a $15,000 wide-plank walnut floor was cupping so bad it looked like a potato chip because the installer didn’t check the crawlspace humidity. The planks were fighting for space that did not exist. The homeowner wanted that high-end look but skipped the moisture barrier. Wood is alive. It is a hygroscopic material that absorbs and releases moisture from the air, changing its cellular volume in the process. When you ask about the best direction to lay your hardwood planks to make a room look bigger, you are asking about the intersection of human psychology and structural engineering. We are manipulating sight lines and vanishing points to trick the brain into ignoring the physical limits of the four walls. If you get the direction wrong, you are essentially creating a visual barrier that makes a room feel like a cramped box. If you get it right, the room opens up. But let me be clear. No amount of clever layout will save a floor if the subfloor is not flat to within 1/8 of an inch over a 10-foot span. Most guys skip the leveling compound. They think the underlayment will hide the dip. It won’t. I spent three days grinding concrete on a job last month just so the floor wouldn’t click like a castanet under every footstep.
The orientation of the longest wall
Laying hardwood planks parallel to the longest wall creates a sense of linear continuity that draws the visual focus across the greatest expanse of the room. This technique stretches the perceived dimensions of the space because the eye follows the long, unbroken lines of the grain and the joints. In narrow rooms or hallways, this is the gold standard for installation. When the planks run the length of the room, they emphasize the distance. If you were to run them perpendicular to the long wall, you would create a ladder effect. This visual stutter makes the room feel shorter and wider in a way that often feels claustrophobic. The long lines of a site-finished oak floor provide a runway for the eye. This is especially true when using wide-plank options. A wider plank means fewer joints. Fewer joints mean less visual noise. When you have a high-quality hardwood floor, you want the natural beauty of the wood to do the work. This is why we avoid the choppy look of short boards in a small space. We want the longest boards available placed parallel to the most significant architectural run in the house.
“A floor is only as good as the subfloor beneath it; deflection is the enemy of every joint.” – Master Flooring Axiom
Why lighting dictates your layout
Placing hardwood planks perpendicular to the primary light source helps to minimize the visibility of joints and makes the floor appear as one continuous and expansive surface. When sunlight enters a room through a large window or sliding glass door, it hits the edges of the planks. If the planks run parallel to the light, the light flows down the length of the board. If they run perpendicular, every slight variation in height or tiny gap will cast a microscopic shadow. These shadows highlight the individual boards rather than the floor as a whole. In a room you want to feel larger, you want the floor to be a singular plane of color and texture. While some people prefer the shadow lines to emphasize the wood, a room that feels small will benefit from the light-smoothing effect of a parallel-to-light layout. This is where the physics of the finish comes into play. A satin or matte finish will scatter light, further hiding imperfections, whereas a high-gloss finish will reflect every sunbeam and expose every dust mote. If you are dealing with laminate or luxury vinyl plank, this is even more critical because the artificial patterns can look repetitive if highlighted by harsh side-lighting.
The structural reality of floor joists
Installing hardwood planks perpendicular to the floor joists is a structural requirement in many traditional homes to ensure the floor remains stable and does not sag between the supports. While the aesthetic goal might be to make the room look bigger, the physical reality of the house often dictates the direction. If you have a plywood subfloor over joists, running the planks parallel to those joists can lead to the floor dipping or the joints separating over time. The floor needs the perpendicular strength of the hardwood to distribute the load across multiple joists. If your heart is set on a direction that runs parallel to the joists, you must reinforce the subfloor. This usually means adding a second layer of 3/8 inch or 1/2 inch plywood on top of the existing subfloor to provide the necessary rigidity. I have seen guys ignore this and then wonder why their floor squeaks every time they walk to the kitchen. A squeaky floor feels cheap and small regardless of how long the planks are. If you are working on a concrete slab, you have more freedom in direction because the slab provides a uniform, non-moving base, provided you have properly tested for moisture vapor emissions using a calcium chloride test or an in-situ probe.
The 1/8 inch that ruins everything
Achieving a sense of space requires a perfectly level subfloor because any dip or rise creates shadows and physical movement that break the illusion of a vast, open area. When I talk about a floor being a performance surface, I am talking about the tolerance levels. The National Wood Flooring Association is very clear on this point. If you have a hump in the middle of the room, your planks will teeter like a seesaw. This is especially dangerous for click-lock laminate or engineered hardwood. The locking mechanisms are designed to sit flat. When they are forced to bend over a hump, the tension on the plastic or wood tongue becomes too great and it snaps. Once that joint is broken, the floor will never feel solid again. I use a 10-foot straight edge on every job. If I see a gap larger than 1/8 of an inch, I pull out the grinder or the self-leveling underlayment. It is a messy, difficult process, but it is what separates a master from a handyman. People want the shortcut. They want to throw down some foam underlayment and hope for the best. But too much cushion is a killer. A thick, soft underlayment allows for too much vertical movement, which will eventually destroy the integrity of the floor joints.
| Wood Species | Janka Hardness Rating | Typical Acclimation Time |
|---|---|---|
| White Oak | 1360 lbf | 7-10 Days |
| Black Walnut | 1010 lbf | 10-14 Days |
| Brazilian Cherry | 2350 lbf | 14-21 Days |
| Maple | 1450 lbf | 7-10 Days |
| Hickory | 1820 lbf | 10-14 Days |
The ghost in the expansion gap
Leaving a proper expansion gap around the perimeter of the room is the only way to prevent a hardwood floor from buckling and destroying the visual lines of the installation. Wood expands and contracts with changes in relative humidity. During a humid summer, those planks are going to swell. If you have installed them tight against the drywall, the wood has nowhere to go but up. I have seen floors lift three inches off the subfloor in the center of a room because the installer didn’t leave a 1/2 inch gap at the walls. This gap is hidden by your baseboards and shoe molding. It is a invisible safety valve. Many homeowners think they want the floor to look as tight as possible, but tightness is the enemy of longevity. Even laminate floors, which are made of pressed wood fibers and resins, require this gap. When a floor buckles, the room feels broken and small. The physics of wood movement are non-negotiable. You must also account for the moisture content of the wood at the time of installation. I never start a job without my pinless moisture meter. I check the subfloor and I check the planks. If the difference is more than 4 percent for solid strip flooring or 2 percent for wide plank, the wood stays in the boxes. It needs to acclimate to the environment of the house.
Transitioning from hardwood to tiled showers
The transition between different flooring materials like hardwood and the tile found in showers and bathrooms must be managed with zero-threshold transitions to maintain a spacious, modern aesthetic. When you are trying to make a room look bigger, you want to avoid those clunky, raised T-moldings. They act like a speed bump for the eyes. In a master suite, you might have hardwood floors in the bedroom that lead right up to the bathroom. Inside that bathroom, you are dealing with water, showers, and grout. You cannot run hardwood into a shower area. It will rot. The chemistry of the grout and the waterproof membranes required for a shower are incompatible with the movement of wood. Instead, we use a schluter strip or a flush marble threshold. This creates a clean line. For the bathroom itself, if you want it to feel as big as the bedroom, you can sometimes find porcelain tiles that mimic the look of your hardwood planks. You lay them in the same direction to keep the visual flow going from one room to the next. This continuity is the secret to making a house feel twice its actual square footage. It requires precise height management so that the tile and the wood meet at the exact same level.
“Wood flooring will perform best when the environment is controlled to stay within a relative humidity range of 30 to 50 percent.” – NWFA Technical Guidelines
Why your subfloor is lying to you
Subfloors often appear flat to the naked eye but contain subtle undulations that will cause hardwood floors to bounce and laminate floors to click. You cannot trust your eyes in this business. You have to trust the tools. A subfloor might be structurally sound but aesthetically ruinous. If you are installing over an old house, the joists have likely settled. This creates a bowl effect in the center of the room. If you lay your planks across that bowl, they will bridge the gap at first, but eventually, they will sag. This creates a hollow sound. There is nothing that makes a room feel cheaper or more poorly constructed than a hollow-sounding floor. To fix this, we use layers of felt paper or specialized shims under the hardwood. In extreme cases, we have to sister the joists from underneath. It is a structural engineering challenge that most people don’t see. They just see the pretty wood on top. But that wood is only the skin. The subfloor is the skeleton. If the skeleton is deformed, the skin will never look right. This is why I spend more time on prep than I do on the actual installation. A floor that is perfectly flat reflects light uniformly, which is the ultimate trick for making a small room feel massive and airy.
Pre-Installation Checklist for a Massive Look
- Verify that the subfloor is flat within 1/8 inch over 10 feet using a mechanical straight edge.
- Measure moisture content of both the subfloor and the hardwood to ensure they are within a 2-4 percent margin.
- Identify the longest wall in the room to establish the primary layout axis for maximum visual length.
- Determine the location of all windows to ensure planks run parallel to the incoming light paths.
- Undercut all door jambs so the wood can slip underneath for a professional, molding-free finish.
- Vacuum the subfloor three times to ensure no grit or debris interferes with the adhesive or the seating of the planks.
The final verdict on structural layout
Choosing the direction of your floor is a decision that locks you into a specific visual experience for decades. If you follow the long wall and the light, you will generally succeed in opening up the space. But you must respect the physics of the house. You must respect the joists and the humidity. I have spent my life fixing the mistakes of people who thought flooring was easy. They see a YouTube video and think they can just click some boards together. But they don’t understand the chemistry of the adhesives or the cellular structure of the timber. They don’t know why a modified thin-set is needed for the tile transition or why grout choice matters for the longevity of the bathroom floor. A floor is a massive investment. Treat it like the engineering project it is. If you do, that small room will feel like a palace. If you don’t, you will be calling someone like me in five years to tear it all out and start over from the joists up. Wood is a beautiful, stubborn material. It will work for you if you follow the rules. It will fight you if you don’t. Keep your lines long, your subfloor flat, and your expansion gaps wide. That is how you build a floor that lasts a lifetime.