
Most guys skip the leveling compound. They think the underlayment will hide the dip. It won’t. I spent three days grinding concrete on a job last month just so the floor wouldn’t click like a castanet. That same level of obsession applies to the grout line. If you treat grout like an afterthought, you are going to end up with a hazy mess that hides the beauty of the tile you just spent thousands of dollars to buy. My hands are stained with the residue of a thousand installations. I know the smell of damp mortar and the grit of sanded grout. A floor is a performance surface. It is a structural engineering challenge that starts at the joists and ends at the microscopic film of the surface glaze. The sponge tactic is not just about cleaning. It is about chemical management and the controlled hydration of cementitious materials.
The ghost in the expansion gap
The ghost in the expansion gap represents the invisible movement that occurs when tile meets a vertical surface or a different material like hardwood floors. Without a proper flexible sealant or a true gap, the grout will crack and crumble within months. You must leave room for the structure to breathe. When you are running laminate or hardwood floors alongside a tiled shower, that transition is where the battle is won or lost. I have seen guys grout right up to a baseboard. It is a rookie move. The house shifts. The wood expands. The grout turns to dust. You need a 1/8 inch gap. Fill it with color matched caulk, never grout. This allows the assembly to move without shearing the bond between the tile and the thin-set. It is basic physics. If the floor cannot move, it will break. I have replaced entire kitchens because someone forgot that wood and ceramic expand at different rates. The expansion gap is the insurance policy for your installation.
“A floor is only as good as the subfloor beneath it; deflection is the enemy of every joint.” – Master Flooring Axiom
Why your subfloor is lying to you
Your subfloor is lying to you when it appears flat to the naked eye but contains micro-deviations that cause tile lippage or grout cracking. A subfloor must be flat within 1/8 inch over a 10 foot radius to ensure that the grout joints remain stable and free of stress. I carry a 10 foot straightedge on every job. I do not trust my eyes. I trust the tool. If I see a dip, I fill it with self-leveling underlayment. If I see a hump, I grind it down. The bond between the tile and the substrate depends on a uniform bed of mortar. When the mortar varies in thickness, it shrinks at different rates. This puts tension on the grout joint. If you want a floor that lasts 50 years, you spend 80 percent of your time on the prep. The grout is just the final seal. If the foundation is rotten, the seal will fail. It is a simple truth that many ignore to save a buck. They pay for it later when the grout starts popping out in chunks.
The zero haze hydration window
The zero haze hydration window is the specific timeframe between the initial set of the grout and the final crystallization of the cement particles. Wiping too early pulls grout out of the joint, while wiping too late leaves a permanent polymer film on the surface of the tile. You have to feel the grout. It should be firm to the touch, like stiff modeling clay, before you even think about touching it with a wet sponge. If it sticks to your finger, wait. If it is hard as a rock, you are in trouble. This window changes based on the environment. In the swampy humidity of Houston, grout stays wet for an eternity. In the dry heat of Phoenix, it sets up before you can finish a single row. I have spent nights under work lights scrubbing haze because a helper didn’t understand the clock. You have to respect the chemistry. Grout is a chemical reaction, not a drying process. It needs water to hydrate, but too much water will weaken the bond and wash out the pigment.
| Grout Type | Joint Width | Best Use Case | Cure Time |
|---|---|---|---|
| Sanded Grout | 1/8 inch to 1/2 inch | Large format floor tile | 72 hours |
| Unsanded Grout | Less than 1/8 inch | Polished marble walls | 48 hours |
| Epoxy Grout | Any width | Commercial kitchens | 24 hours |
The sponge tactic for a perfect finish
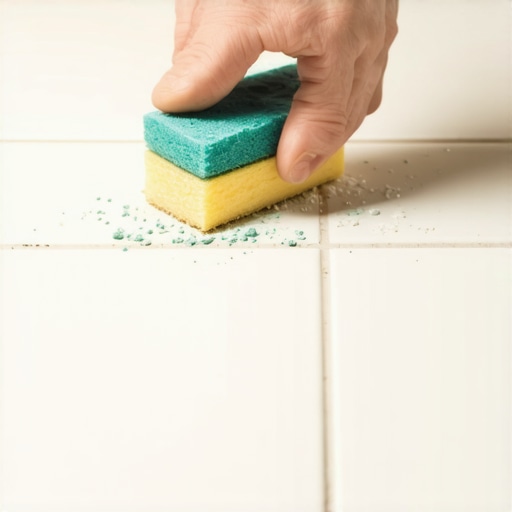
The sponge tactic for a perfect finish involves a two bucket system and a hydrophilic sponge used at a 45 degree angle to the grout joints. This method ensures that the surface is cleaned without removing the structural grout needed to support the tile edges and prevent water penetration. You need two buckets of clean water. One for the first rinse, one for the final wipe. If your water is cloudy, your floor will be hazy. It is that simple. I see guys using the same bucket of grey water for an entire room. They are just moving the dirt around. Use a hydrophilic sponge. It holds more water but releases it more predictably. Squeeze it until it is just damp. If you can wring a drop of water out of it, it is too wet. Excess water in the grout joint causes efflorescence, those white salty stains that ruin a dark grout job. Wipe at a 45 degree angle. This prevents the sponge from dipping into the joint and scooping out the material. One pass. Flip the sponge. One pass. Rinse. Repeat. It is a ritual. It is slow. It is the only way.
- Use two buckets of clean water at all times.
- Squeeze the sponge until it is barely damp.
- Wipe at a 45 degree angle to avoid scooping joints.
- Change water every 50 square feet.
- Finish with a dry microfiber cloth to buff the surface.
The 1/8 inch that ruins everything
The 1/8 inch that ruins everything refers to the minor height differences between tiles known as lippage which creates shadows and traps grout haze during the cleaning process. Even a tiny variation prevents the sponge from making uniform contact with the tile surface leading to uneven cleaning. Lippage is the mark of a hack. You use leveling spacers to keep everything flush. If one tile is higher than the other, your sponge will skip over the low side. That low side will collect a pool of grout water. When that water evaporates, it leaves behind a thick crust of haze. I have seen homeowners try to scrub this off with acid. That is a mistake. Acid can eat the pigment out of your grout and ruin the finish of your tile. The solution is mechanical. You prevent the lippage during the set. You use the right trowel size. You back-butter every large format tile. You ensure 95 percent coverage of the mortar. If the tile is flat, the cleaning is easy. If the tile is a roller coaster, the haze is inevitable.
“Cementitious grout requires controlled hydration to reach maximum compressive strength.” – TCNA Handbook 2023
Molecular zooming into the grout bond
Molecular zooming into the grout bond reveals that Portland cement forms a crystalline lattice that anchors into the microscopic pores of the tile edge and the subfloor substrate. The strength of this bond is dictated by the water to cement ratio and the absence of contaminants. When you mix your grout, use a margin trowel. Do not use a drill. A drill introduces air bubbles. Air bubbles are voids. Voids are weak points. I mix by hand until it looks like peanut butter. Then I let it slake. Slaking is vital. You let the chemicals sit for ten minutes so the polymers can fully activate. Then you stir it again. Never add more water after it has slaked. This breaks the chemical chains. If you add water, you are making the grout weaker and changing the color. I have seen floors where the grout is five different shades of grey because the installer kept adding water to the bucket. It looks terrible. It is unprofessional. Respect the mix. Respect the chemistry. The floor depends on it.