
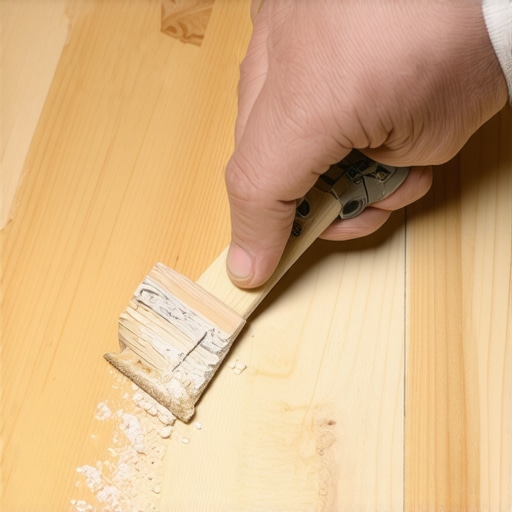
The Wood Filler Secret for Flawless Hardwood Edge Repairs
I once walked into a house where a $15,000 wide-plank walnut floor was cupping so bad it looked like a potato chip because the installer didn’t check the crawlspace humidity. The edges were a disaster. The gap between the floor and the baseboard looked like a canyon. Most guys would just squeeze some cheap putty in there and call it a day. That is how you end up with a floor that looks like a middle school art project. Wood is a living thing. It breathes. It moves. It fights you every step of the way. If you do not understand the molecular structure of the timber you are working with, your repair will fail before the filler even dries. I have spent twenty-five years on my knees with a moisture meter and a level. I have seen every mistake in the book. You cannot treat a hardwood floor like it is a piece of furniture that stays in one place. It is a performance surface. It is a structural engineering challenge that requires precision and the right chemistry to solve properly.
The ghost in the expansion gap
Expansion gaps represent the necessary perimeter spacing between hardwood floors and structural walls designed to accommodate hygroscopic movement. Without this 1/2 inch void, seasonal humidity fluctuations cause plank buckling and joint failure, leading to structural damage across the entire flooring installation surface. Many amateur installers look at that gap and think it is a mistake. They try to fill it solid with wood filler. That is the quickest way to ruin a floor. The filler will crack. The wood will buckle. You have to understand that wood expands across the grain. If you lock those edges down, the energy has to go somewhere, and usually, it goes up. I have seen floors lift two inches off the subfloor because some guy thought he was being neat by filling the expansion gap. The secret is not just filling a hole, it is managing the physics of movement. In humid regions like the swampy humidity of Houston, solid wood is a death wish if you do not respect these gaps. You need engineered cores or a very disciplined approach to perimeter management.
“A floor is only as good as the subfloor beneath it; deflection is the enemy of every joint.” – Master Flooring Axiom
Why your subfloor is lying to you
Subfloor preparation requires a dead-level surface with no more than 1/8 inch deviation over a ten-foot radius to ensure structural integrity. A concrete slab or plywood deck that appears flat often contains hidden dips and peaks that cause plank deflection, clicking noises, and filler ejection. Most guys skip the leveling compound. They think the underlayment will hide the dip. It won’t. I spent three days grinding concrete on a job last month just so the floor wouldn’t click like a castanet. When the subfloor is not level, the hardwood planks flex every time you walk on them. This movement acts like a piston, slowly pumping the wood filler out of the cracks until it turns into dust. You can use the most expensive filler in the world, but if the floor is moving, the filler is leaving. You have to address the substrate. I always tell homeowners that the pretty part of the floor is only ten percent of the job. The other ninety percent is the stuff you will never see again once the baseboards go down.
The 1/8 inch that ruins everything
Precision measurements in hardwood edge repairs must account for millimeter-scale tolerances to prevent filler cracking and bond failure. Gaps exceeding 1/8 inch require wood slivers or dutchman repairs rather than putty, as the volumetric shrinkage of solvent-based fillers leads to concave surfaces and aesthetic defects. When you get into gaps that are wider than a nickel, the chemistry of the filler starts to work against you. Most fillers are made of wood flour and a binder. As the binder evaporates, the filler shrinks. In a small crack, this is negligible. In a wide gap, it is a disaster. It pulls away from the edges of the wood fibers. It leaves a hairline crack that catches dirt. If you are dealing with a wide gap at the edge of a floor near showers or high-moisture areas, that crack becomes a straw for humidity. It sucks moisture down into the end grain of the wood. Then you get staining. Then you get rot. You have to know when to put down the putty knife and pick up a saw to cut a custom piece of wood to fill that void.
Chemistry of the cellular bond
Molecular bonding between wood filler and timber cells depends on the porosity of the lignin structure and the solvent type used in the repair compound. Nitrocellulose-based fillers provide superior adhesion to oak and maple by penetrating the capillary tubes of the wood, creating a mechanical lock that resists seasonal movement. Water-based fillers have their place, but they do not bite into the wood the same way. They sit on top. They are easy to clean up, which is why the big-box retailers love them, but they are not the professional choice for edge repairs. I prefer a solvent-based filler that I mix myself using the actual sawdust from the floor I am working on. This ensures a perfect color match and a chemical bond that is compatible with the wood’s natural oils. You have to be careful with the mix ratio. Too much sawdust and the filler becomes brittle. Too much binder and it takes forever to dry and shrinks like crazy. It is a balancing act that you only learn after you have ruined a few hundred square feet of flooring.
| Wood Species | Janka Rating | Movement Risk | Filler Choice |
|---|---|---|---|
| White Oak | 1360 | Moderate | Solvent-Based |
| Red Oak | 1290 | High | High-Solid Water |
| Maple | 1450 | Low | Nitrocellulose |
| Walnut | 1010 | Low | Custom Sawdust Mix |
The moisture meter truth
Moisture content (MC) readings are the absolute authority in hardwood installation, determining if the timber has reached equilibrium moisture content (EMC) with its environment. Using a pin-less meter to scan the entire surface and a pin-meter for edge checks ensures that filler application occurs only when the wood cells are stable. If you apply filler to a floor that is at 12 percent moisture in a house that is going to be kept at 6 percent moisture, you are wasting your time. The wood will shrink, the gaps will open up, and your beautiful repair will fall into the basement. You have to acclimate the wood. I have walked off jobs because the homeowner wanted the floor installed the day it was delivered. I do not care if your party is on Saturday. If the wood is not ready, the floor will fail. This is especially true near bathrooms. The humidity spikes from showers can swing the moisture content of the edges by three or four percent in an hour. You need a filler that can handle that stress, or better yet, a design that accounts for it.
Grout vs wood filler physics
Grout and wood filler serve fundamentally different purposes, with grout providing compression strength for rigid tile and filler offering flexibility for organic wood. Using cementitious grout near hardwood edges is a critical failure, as the alkalinity can discolor the wood and the rigidity will cause cracking during thermal expansion. I see this all the time where a tile floor meets a hardwood floor. Some guy runs the grout right up to the wood. Within six months, the grout is crumbled into pebbles and the wood is stained black. You need a transition. You need a color-matched 100 percent silicone or a specific wood-to-tile caulk that stays flexible. Wood moves. Tile does not. When you put a moving object against a stationary object, the joint is the sacrificial lamb. You have to plan for that failure by using the right materials. While most people want the thickest underlayment, too much cushion actually causes the locking mechanisms on LVP to snap under pressure, and the same logic applies to the stability of hardwood edges. You need a firm base.
- Check moisture content with a calibrated Pin-Meter.
- Vacuum every microscopic speck of dust from the edge gap.
- Tape the perimeter with blue painter’s tape to protect the finish.
- Apply the solvent-based filler at a 45-degree angle to the grain.
- Allow the repair to cure for a full 24 hours before final sanding.
The failure of laminate comparisons
Laminate flooring lacks the cellular depth of solid hardwood, making edge repairs via wood filler largely ineffective due to the synthetic wear layer. Because laminate is photographic paper over HDF core, filler cannot bond to the fibers, resulting in surface peeling and delamination at the repair site. Do not try to use these wood filler secrets on your cheap laminate floor. It will not work. Laminate is a disposable product. Hardwood is an investment. You can sand hardwood. You can finish hardwood. You can heal hardwood. Laminate is just plastic and glue waiting to fail. If you have a chip in your laminate edge, you are better off replacing the plank. But with hardwood, you can create a repair that is invisible to the naked eye if you follow the grain and use the right binder. The final word on the matter is that quality takes time. There are no shortcuts in flooring. You either do it right the first time, or you do it again in two years. I prefer to do it once.
“Wood flooring will perform best when the environment is controlled to stay within a relative humidity range of 30 to 50 percent.” – Master Flooring Axiom