
Most guys skip the leveling compound. They think the underlayment will hide the dip. It won’t. I spent three days grinding concrete on a job last month just so the floor wouldn’t click like a castanet. That is the reality of the trade. You are either doing it right or you are doing it twice. My knees tell the story of twenty-five years spent chasing the perfect surface, and if there is one thing I have learned, it is that the decorative top is a liar. It hides the structural failures until it is too late. When we talk about laminate, we are talking about a photographic layer protected by a brittle melamine resin. If you hit that resin with a circular saw blade spinning at 5,000 RPM, it shatters like glass. You end up with a jagged, white edge that looks like a beaver chewed through the plank. But there is a way to stop the carnage with a simple roll of blue painters tape.
The physics of the brittle edge
Laminate flooring boards consist of a high-density fiberboard (HDF) core topped with a decorative image layer and a protective wear layer made of aluminum oxide. When a saw blade enters the material, the upward or downward stroke of the teeth exerts mechanical pressure that exceeds the tensile strength of the resin. This results in chipping. To prevent this, you must provide external tension to the surface area where the blade exits the wood. Painters tape acts as a sacrificial stabilizer. It holds the microscopic particles of the wear layer in place during the fraction of a second when the carbide tooth is tearing through the fibers. Without this tension, the resin has nowhere to go but up and out, creating the unsightly chips that ruin a professional finish. It is a matter of managing the kinetic energy of the blade and the structural integrity of the melamine bond.
“A floor is only as good as the subfloor beneath it; deflection is the enemy of every joint.” – Master Flooring Axiom
The blue tape defense strategy
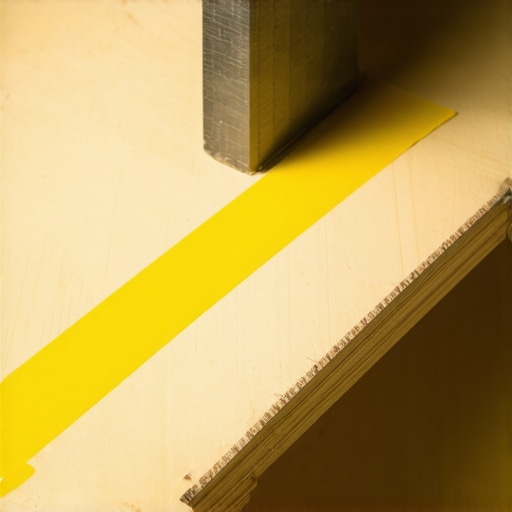
Professional laminate installation requires low-tack painters tape applied directly to the cut line to prevent top-layer splintering during table saw or miter saw operations. You do not just slap it on. You need to burnish the edges of the tape with your thumb to ensure the adhesive has 100 percent contact with the wear layer. I prefer the blue 14-day tape because it leaves zero residue. If you use high-tack masking tape, you risk pulling the finish off some of the cheaper, builder-grade materials when you peel it back. Once the tape is secure, you mark your cut line directly on the tape. This gives you a high-visibility guide and keeps the blade from wandering. The tape creates a sandwich effect, compressing the surface and absorbing the micro-vibrations that cause the resin to fail. It is a five-dollar insurance policy for a five-thousand-dollar floor.
Blades and the high speed friction war
Carbide-tipped saw blades with a high tooth count, typically 60 to 80 teeth, are the only acceptable choice for clean laminate cuts. A standard 24-tooth framing blade will destroy the material regardless of how much tape you use. The geometry of the tooth matters. You want an ATB (Alternate Top Bevel) grind. This design shears the wood fibers rather than plowing through them. When the blade is spinning, friction generates heat. Heat softens the resin, making it more prone to gumming up the blade. A clean blade is a fast blade. If I see pitch buildup on my teeth, I stop and clean it with a bit of solvent. You should also check the run-out on your saw. If the blade wobbles even a hair, the tape trick will not save you. The vibration will shatter the core from the inside out. I have seen guys try to use a jigsaw for long rips. Unless you have a steady hand and a down-stroke blade, you are asking for a headache.
| Material Type | Core Density (kg/m3) | Recommended Blade Tooth Count | Acclimation Time (Hours) |
|---|---|---|---|
| Standard Laminate | 800-900 | 60-80 | 48 |
| High-End Engineered | 900-1000 | 80-100 | 72 |
| Budget HDF | 700-800 | 40-60 | 48 |
| Water-Resistant Composite | 1000+ | 80-100 | 24-48 |
Why your subfloor is lying to you
Subfloor flatness is the primary factor in long-term laminate performance, as even a 3/16 inch dip over 10 feet will cause locking mechanism failure. You might get the prettiest cut in the world with your painters tape, but if that plank is spanning a hollow spot in the concrete, it will flex every time someone walks on it. That flex is death. It wears down the tongue and groove until the joint separates. I spend more time with a 10-foot straight edge than I do with a saw. If I find a low spot, I fill it with self-leveling underlayment. If I find a high spot, I grind it down. You can smell the concrete dust in my clothes for a week after a grinding job. It is miserable work, but it is the difference between a floor that lasts twenty years and one that fails in twenty months. Do not trust the underlayment to fix the floor. Foam is for sound, not for structural support.
The 1/8 inch that ruins everything
Expansion gaps are mandatory perimeter requirements for floating floors, usually requiring a minimum of 1/4 inch to 1/2 inch of space against all vertical obstructions. Homeowners always want to push the boards tight against the baseboards. They think it looks better. Then summer hits, the humidity rises, and the floor grows. Since it has nowhere to go, it peaks at the seams. You get a mountain range in the middle of your living room. I always tell people that a floor is a living thing. It breathes. In high-humidity areas like the Gulf Coast, that expansion is aggressive. In dry climates like Arizona, the floor might shrink, exposing the gaps. You have to account for the regional climate. I use spacers on every single wall. If you lock the floor under a heavy kitchen island, you have effectively pinned it. It can no longer move. The next thing you know, the planks are pulling apart three rooms away.
“Laminate flooring requires a flat substrate within 3/16 inch over 10 feet to prevent mechanical failure of the locking system.” – General Flooring Standards
The chemistry of the wear layer
Aluminum oxide particles are suspended in melamine resin to create a wear layer that ranks high on the Mohs scale of hardness. This is what makes laminate scratch-resistant, but it also makes it incredibly hard on tools. It is essentially like cutting through a thin layer of stone. This is why the tape is so effective. It dampens the impact of the stone-hard particles against the steel of the blade. If you are doing a large house, plan on changing your blade halfway through. A dull blade will start to burn the HDF core. You will smell that acrid, burnt-toast odor. That heat can actually delaminate the photographic layer from the core before you even get it out of the saw. I always keep a spare blade in the truck. It is not an option. It is a requirement for the job.
Managing the expansion gap ghost
Floating floor systems must remain unconstrained to allow for thermal expansion and hygroscopic movement of the wood fiber core. This means no nails through the boards, no heavy cabinetry on top, and no tight fits around door casings. I use a jamb saw to undercut the trim so the floor can slide underneath. It looks cleaner and allows the floor to do what it needs to do. If you try to cut around the casing and caulk the gap, you are creating a failure point. The caulk will eventually tear or the floor will buckle. Every transition mold, every T-molding, and every reducer is there for a reason. They are not just decorative. They are the joints that keep the system from tearing itself apart. I have seen $10,000 installs ruined because someone didn’t want to see a T-molding in a 40-foot span. The laws of physics do not care about your aesthetics.
- Check subfloor for moisture using a pinless meter before starting.
- Acclimate the planks in the room for at least 48 hours.
- Apply blue painters tape to both the top and bottom of the cut line for maximum protection.
- Use a sacrificial piece of scrap wood underneath the plank to prevent blowout.
- Maintain a consistent feed rate through the saw to avoid heat buildup.
- Leave a 3/8 inch expansion gap around the entire perimeter.
The moisture trap in concrete slabs
Vapor emissions from concrete subfloors can exceed 3 pounds per 1,000 square feet, necessitating a 6-mil polyethylene vapor barrier. Even if the slab looks dry, it is pulling moisture from the earth. That moisture hits the bottom of your laminate and gets absorbed by the fiberboard. The core swells, the edges curl, and the floor is ruined. I always tape a piece of plastic to the floor for 24 hours as a quick test. If there is condensation under the plastic the next day, you have a problem. You need a real barrier. I don’t care if the underlayment says it has a built-in barrier. I still put down the poly. It is cheap, and it works. In a basement, this is even more vital. Hydrostatic pressure can push water through concrete like a sponge. If you do not respect the moisture, the moisture will destroy your work. I have replaced more floors due to moisture than any other cause.
The bottom line for professional results
Getting a clean cut is about more than just a roll of tape. It is about understanding the materials you are working with. Laminate is a composite. It is a marriage of paper, resin, and wood fiber. Each of those components reacts differently to stress and environment. The tape trick is the hallmark of an installer who cares about the details. It shows you understand that the last 1/32 of an inch is what the customer sees. But as a professional, I know that the 4 inches of concrete and the 6-mil plastic underneath are what actually matter. Keep your blades sharp, your subfloor flat, and your expansion gaps wide. If you do that, you won’t need to call me in two years to tear it all out and start over. A floor should be a foundation, not a frustration. Respect the process and the tools will do the work for you. Put the tape down, mark your line, and make the cut. Just make sure you are wearing your kneepads, because the floor doesn’t get any softer with age.