
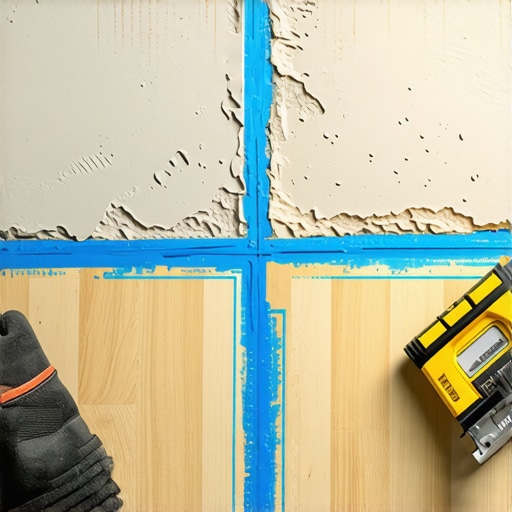
The invisible foundation that destroys expensive materials
A subfloor is the structural layer beneath your finished flooring that dictates the longevity of hardwood floors and laminate alike. If the substrate is not flat to within one eighth of an inch over a ten foot radius, your investment will fail. I spent three days grinding concrete on a job last month just so the floor would not click like a castanet. Most guys skip the leveling compound because it is messy and expensive. They think the underlayment will hide the dip. It will not. I have seen fifteen thousand dollar wide plank walnut installations turn into potato chips because the installer ignored a three percent spike in subfloor moisture or a half inch dip in the plywood. My hands are stained with adhesive and my knees have seen better days, but I know that a floor is only as good as what is underneath it. You cannot hide physics with a pretty rug. When the subfloor moves, the floor moves. When the floor moves, the joints break. This is the reality of the trade. If you want a floor that lasts a lifetime, you start with the slab, not the sample board. We look at the chemistry of the bond and the physics of the load. We do not look at the color of the stain until the level says we are allowed to. This is the difference between a contractor and a craftsman. One builds for the photo on social media. The other builds for the next thirty years. I prefer the latter. Sawdust and sweat are the only ways to get there.
The blue chalk method for identifying subfloor valleys
The blue chalk secret involves dragging a ten foot magnesium straightedge across the entire surface of the subfloor to map out every low spot. By coating the bottom of the straightedge with blue carpenter chalk, you leave a visual record of high points while the valleys remain gray and untouched. This technique is more reliable than a laser level for detecting micro-deviations. When the chalk does not transfer to the concrete or plywood, you have found a void that requires filling. We are looking for a tolerance of three sixteenths of an inch over ten feet for most laminate and hardwood floors. Anything more than that causes the locking mechanisms to flex. Over time, that flex leads to fatigue. The plastic or wood tongues will eventually snap. Then you get the dreaded floor squeak. The blue chalk tells the truth that the naked eye cannot see. I have walked onto jobs where the builder swore the slab was level. I took out my straightedge and my chalk. Within five minutes, the floor looked like a topographical map of the Grand Canyon. You cannot argue with the chalk. It shows you exactly where the self-leveling underlayment needs to go. We mix the compound to a specific viscosity to ensure it flows into those chalkless voids. We do not just dump it and hope for the best. We use a gauge rake to set the depth. This is how you prevent the deflection that ruins a modern click-lock floor. It is about precision. It is about the one eighth of an inch that ruins everything.
“A floor is only as good as the subfloor beneath it; deflection is the enemy of every joint.” – Master Flooring Axiom
The chemical bond of modified thinset and grout
Modified thinset utilizes liquid latex or acrylic polymers to increase bond strength and flexibility between the tile and the subfloor. In wet environments like showers, the chemistry of the mortar is just as vital as the waterproofing membrane itself. High performance grout must also resist compression and water absorption to prevent structural rot. When you are working in showers, you are fighting gravity and capillary action. The grout is not just a filler. It is a structural component. If the subfloor has too much deflection, the grout will crack. Once the grout cracks, water finds a way in. Water is the universal solvent. It will find the wood, it will find the fasteners, and it will cause the entire system to fail. We use high-grade polymer modified mortars because they allow for a tiny bit of movement without losing their grip. This is essential in modern construction where houses settle. If you use a cheap, unmodified thinset on a plywood subfloor, you are asking for trouble. The wood expands and contracts at a different rate than the tile. Without those polymers to act as a shock absorber, the bond will shear off. I have seen entire bathroom floors lift up like a carpet because the installer used the wrong bag of mud. It is about the crystalline structure of the cement as it hydrates. If that process is interrupted by vibration or poor mixing, the floor is doomed.
Why showers and wet areas require specialized subfloor prep
Shower subfloors must be sloped at a rate of one quarter inch per foot toward the drain to ensure proper gravity fed drainage. This requires a pre-slope mortar bed beneath the waterproofing liner to prevent stagnant water from rotting the floor joists. Most homeowners think the tile and grout are waterproof. They are not. Tile is a decorative wear layer. The real work happens in the mud bed and the membrane. I have torn out enough moldy showers to know that people cut corners on the slope. They think they can build up the thinset to make the grade. That is a recipe for disaster. You need a solid, compacted sand-and-cement bed. It has to be packed tight. If there are air pockets, the tile will crack under the weight of the user. We also have to consider the drain flange. It must be integrated into the subfloor so that the transition is flush. If the drain is too high, you get a puddle. Puddles lead to mold. Mold leads to lawsuits. I do not like lawsuits. I like floors that stay dry and solid. That means spending a full day just on the slope before a single piece of tile touches the ground. It is slow work. It is hard on the back. But it is the only way to do it right.
The regional humidity factor in hardwood floors
Hardwood floors act like a sponge, expanding in high humidity and shrinking in dry environments, which necessitates a strictly controlled acclimation period. In the swampy humidity of Houston, solid wood is a death wish without a massive expansion gap; you often need engineered cores to maintain stability. If you live in the dry heat of Phoenix, the wood will shrink until your baseboards show a gap wide enough to lose a coin in. I always carry a moisture meter. I test the subfloor and I test the wood. If the difference between the two is more than four percent, the wood stays in the boxes. I do not care if the homeowner is in a hurry. I have seen planks cup so hard they ripped the nails right out of the plywood. You have to respect the environment. Wood is a living material even after it is cut. It wants to be in equilibrium with the air. If you trap moisture under a vapor barrier, it has nowhere to go but up through the grain. That is how you get crowning. That is how you get buckling. We use premium adhesives with built-in moisture barriers for slab-on-grade installs to mitigate this. It is an expensive insurance policy, but it is cheaper than replacing a whole house of oak.
| Subfloor Type | Material Tolerance | Recommended Leveling Method | Acclimation Time |
|---|---|---|---|
| Concrete Slab | 1/8 inch per 10 feet | Self-Leveling Compound | 72 Hours |
| Plywood Subfloor | 3/16 inch per 10 feet | Sanding & Plywood Shims | 48 Hours |
| OSB (Board) | 1/4 inch per 10 feet | Patching Compound | 48 Hours |
| Radiant Heat Slab | 1/8 inch per 10 feet | Thermal Mass Pour | 96 Hours |
The myth of thick underlayment for laminate
While most people want the thickest underlayment for comfort, too much cushion actually causes the locking mechanisms on laminate to snap under pressure. A high density underlayment with a low compression set is required to support the joints while providing sound dampening. I have seen people use two layers of foam thinking it would make the floor feel like a cloud. Instead, it felt like walking on a trampoline. Every time they took a step, the planks dipped. That dipping action acts like a lever on the tongue and groove. Within six months, the floor was coming apart at the seams. You want an underlayment that is thin but firm. It should have a high IIC rating for sound, but it should not be squishy. If the subfloor is level, you do not need the foam to hide anything. The foam is there for a thermal break and acoustic control. It is not a structural repair for a bad slab. If your subfloor is lumpy, no amount of underlayment will save you. You fix the lumps first. Then you lay the foam. Then you lay the floor. That is the order of operations. Anything else is just a shortcut to a renovation.
“Deflection is the silent killer of the modern floor; if the substrate bends, the finish breaks.” – TCNA Handbook Principle
The 1/8 inch that ruins everything
Precision in subfloor preparation is the only way to avoid the mechanical failure of click-lock flooring systems and the cracking of grout lines. Small humps in the substrate create a fulcrum point that puts immense stress on the shortest part of the plank. I have spent years studying how these systems fail. It is almost always a preparation issue. People see the pretty pictures in the catalog and think it is an easy weekend project. It is not. It is a technical installation that requires an understanding of structural engineering on a small scale. We look at joist spacing. We look at the thickness of the subfloor sheets. We look at the screw pattern. If the subfloor is not screwed down tight, it will squeak. Glue and screws are the only way to go. I do not use nails for subfloors anymore. Nails pull out. Screws stay put. It is a small detail that makes a big difference. When you are walking across a floor in the middle of the night, you do not want it announcing your presence to the whole house. You want it silent. Silence comes from a flat, solid, well-attached subfloor.
- Check moisture levels in the slab with a calcium chloride test.
- Identify all high spots with a straightedge and blue chalk.
- Grind down concrete ridges using a diamond cup wheel.
- Fill low spots with a high-strength Portland cement-based leveler.
- Vacuum all dust to ensure a proper adhesive bond.
- Confirm the subfloor is within 1/8 inch of flat across 10 feet.
The ghost in the expansion gap
Expansion gaps are not optional; they are the breathing room that prevents a floor from tenting against the wall during seasonal changes. A floor needs at least one quarter to one half inch of space around the entire perimeter, hidden by baseboards or shoe molding. I have seen floors lift six inches off the ground in the center of a room because they were pinned against the drywall. It looks like a ghost is trying to get out from under the planks. This happens because the installer didn’t leave a gap. When the humidity rises, the wood or laminate expands. If it has nowhere to go, it goes up. You cannot stop it. The force of expanding wood can crack headers and push out baseboards. We use spacers during the install to ensure that gap is consistent. We also have to be careful with heavy kitchen islands. If you pin a floating floor under a heavy island, you have locked it in place. It cannot expand. It will buckle at the weakest point. You install the island first, then the floor around it. Or you use a specific mounting system that allows the floor to move. This is the kind of stuff they do not tell you at the big box store. They just want to sell you the boxes. I want to make sure the boxes stay flat on your floor for the next thirty years. That is why I obsess over the gap. That is why I obsess over the blue chalk. It is the only way to be sure. It is the only way to do the job once.