
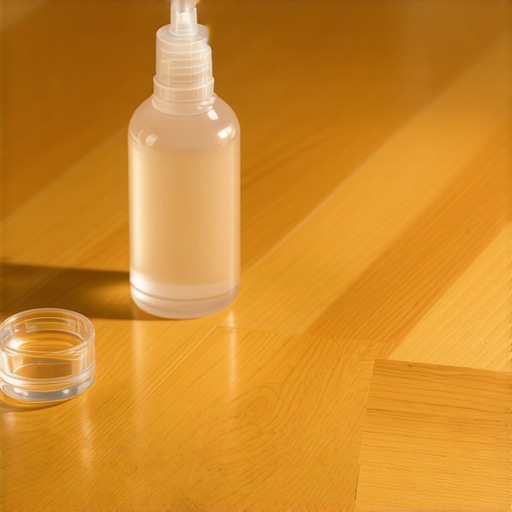
Most guys skip the leveling compound. They think the underlayment will hide the dip. It won’t. I spent three days grinding concrete on a job last month just so the floor wouldn’t click like a castanet. That is the hard truth of this industry. If you do not respect the physics of the prep work, the final product will fail every single time. This principle applies to more than just subfloors. It applies to the very surface of the wood you walk on. When a homeowner calls me complaining that their expensive white oak looks cloudy or feels sticky, I do not reach for a fancy polish. I reach for the same soap I use to wash the grease off my hands after fixing the drum sander. This is about the chemistry of contamination and the reality of surface tension.
The science of surface contamination and residue
The dish soap test identifies wax or acrylic buildup on hardwood floors by using a surfactant to break surface tension and dissolve a small patch of residue. This test is the most effective way to determine if your floor is coated in a chemical film that prevents new finishes from bonding or makes regular cleaning impossible. If the soap dissolves a cloudy layer to reveal the original finish, you have a residue problem. This film usually comes from supermarket cleaners that promise a quick shine. Those products are the bane of my existence. They use low grade acrylics or waxes to fill micro scratches. While it looks good for a week, it eventually turns into a microscopic graveyard of trapped dirt and hair that no vacuum can touch. It creates a barrier that is often hydrophobic, meaning water based cleaners will just bead up on top of it rather than cleaning the wood.
“A floor is only as good as the subfloor beneath it; deflection is the enemy of every joint.” – Master Flooring Axiom
The molecular zooming of surfactant action
To understand why this test works, we have to look at the chemistry of the dish soap itself. Most high quality dish soaps contain surfactants like sodium lauryl sulfate. These molecules are unique because they have a hydrophilic head that loves water and a lipophilic tail that loves fats and oils. When you apply a concentrated drop to a hardwood floor, the lipophilic tails attach themselves to the wax or acrylic polymers. This action physically lifts the residue away from the polyurethane topcoat. This is why we do not use this for daily cleaning. It is too effective. If you used it every day, you would eventually strip the natural oils from the wood or dull the factory finish. But as a diagnostic tool, it is unmatched. It cuts through the ‘quick shine’ layers that have been built up over months of improper maintenance. When you see the water turn a milky white or a dingy gray during the test, you are seeing the liquefaction of months of floor wax.
The hidden trap of acrylic restorers
Homeowners often fall into the trap of using ‘floor restorers’ or ‘refresher’ liquids. These are essentially liquid plastics. They are designed to be wiped on and left to dry. Unlike a professional site finished polyurethane that undergoes a complex chemical cross linking process, these restorers just dry through evaporation. This leaves a soft, permeable layer on the surface. Because the layer is soft, it absorbs dirt. Because it is permeable, it allows moisture to sit against the wood finish. I have seen hundreds of floors where the homeowner thought the finish was wearing off, but in reality, they had just buried the beauty of the wood under six layers of acrylic sludge. This sludge eventually starts to peel in high traffic areas, creating what looks like a skin disease on your floor. The dish soap test is the only way to prove to a skeptic that their floor is not actually ruined, just buried under bad chemistry.
| Residue Type | Chemical Base | Solvent Required | Risk Level |
|---|---|---|---|
| Paste Wax | Paraffin and Carnauba | Mineral Spirits | High |
| Acrylic Shine | Plastic Polymers | Ammonia and High pH | Medium |
| Oil Soap | Fatty Acids | TSP Substitute | Low |
| Silicone | Synthetic Polymers | Full Sanding | Extreme |
The step by step protocol for testing your floor
You cannot just dump a bucket of soapy water on the floor and hope for the best. Precision is the mark of a pro. You need a controlled environment to see the results clearly. I always suggest doing this in a corner or under a piece of furniture that rarely moves, but also in a high traffic area where the residue is likely at its thickest. You want to see the contrast between the treated area and the rest of the floor.
- Mix two drops of grease cutting dish soap with four ounces of distilled water.
- Select a six inch square area of the floor for the test.
- Apply the solution with a soft white microfiber cloth using circular motions.
- Let the solution sit for exactly sixty seconds to allow the surfactants to penetrate.
- Gently rub the area with the cloth and look for a change in color or texture.
- Rinse the area with a damp cloth and dry it immediately to prevent water spots.
Why your subfloor is lying to you about the finish
Many people think a floor feels ‘bouncy’ or ‘hollow’ because of the finish, but that is a structural delusion. However, the residue on top can actually amplify these structural issues. If you have a subfloor with a slight dip, the acrylic residue will often pool in that low spot. As it dries, it becomes thicker in the dip than on the peaks. This creates an uneven surface that catches light at different angles, making the floor look warped even if the wood itself is flat. When I am grinding concrete to fix a subfloor, I am looking for 1/8 inch of deviation over ten feet. Residue can easily add 1/32 of an inch of uneven buildup. That might sound small to a layman, but in the world of high end flooring, it is the difference between a professional finish and a DIY disaster.
“Wood is a hygroscopic material; it never stops moving even after the finish is cured.” – NWFA Technical Manual
The ghost in the expansion gap
Residue does not just stay on the surface. It migrates. It moves into the expansion gaps at the perimeter of the room and into the bevels of the planks. This is where the real trouble starts. If you ever decide to have your floors professionally screened and recoated, these residues will ruin the job. If even a microscopic amount of silicone or wax remains in those gaps, the new polyurethane will bead up and pull away. We call this ‘fish-eye’ in the trade. It is a nightmare to fix. Usually, it means the whole job has to be sanded down to bare wood, costing the homeowner thousands of dollars more than a simple recoat would have. This is why I am so obsessed with the dish soap test. It is an early warning system. If you find residue now, you can strip it off before it migrates deep into the grain and the joints of the floor.
The final word on floor purity
Maintaining a hardwood floor is not about adding more products. It is about removing the things that do not belong. A floor should be wood and a high quality protective finish. That is it. Anything else is just a contaminant. Whether you are dealing with the humidity of a coastal home or the dry air of a desert basement, the physics remains the same. Keep it clean, keep it dry, and keep the chemistry simple. If your floor has lost its luster, do not go to the store for a ‘magic’ bottle. Go to the kitchen, get some dish soap, and find out what is actually happening on the surface of your wood. Only then can you make an informed decision about how to restore the structural and aesthetic integrity of your home. If you ignore the residue, you are just building on a foundation of sand, and as any installer will tell you, that never ends well.