
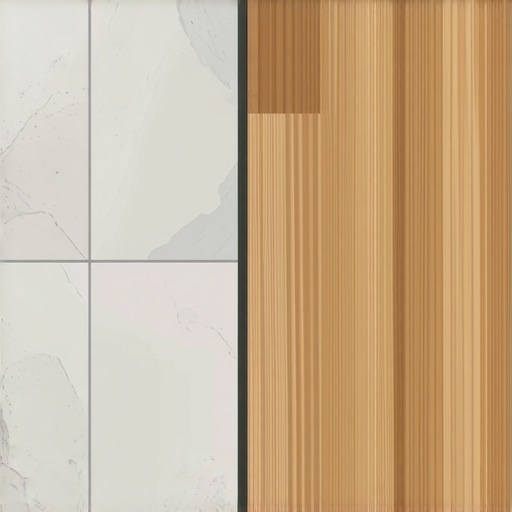
Mastering the Flush Wood to Tile Transition Without Metal Strips
Most guys skip the leveling compound. They think the underlayment will hide the dip. It won’t. I spent three days grinding concrete on a job last month just so the floor wouldn’t click like a castanet. The homeowner wanted a clean line from the kitchen tile to the living room oak. No metal. No plastic. Just a clean break. Most installers would have just slapped a T-molding down and called it a day. But T-moldings are the lazy man’s way out. They are a trip hazard and they look like garbage. To do it right, you have to understand the math of the stack height. I remember the smell of the burning diamond blade as I leveled that slab. It was a mix of lime and heat. If that floor had even a 3/16 inch deviation, the whole transition would have failed. You cannot hide mistakes when there is no metal cover. It is the raw truth of the floor. Your hardwood floors must meet the tile with surgical precision or you will spend your life stubbing your toes on the edge of a porcelain plank.
The physics of differential expansion
Wood and tile react to environmental changes in fundamentally different ways because of their molecular structure and porosity. While hardwood floors are hygroscopic and expand or contract based on ambient humidity, porcelain tile is a vitrified, stable material that remains static. If you join them without a flexible joint, the wood will eventually crush the tile grout or shear the bond. The wood is a living thing. It breathes. It moves with the seasons. In the humid summers of the Midwest, that oak is going to swell. In the dry winters, it is going to pull back. If you have slammed it tight against a rigid tile edge, something has to give. Usually, it is the grout joint. It will turn to powder and pop out. You are left with a gap that collects dog hair and dirt. This is why you never use grout in the actual transition gap. You use a high quality, 100 percent silicone or a urethane based sealant that can stretch and compress without breaking.
“A floor is only as good as the subfloor beneath it; deflection is the enemy of every joint.” – Master Flooring Axiom
The subfloor secret no one tells you
Subfloor preparation is the most mandatory part of an uninterrupted transition because it determines the final vertical alignment of different materials. You must calculate the stack height of your thin-set, underlayment, tile, and hardwood to ensure they finish on the exact same horizontal plane. If you are off by a hair, the transition is ruined. I see guys all the time who try to use extra glue to shim up a low spot. That is a disaster waiting to happen. The glue shrinks as it cures. The tile sinks. Now you have a lip. You need to use a self leveling underlayment. You need to get the floor flat within 1/8 inch over 10 feet. That is the industry standard. I use a long straightedge and a flashlight. If I see light under the level, I have work to do. Grinding concrete is a dirty, miserable job, but it is the only way to get a professional result. You have to be a mechanic about it. You have to care about the math more than the aesthetic in the beginning.
The scribe method for precision joints
Scribing wood involves tracing the exact profile of the installed tile onto the hardwood planks to create a gap-free fit. This technique requires a compass or a scribing tool and a steady hand with a jigsaw or a track saw to match the unique edges of the stone or ceramic. You install the tile first. Let the thin-set cure for at least 24 hours. Then you lay your wood planks up to the edge. You use the compass to follow the line of the tile. This is vital if you are using a natural stone with a slightly irregular edge. If you just try to cut a straight line, it will look like an amateur did it. You want that line to be tight. Not so tight that the wood has no room to breathe, but tight enough that a single bead of color matched sealant looks like a design choice rather than a mistake. This is where the mechanic earns his money. It is slow work. It is tedious. But the result is a floor that looks like it grew that way.
| Material Pair | Expansion Rate | Recommended Joint Width | Sealant Type |
|---|---|---|---|
| Oak to Porcelain | High | 1/8 to 1/4 inch | Urethane or Silicone |
| Engineered Wood to Ceramic | Medium | 1/8 inch | Color-Matched Caulk |
| Laminate to Stone | Low | 1/4 inch | Flexible Acrylic |
The 1/8 inch that ruins everything
Vertical offset between the wood and tile surfaces creates a trip hazard and causes premature wear on the exposed edges of the flooring materials. A flush transition requires the subfloor to be adjusted or the underlayment thickness to be varied so that the finished floor height is identical across the threshold. If you are installing a thick 3/4 inch solid oak next to a thin 1/4 inch ceramic tile, you are going to have a massive height difference. You might need to add a layer of 3/8 inch plywood under the tile area just to bring it up to the wood level. Or you might have to use a thicker mortar bed. But be careful with thick mortar. If it is too thick, it can become brittle. You have to find the balance. I have spent hours in the shop planers, shaving down the bottom of oak boards just to make them sit flush with a specific tile. It is about the chemistry of the build. You are an architect of the surface. You are not just laying boards.
“Expansion and contraction are not suggestions; they are physical mandates that wood must obey.” – NWFA Structural Guidelines
Why your moisture meter is the only friend you have
Moisture content in the wood and the concrete slab must be monitored before any flooring installation to prevent cupping or debonding at the transition line. Wood should typically be between 6 and 9 percent moisture, while a calcium chloride test or in-situ probe should confirm the vapor emissions from the slab are within safe limits. If you install wood that is too dry in a humid house, it will expand like a sponge. It will push against that tile with enough force to crack the porcelain. I have seen it happen. A guy installs a beautiful walnut floor in the winter. He does a tight transition to the tile. Summer hits. The humidity jumps to 80 percent. The wood expands. The tile pops off the floor because there was no expansion gap. You have to respect the chemistry of the wood. You have to know the relative humidity of the room. I never start a job without my meter. If the GC tells me it is ready and my meter says it is not, I walk away. I am not putting my name on a floor that is going to buckle in six months.
The chemistry of the color matched sealant
Flexible sealants used in flooring transitions provide the elasticity needed to accommodate lateral movement while maintaining a waterproof barrier between showers and hardwood floors. Using a siliconized acrylic or 100 percent silicone that matches the grout color ensures the transition remains visually inconspicuous while functioning as an expansion joint. This is the secret to the no-metal look. You go to the tile store and you buy the caulk that matches the grout exactly. You fill that 1/8 inch gap between the wood and the tile. It looks like grout. It feels like grout. But it moves like rubber. This is especially vital in showers or bathrooms where water is a factor. You do not want water seeping into the end grain of your hardwood. That is how you get rot. That is how you get black mold. A good bead of silicone is the difference between a floor that lasts 50 years and one that lasts five. It is the final defense. It is the most vital step.
A checklist for perfect transitions
- Confirm subfloor deflection meets L/360 standards to prevent tile cracking.
- Check moisture content of the wood to ensure it is within 2 percent of the home equilibrium.
- Verify concrete slab RH is below 75 percent before using adhesives.
- Scribe the wood to the tile for a tight and professional fit.
- Apply a 100 percent silicone bead instead of grout in the transition gap.
- Ensure the wood and tile are perfectly level to avoid trip hazards.
- Use a high quality urethane glue for the last row of wood to prevent movement.
The selection of the right material
Material selection plays a significant role in the success of a metal-free transition because certain engineered products offer superior dimensional stability compared to solid wood. While laminate or engineered hardwood floors are less prone to drastic expansion, they still require a perimeter gap to function correctly within the structural environment. If you are using a floating laminate floor, this transition is much harder. Floating floors need to move as a single unit. If you pin them against the tile with silicone, they might pinch and buckle. For a truly flush, no-metal look, a glue-down application is always better. It gives you more control. It allows you to get that gap tighter. It feels more solid underfoot. People want the cheap way out with click-lock floors, but if you want the high-end architectural look, you have to go with a permanent bond. You have to commit to the subfloor. You have to be the master of the adhesive chemistry. That is how you build a floor that people talk about. That is how you win.