
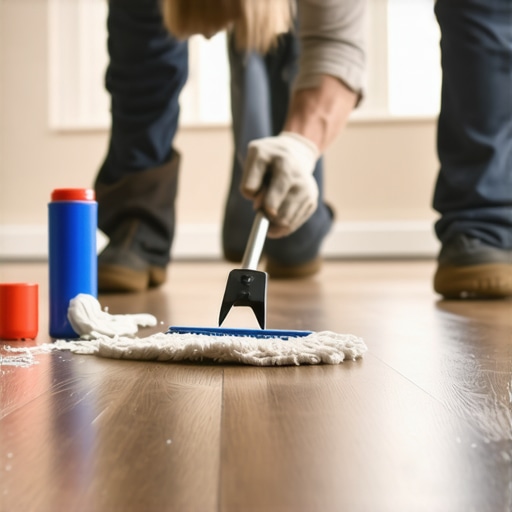
I once walked into a house where a $15,000 wide-plank walnut floor was cupping so bad it looked like a potato chip because the installer didn’t check the crawlspace humidity, but that was nothing compared to the sight of dried construction adhesive smeared across the surface of a brand-new installation. It is a gut-punch for any homeowner or pro. You spend weeks selecting the perfect grade of white oak, checking the Janka hardness, and ensuring the subfloor is flat within an eighth of an inch over a ten foot radius, only to find a glob of polyurethane glue that has cured into a rock-hard blemish. Most guys would just grab a metal putty knife and start hacking away, but that is how you ruin a factory finish. Flooring is not a decoration, it is a structural engineering challenge that requires a mechanical understanding of how polymers bond to cellulose fibers. I have spent twenty five years with sawdust under my nails and a moisture meter in my pocket. I know that removing dried adhesive is a delicate surgery that balances chemical dissolution with mechanical precision. If you rush this, you are looking at a full sand and finish job before the furniture even moves in. We are going to look at the molecular reality of these bonds and how to break them without destroying the aluminum oxide wear layer that you paid so much to protect.
The chemical nightmare on your floor
Dried construction adhesive on hardwood requires a targeted approach using low-odor mineral spirits or specialized adhesive removers to soften the bond without dissolving the wood finish. It is important to identify if the adhesive is solvent-based or polyurethane-based before choosing a removal agent. Most modern adhesives used in residential construction create a cross-linked bond that becomes increasingly difficult to remove the longer it cures. When we talk about hardwood floors, we are dealing with a biological material that is porous. If you use the wrong chemical, you risk the solvent leaching into the grain, causing permanent staining or even delamination of the veneer if you are working with engineered products. Unlike laminate, which has a plastic melamine wear layer, real wood has a finish that can be stripped if you get too aggressive with acetone or paint thinner. You have to treat the finish as a shield. Most pre-finished floors use a UV-cured aluminum oxide coating. This is incredibly hard, but it is thin. Once you scratch through it to hit the raw wood, you have created a gateway for moisture to enter, leading to the localized swelling that every installer fears.
| Solvent Type | Safe for Prefinished Wood | Effectiveness on Poly Adhesive | Evaporation Rate |
|---|---|---|---|
| Mineral Spirits | Yes | Moderate | Slow |
| Acetone | No | High | Very Fast |
| Adhesive Remover (Citrus) | Yes | Low | Medium |
| Denatured Alcohol | Yes | Low | Fast |
The physics of the bond is where the battle is won. Adhesive works by mechanical interlocking. It finds the microscopic valleys in the wood grain and hooks in. As it cures, it shrinks slightly, pulling itself tighter against the surface. If you try to pop it off while it is cold and brittle, you might take a chunk of the wood with it. This is why temperature control is a factor that most people ignore. If the house is too cold, the glue is brittle. If it is too hot, it becomes gummy. You want to hit that sweet spot where the adhesive is slightly pliable but not liquid. This is also why we see so many issues in showers where people try to use flooring adhesives near grout lines. The moisture levels are never right. On a hardwood job, the humidity must be between thirty five and fifty five percent. Anything outside that range and you are fighting the wood while you are fighting the glue.
“A floor is only as good as the subfloor beneath it; deflection is the enemy of every joint.” – Master Flooring Axiom
The 1/8 inch that ruins everything
Precision in adhesive removal is measured in fractions of an inch to avoid gouging the wood fibers or the protective wear layer. You must use a plastic scraper or a wooden shim rather than a metal blade to apply pressure to the glue glob. A metal blade has a higher Janka hardness than your floor, meaning it will win every time it comes into contact with the wood. I have seen guys spend days trying to fix a scratch they made in five seconds with a 5-in-1 tool. The goal is to apply the solvent only to the glue. You can use a cotton swab to pinpoint the application. This prevents the chemical from sitting on the finish for too long. If you are working on hardwood floors, remember that the finish is your primary defense. If you soak the area in mineral spirits, you might soften the finish itself, leading to a dull spot that will haunt you every time the sun hits the floor at an angle.
- Plastic putty knife or an old credit card
- Low-odor mineral spirits (not paint thinner)
- Clean white microfiber cloths
- Cotton swabs for precision application
- Plastic wrap to prevent fast evaporation
- Fine-grade plastic wool (never steel wool)
One contrarian data point that most big-box retailers will not tell you is that the thickest underlayment is often the worst choice for floor stability. While most people want the thickest underlayment, too much cushion actually causes the locking mechanisms on LVP to snap under pressure, and it creates a bouncy, unstable feel for hardwood. The same logic applies to adhesive. More is not better. When adhesive oozes out of the joints, it is usually because the installer used a trowel with the wrong notch size. A 3/16 inch notch is standard for most engineered products, but if the subfloor is not perfectly flat, installers over-apply to fill the gaps. This leads to the very mess we are trying to clean up. The adhesive is forced up through the tongue and groove, creating a surface blemish that cures before the job is even done.
The physics of the plastic scraper
Applying mechanical force at a low angle is the most effective way to shear the adhesive bond without damaging the underlying wood. You want to approach the glob from the side, not from the top. Think of it like a plane taking off. If you push down, you are just grinding the glue into the grain. If you slide the scraper horizontally, you are using shear force to break the chemical bond. This is particularly effective if you have allowed the mineral spirits to sit on the glob for ten minutes. Use a piece of plastic wrap to cover the solvent-soaked glob. This stops the spirits from evaporating and forces them to penetrate the adhesive. It is a slow process. You might have to repeat this three or four times for a thick deposit. Do not get impatient. Impatience is the leading cause of floor replacements in this industry.
“Wood flooring is a living product; it responds to the environment long after the last nail is driven.” – Master Flooring Axiom
The molecular structure of polyurethane adhesive is designed to be permanent. It is a moisture-cure product, meaning it draws water from the air and the wood to harden. This is why it is so difficult to remove once it is fully cured. In high-humidity areas, the glue sets faster and harder. If you are in a coastal environment, you have a much shorter window to clean up mistakes than you would in a dry climate like Denver. This is why I always keep a tub of professional-grade adhesive wipes on my belt. If you catch it while it is wet, a simple wipe does the job. Once it is dry, you are in the realm of chemistry. You are essentially trying to reverse a one-way chemical reaction. It is not always possible to get it back to perfect, but with the right solvents and a steady hand, you can get close enough that only an inspector with a flashlight would notice.
Protecting the aluminum oxide layer
Modern factory finishes are engineered to be incredibly durable but they are susceptible to chemical etching if high-strength solvents are left on the surface too long. Aluminum oxide is essentially liquid sandpaper that has been baked onto the wood. It is what gives hardwood floors their twenty-five-year warranty. However, this layer is brittle. If you use a heat gun to soften the glue, you risk making the finish brittle enough to flake off. I generally advise against heat unless you are an expert. The risk of scorching the wood or bubbling the finish is too high. Instead, focus on the mechanical breakdown. Once the bulk of the glue is gone, you will likely have a hazy residue left behind. This is where the mineral spirits shine. A light buffing with a microfiber cloth and a small amount of spirits will lift that haze. Always follow up with a manufacturer-approved floor cleaner to remove any oily film left by the spirits. If you leave that oil there, it will attract dirt and create a permanent smudge. The final walk through should involve looking at the floor from a low angle against the light. If you see a shadow or a change in texture, you still have residue. Take your time. A floor is a legacy. You are not just building a surface, you are building the foundation of a home. Treating it with the respect that the engineering demands is the difference between a hack job and a master installation.