
I spent three days grinding concrete on a job last month just so the floor wouldn’t click like a castanet. It was a high-end bathroom remodel where the previous installer had ignored a 3/16 inch dip right near the shower entrance. The result was a catastrophic failure. The grout lines had shattered and the homeowner was convinced the tile was defective. It was not the tile. It was the lack of structural integrity in the substrate. Most guys skip the leveling compound. They think the underlayment or a bit of extra thin-set will hide the dip. It won’t. I see this same negligence applied to shower floors, especially when people wonder why their dark grout turns into a chalky, faded mess within six months of the first shower. You can’t cheat the physics of water and the chemistry of Portland cement.
The physics of the standing puddle
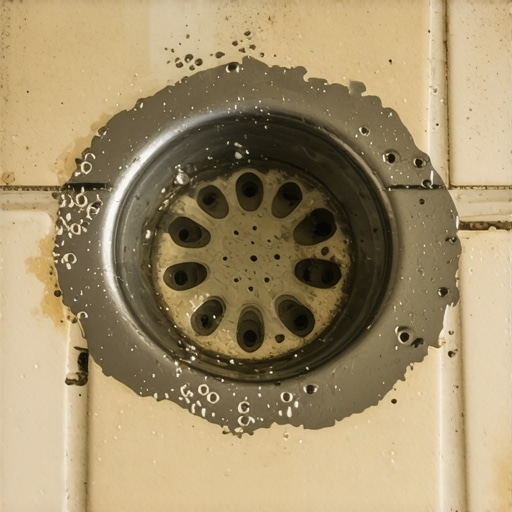
Dark grout fades near the drain because of constant moisture saturation that triggers a chemical process known as efflorescence. When water remains trapped in the grout matrix or the setting bed beneath it, it dissolves minerals like calcium hydroxide, which then migrate to the surface as the water evaporates. This leaves behind a white, powdery residue that makes dark pigments look washed out. It is not a loss of color in the pigment itself but rather a mask of mineral deposits that obscures the original hue. In many cases, the issue is not the grout but a failure of the pre-slope or the weeping holes in the drain assembly. If the water cannot reach the drain and instead sits under the tile, it will wick back up through the grout lines. This constant cycle of saturation and evaporation is a death sentence for aesthetic consistency in shower floors.
The chemistry of calcium hydroxide leaching
Efflorescence occurs when soluble salts and other water-dispersible materials come to the surface of concrete or grout through capillary action. As the moisture evaporates, it leaves the salt behind, creating the white haze that homeowners mistake for fading. Most cementitious grouts are essentially high-strength concrete with added pigments. When you mix this material with too much water or when the installation is subjected to excessive moisture before it has fully cured, the polymer chains are compromised. The pigments, often iron oxides, are not chemically bonded in a way that can resist a constant onslaught of mineral-rich water. This is why professional installers often recommend distilled water for mixing grout. The minerals in tap water can react with the cement to create a variegated, blotchy finish before the floor is even used. If you are dealing with a dark charcoal or black grout, any tiny amount of white mineral deposit will stand out like a beacon.
“A floor is only as good as the subfloor beneath it; deflection is the enemy of every joint.” – Master Flooring Axiom
Why dark pigments fail first
Darker grout colors use higher concentrations of pigments that are more susceptible to being masked by mineral deposits and chemical etching from acidic cleaners. The contrast between a deep black grout and white calcium deposits is much higher than it would be with a sand or bone-colored grout. When you choose a dark color, you are signing up for a high-maintenance relationship. The iron oxide used to reach those deep tones is stable, but the cement matrix holding it is not. If the pH of your water is off, or if you use a harsh cleaner, you are effectively stripping the top layer of the grout. This exposes the unpigmented sand particles underneath. This is not fading in the sense of UV bleaching; it is mechanical and chemical wear of the binder that holds the color in place.
The myth of the waterproof sealer
Sealers are designed to be vapor-permeable and do not make grout waterproof; they only provide a temporary barrier against oil and water-based stains. Over-applying sealer or applying it to damp grout can actually trap moisture inside the grout joint, worsening the fading effect. I have walked into countless jobs where the homeowner has applied five coats of sealer thinking it would solve the fading. All they did was create a cloudy film that eventually peeled. If the moisture is coming from the subfloor or the mud bed because of a blocked weep hole, no amount of sealer on top will help. In fact, it can cause the grout to crumble. You need the grout to breathe. If you trap water under a sealer, you are essentially creating a pressure cooker for mineral leaching. The white haze will form underneath the sealer where you cannot even scrub it off.
How laminate and hardwood compare to tile moisture
While tile and grout face mineral leaching, hardwood floors and laminate are even more sensitive to moisture, often suffering from swelling or delamination if exposed to the humidity levels found in bathrooms. Hardwood floors are hygroscopic, meaning they absorb moisture from the air, leading to cupping and crowning. If you think your grout looks bad, imagine a walnut floor where the edges are lifting because the crawlspace wasn’t sealed. Laminate is essentially a photograph glued to a fiberboard core. Once moisture penetrates the click-lock joint, the core swells and the floor is ruined. This is why I always tell people that if they can’t handle the maintenance of a tiled shower floor, they definitely shouldn’t be looking at wood-look products that aren’t porcelain. The durability of tile is superior, but it requires an understanding of the chemistry beneath the surface.
The 1/8 inch that ruins everything
A shower floor requires a precise slope of 1/4 inch per foot toward the drain to ensure that water moves off the surface and through the drainage system. Even a small dip of 1/8 inch can cause water to pool, leading to localized grout fading and potential mold growth. Most installers get lazy with the mud bed. They think they can pull it flat with a trowel and it will be fine. It is never fine. If you have a flat spot, the water will sit. That water will eventually find a way into the grout. Once it is in the grout, it starts moving minerals. You need to be a stickler for the slope. I use a digital level on every shower pan I build. If I see a flat spot, I tear it out and start over. It is the only way to guarantee the color stays consistent.
| Grout Type | Moisture Resistance | Color Stability | Required Maintenance |
|---|---|---|---|
| Standard Cementitious | Low | Low | High |
| High-Performance Cement | Medium | Medium | Moderate |
| Epoxy Grout | High | High | Low |
| Urethane Grout | High | High | Low |
The failure of the mud bed
The traditional thick-set mortar bed, or mud bed, acts as a giant sponge if the waterproofing layer is located beneath it rather than on top of it. This saturated mud bed provides a constant source of moisture for the grout, leading to chronic efflorescence. In the old days, we put the liner on the subfloor, then dumped three inches of mud on top. The mud stayed wet forever. Modern systems use topical waterproofing like Kerdi or RedGard. This keeps the water in the tile and grout layer where it can evaporate quickly. If your dark grout is fading, there is a high probability that your shower was built with an old-school saturated mud bed that never fully dries out. You are fighting a losing battle against a reservoir of water that lives under your feet.
“Cementitious grout is a porous material that reflects the health of the entire assembly; it is the canary in the coal mine for shower failures.” – TCNA Installation Manual Insight
Professional checklist for a permanent bond
- Verify the pre-slope is a minimum of 1/4 inch per foot.
- Ensure weep holes in the drain assembly are clear of mortar.
- Use distilled water when mixing cementitious grout to avoid mineral contamination.
- Do not over-wash the grout during installation; excess water pulls pigment out.
- Wait at least 72 hours before the first shower to allow for full chemical curing.
- Clean only with pH-neutral cleaners to avoid etching the cement binder.
How to restore the dark aesthetic
If your grout has already faded, the only permanent solution is to remove the mineral deposits with a phosphoric acid-based cleaner and then apply a high-quality grout colorant. A colorant is essentially an epoxy-based paint that sinks into the grout and seals it while providing a uniform color. Scrubbing with vinegar or bleach will only make the problem worse in the long run. Vinegar is acidic and will eat the cement, making it even more porous. You need to strip the minerals, let the grout dry for several days, and then apply a professional-grade colorant. This will give you the look you wanted while providing a much more water-resistant surface than standard grout. But remember, if the subfloor is holding water, even a colorant will eventually fail. You have to fix the water management before you fix the aesthetics.