
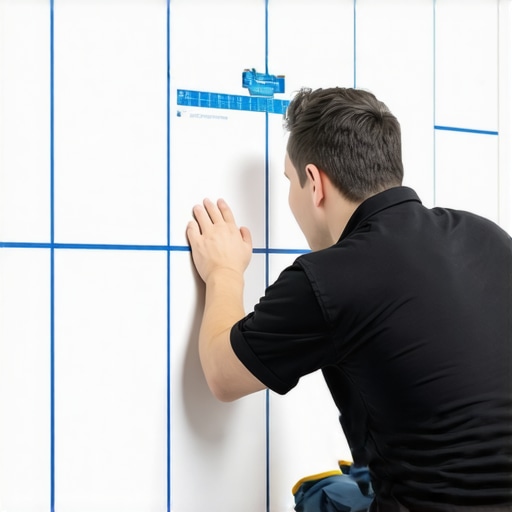
Most guys skip the leveling compound. They think the underlayment will hide the dip. It won’t. I spent three days grinding concrete on a job last month just so the floor wouldn’t click like a castanet. That is the reality of modern flooring. I have spent twenty five years on my knees with a moisture meter and a straightedge, and if there is one thing I have learned, it is that a floor is only as good as the physics of the substrate. When you are dealing with large format tiles in a shower, you are not just laying a decorative surface. You are engineering a waterproof system that must withstand thousands of pounds of hydrostatic pressure and the relentless expansion and contraction of a house that is constantly breathing. If you mess up the layout by even a quarter of an inch, the entire visual symmetry of the room collapses. The blue chalk line is not just a guide. It is the mathematical anchor of the entire installation.
The grinding reality of a bad subfloor
Subfloor preparation for large format tiles requires a surface deviation of no more than one eighth of an inch over ten feet. This standard is set by the Tile Council of North America to prevent lippage and structural cracking. When a concrete slab or plywood subfloor has a dip, the tile will bridge that gap, creating a hollow spot that eventually snaps under the weight of a human heel. I have seen fifteen thousand dollar installations fail because the installer thought a little extra thin-set would act as a filler. It does not work that way. Thin-set is an adhesive, not a structural leveling agent. If you do not grind the high spots and fill the low spots with a high compression strength self-leveler, you are building a house on sand. You need to verify the moisture vapor emission rate before you even think about opening a bag of mortar. Concrete is a sponge. It looks dry, but it is constantly exhaling water vapor that will delaminate your bond if you do not use a proper moisture barrier. I smell the wet dust every time I start a job, and it reminds me that the earth is always trying to reclaim the materials we put on top of it.
“A floor is only as good as the subfloor beneath it; deflection is the enemy of every joint.” – Master Flooring Axiom
The geometry of the perfect shower layout
Centering large format shower tiles involves finding the true midpoint of the primary focal wall and snapping a blue chalk line to establish a perpendicular grid. You must account for the thickness of the grout joints and the placement of the drain to avoid sliver cuts at the corners. A sliver cut is the mark of an amateur. If you end up with a half inch piece of tile at the wall, you failed the layout phase. You should always shift your center line by half the width of a tile if the math leaves you with a tiny remnant at the perimeter. This is where the blue chalk comes in. I use blue because red is permanent and black is too messy to clean off the substrate. You snap that line and it gives you a cold, hard truth about how crooked your walls actually are. Most houses are not square. They are rhombuses disguised as rectangles. You have to split the difference so the eye does not catch the taper. This is particularly vital when transitioning from showers to hardwood floors in an adjacent bathroom, where the height of the transition must be perfectly flush to avoid a trip hazard.
The chemical reaction inside your thin-set
Modified thin-set mortars contain specialized polymers that create a flexible mechanical bond between the tile and the substrate. These chemical chains allow the tile to move slightly without shearing off the subfloor during thermal expansion. When you mix a bag of thin-set, you are starting a complex exothermic reaction. If you over-mix it, you introduce too many air bubbles, which weakens the final compressive strength. If you under-mix it, the polymers do not fully hydrate. You need to let it slake for ten minutes. This allows the water to fully penetrate the dry chemicals. While you wait, you can think about why you chose a specific tile. Large format tiles have a much lower water absorption rate than old school ceramic. This means the adhesive has to work harder to grab onto the back of the tile. You must back-trowel every single piece. If you do not have ninety five percent coverage in a wet area, you are inviting mold and mildew to grow in the voids behind the wall. It is not just about stickiness. It is about total air evacuation.
Managing the inevitable physics of lippage
Lippage occurs when one edge of a tile sits higher than the adjacent tile, creating a vertical offset that is both unsightly and dangerous. With tiles larger than fifteen inches on one side, the manufacturing process often leaves a slight bow or crown in the center of the piece. If you try to offset these tiles by fifty percent, like a traditional brick pattern, you are putting the highest point of one tile next to the lowest point of the next. This is a recipe for disaster. You must limit your offset to thirty three percent or use a lippage tuning system. These plastic clips and wedges pull the tiles into a single flat plane while the mortar sets. It is a mechanical solution to a physical limitation of the material. Even the most expensive Italian porcelain has a slight curve. You cannot fight the kiln, so you have to outsmart it with your leveling system. This is the same reason why laminate flooring requires a perfectly flat base. Any deflection causes the locking mechanisms to rub together, which leads to that annoying squeaking sound every time you walk across the room.
| Material Property | Large Format Tile | Solid Hardwood | Laminate Flooring |
|---|---|---|---|
| Moisture Resistance | High | Low | Medium |
| Expansion Coefficient | Low | High | Moderate |
| Deflection Limit | L/720 | L/360 | L/360 |
| Installation Method | Chemical Bond | Mechanical Fastener | Floating Click |
| Acclimation Time | None | 7 to 14 Days | 48 Hours |
The difference between grout and expansion joints
Grout is a cementitious or epoxy filler used to stabilize tile edges, while expansion joints are flexible gaps filled with silicone to allow for movement. Many people make the mistake of running grout all the way to the corner where the wall meets the floor. This is a guaranteed crack. Changes in plane require a flexible sealant because the walls and the floor move at different rates. If you use rigid grout in a corner, the house will eventually crush it into powder. I always use a color matched 100 percent silicone for these joints. It is the only way to ensure the shower remains watertight for decades. This is the same principle used in hardwood floors where we leave a three quarter inch gap at the baseboard. Wood expands when the humidity hits eighty percent in the summer and shrinks when the furnace kicks on in the winter. If you do not give it room to move, it will cup or buckle. The physics of materials is non-negotiable. You either respect the movement or you watch your work fall apart.
- Check the subfloor for flatness using a ten foot straightedge.
- Vacuum all dust and debris to ensure a clean mechanical bond.
- Snap blue chalk lines for both the X and Y axes of the room.
- Dry lay the tiles to verify the layout and avoid sliver cuts.
- Mix thin-set to a peanut butter consistency and allow it to slake.
- Apply mortar with the correct notch trowel for the tile size.
- Back-butter every tile to achieve ninety five percent coverage.
- Use a leveling clip system to eliminate lippage between pieces.
Why large format tiles demand surgical precision
The weight and surface area of large tiles create a suction effect that makes them difficult to adjust once they are set in the mortar bed. You have one shot to get it right. If you pull a tile back up, you break the ridges of the thin-set and have to re-trowel the entire area. This is why the blue chalk line is so vital. It gives you a visual reference that you can see through the thin-set if you trowel correctly. I always notch the mortar in straight lines, never in swirls. Swirls trap air pockets. Straight lines allow the air to escape as you collapse the ridges. This is basic fluid dynamics. When you press a thirty pound slab of porcelain into a wet bed of mortar, that air has to go somewhere. If it stays trapped, it creates a weak spot. Over time, the vibrations of the house will cause that tile to lose its bond. I have seen it happen a hundred times. People think tile is permanent, but it is only as permanent as the guy who laid it. You have to be a surgeon with a trowel. You have to be an architect with a chalk line. You have to be a chemist with your water to powder ratios. If you are not willing to do the math, you should not be laying the floor.