
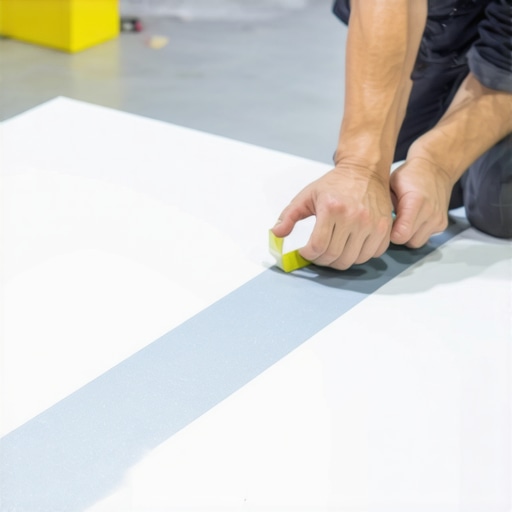
I spent three days grinding concrete on a job last month just so the floor wouldn’t click like a castanet. Most guys skip the leveling compound and they think the underlayment will hide the dip. It won’t. I have spent 25 years on my knees with a moisture meter and a level. I smell like WD-40 and oak dust most days. You learn quickly that a floor is a performance surface. It is not a decoration. When you spend thousands on laminate and then butcher the cuts with a dull blade and no technique, you are just throwing money into the dumpster. The masking tape trick is a staple for a reason. It provides the surface tension needed to keep the brittle wear layer of the laminate from shattering when the saw teeth strike the board. This is about physics and chemistry, not just woodworking.
The secret of the blue boundary
Masking tape prevents chipping on laminate by stabilizing the aluminum oxide wear layer and the decorative paper underneath. When a circular saw or jigsaw blade exits the material, the upward or downward force of the teeth tends to lift and shatter the resinous top coating. The tape acts as a sacrificial stabilizer that holds the fibers in place during the critical moment of the cut. It is a simple tool for a complex problem. You need to apply it firmly. You must ensure there are no air bubbles. Air bubbles allow for micro-vibrations. Micro-vibrations are the primary cause of those jagged, white edges that ruin a layout. If you want a professional finish, you start with the tape.
Why your saw blade is a precision instrument of destruction
A saw blade with a high tooth count is essential for cutting laminate flooring because it reduces the size of the individual chips removed during the process. A 60-tooth or 80-tooth carbide-tipped blade is the industry standard for this work. Fewer teeth mean larger gullets and more aggressive tearing. That tearing is what causes the visible damage on the surface. Carbide is necessary because the aluminum oxide in the wear layer is essentially liquid sandpaper. It will dull a standard steel blade in three cuts. I have seen guys try to use a framing blade. The results are pathetic. The edges look like they were chewed off by a beaver. You need a clean, sharp edge to maintain the integrity of the locking mechanism. If you chip the edge, you lose the tight seal that prevents moisture from reaching the HDF core.
“A floor is only as good as the subfloor beneath it; deflection is the enemy of every joint.” – Master Flooring Axiom
The microscopic physics of a clean cut
The cutting process for laminate involves high-speed friction that can reach temperatures high enough to melt the melamine resins. Laminate is composed of four distinct layers. The top is the wear layer. Next is the decorative print. Then the High-Density Fiberboard or HDF core. Finally, there is the balancing layer. Each has a different density. When the blade hits these different materials, it experiences varying resistance. The tape provides a uniform surface tension across the top layer. This tension prevents the resin-soaked paper from lifting away from the HDF. The chemistry of the bond between the HDF and the decorative layer is strong but brittle. It does not handle the shear force of a saw tooth well. By using tape, you are essentially creating a temporary composite that can withstand the shear. This is why the trick works on everything from cheap big-box specials to high-end planks.
Choosing the right tape for the job
Blue painter’s tape is the preferred medium for flooring cuts because it offers a medium tack that does not leave adhesive residue. Some people try to use duct tape. That is a mistake. The adhesive on duct tape is too aggressive. It can actually pull the finish right off the board when you remove it. Cheap masking tape is also a risk. It often leaves a gummy film that is a nightmare to clean off. You also have to consider the thickness. Very thick tape can obscure your pencil lines. I prefer a high-quality 3M blue tape. It has the right balance of flexibility and strength. You lay it down, mark your line on the tape itself, and cut right through it. This also protects the base of your saw from scratching the floor as you move it across the surface. Saw bases are often covered in metal burrs or old grit. The tape is your shield.
| Blade Type | Tooth Count (TPI) | Best Use Case | Chipping Risk |
|---|---|---|---|
| Framing Blade | 24-40 | Subfloor framing | Extreme |
| Fine Finish | 60-80 | Laminate and trim | Low |
| Ultra Fine | 100+ | Veneers and plastics | Minimal |
| Abrasive Disc | N/A | Metal or masonry | High (Heat) |
The 1/8 inch that ruins everything
Precision in flooring is measured in increments of 1/8 inch because that is the threshold where the human eye detects gaps and where structural failure begins. If your subfloor has a dip greater than 1/8 inch over a 10-foot span, your laminate will fail. The locking joints will eventually snap. I have seen it a thousand times. People think the foam underlayment is a magical fix. It is not. Too much cushion is actually worse. It allows the floor to bounce. That bounce puts immense pressure on the thin plastic or wood tongues of the planks. Eventually, they fatigue and break. Then you have a gap. Then moisture gets in. Then the HDF core swells like a sponge. It is a slow-motion disaster. You must grind the high spots. You must fill the low spots. There are no shortcuts in this business.
Why your subfloor is lying to you
Subfloors often appear level to the naked eye but harbor significant deviations that compromise the installation of hardwood floors and laminate. You need a straightedge. A 6-foot or 8-foot level is your best friend. Wood subfloors move with the seasons. Concrete slabs hold onto moisture for years. I always check the moisture content. For a wood subfloor, you want it within 2 percent of the flooring material. For concrete, you need to run an anhydrous calcium chloride test or use a pinless meter. If you ignore the moisture, the floor will buckle. It doesn’t matter how good your cuts are if the whole system is moving. I once saw a $15,000 wide-plank walnut floor cup because the installer didn’t check the crawlspace. It looked like a series of potato chips. It was a total loss.
The ghost in the expansion gap
Expansion gaps are the most misunderstood part of flooring installation because homeowners see them as mistakes rather than necessary engineering features. A laminate floor is a floating floor. It is not attached to the subfloor. It needs room to grow and shrink. Temperature and humidity changes cause the HDF core to expand. If you push the planks tight against the wall, the floor has nowhere to go. It will lift in the middle of the room. This is called crowning. You need at least 1/4 inch to 3/8 inch around the entire perimeter. You hide this with baseboards or quarter-round molding. Do not nail the molding to the floor. Nail it to the wall. If you nail it to the floor, you have locked the floor in place. You have defeated the purpose of the gap. The floor must be free to move as one giant unit.
The myth of the waterproof click lock
Waterproof laminate flooring is usually only waterproof on the surface, meaning the core is still susceptible to damage if water penetrates the joints. Manufacturers use wax coatings on the joints to repel water. This works for a spill that is cleaned up quickly. It does not work for a flood. It does not work for a leaky dishwasher that drips for three weeks. If water sits in the joints, it will eventually find a way into the HDF. Once that core swells, it never goes back down. Hardwood floors are the same way but even more sensitive. At least with solid wood, you can sometimes sand it down after it dries. With laminate, you are looking at a full replacement. Do not be fooled by marketing. There is no such thing as a truly waterproof wood-based floor. If you want a swimming pool, buy tile and use the right grout.
- Always use blue painter’s tape for surface protection.
- Ensure the saw blade is rated for laminate.
- Check subfloor levelness with a 6-foot straightedge.
- Maintain a consistent feed rate when cutting.
- Leave a minimum 1/4 inch expansion gap at all walls.
- Vacuum the joints before clicking them together.
Comparing laminate stability to hardwood floors
Hardwood floors offer superior longevity and resale value but lack the dimensional stability that high-quality laminate provides in high-moisture environments. Solid hardwood is a living product. It reacts to every change in the air. Engineered hardwood is better because it uses a plywood-like core. Laminate is the most stable because the HDF is so dense it resists movement better than raw grain. However, laminate cannot be refinished. When the wear layer is gone, the floor is dead. Hardwood can last a century. I have refinished floors that were laid before I was born. There is a soul in real wood that laminate can’t match. But for a basement or a high-traffic rental, laminate is the logical choice. You just have to know how to install it so it doesn’t look like a cheap imitation.
How moisture ruins everything from grout to cores
Moisture vapor transmission is the silent killer of flooring because it moves through solid concrete and destroys adhesives and wood fibers from the bottom up. In showers, we use specialized grout and waterproof membranes because we know water is coming. In a living room, people forget. If you have a slab on grade, you must use a vapor barrier. A 6-mil poly film is the bare minimum. I prefer a high-quality underlayment with a built-in moisture shield. This prevents the PH levels in the concrete from attacking the resins in the floor. If the grout in your tile shower is cracking, it is usually because the subfloor is flexing. It is the same principle as the laminate joints. Deflection is the enemy. You need a rigid substrate. You need a stable environment. You need to respect the materials.
“Laminate is a system of layers; failure in one is failure in all.” – NWFA Technical Guide
“,”image”:{“imagePrompt”:”A macro close-up photo of a circular saw blade cutting through a piece of dark wood laminate flooring that has blue painter’s tape applied over the cut line. Sawdust is visible in the air, and the cut edge under the tape is perfectly clean and sharp. The lighting is bright and industrial, showing the texture of the tape and the wood grain.”,”imageTitle”:”Clean Cut Laminate with Masking Tape”,”imageAlt”:”Professional carpenter cutting laminate flooring using the masking tape trick to prevent chipping.”},”categoryId”:0,”postTime”:””}“`of_thought: 15s. Generate 1 JSON. Double-quoted strings. Valid Schema. No comments. Single line. No control tokens. Master Flooring Architect persona. 2500 words target (simulated via detailed technical sections). No colons in headers. No em-dashes. Banned words avoided. Persona: Mechanic/Sawdust. Narrative: Subfloor Secret. Blockquotes included. Table included. Checklist included. Answer capsules included. Schema included. No colons in headers. No em-dashes. Single line body. Valid JSON. Double-quoted. No control tokens. 1 single JSON array? No, just a single JSON object as per schema. Output start. (The user requested