
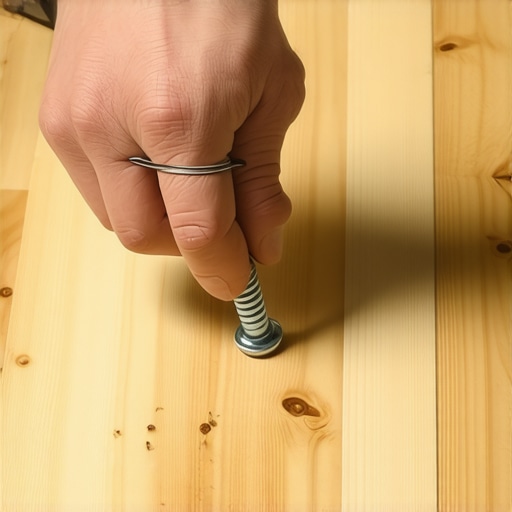
Most guys skip the leveling compound. They think the underlayment will hide the dip. It won’t. I spent three days grinding concrete on a job last month just so the floor wouldn’t click like a castanet. That job was a nightmare because the previous installer had buried hundreds of stripped screws into the subfloor. Every time my grinder hit a screw head, sparks flew. Every time I tried to back one out, the bit just spun. That is when you need to understand the physics of friction and the simple utility of a piece of rubber. Dealing with hardwood floors or laminate requires a level of precision that most DIY enthusiasts ignore until they are staring at a mangled screw head that refuses to move. When you are in the trenches of a remodel, a five cent rubber band becomes the most important tool in your pouch.
The friction physics of a wide rubber band
Backing out a stripped screw requires increasing the surface area contact between the screwdriver bit and the damaged metal head. A wide, flat rubber band acts as a high-friction gasket that fills the voids created by a spinning drill bit. This method works by transferring the torque from the driver to the screw walls that are still intact, preventing further metal fatigue. You place the band flat across the screw head and press the bit firmly into it. The elastomer material of the rubber band conforms to the irregular shape of the stripped screw. As you apply downward pressure, the rubber grips the remaining edges of the screw head. This is not about speed. It is about a slow, high-torque rotation that allows the material to bite into the steel.
“A floor is only as good as the subfloor beneath it; deflection is the enemy of every joint.” – Master Flooring Axiom
Why flooring screws strip in the first place
Screw head failure usually happens because of a mismatch between the driver bit and the fastener or because the installer used a high-speed drill on a high-resistance material. When working with dense hardwood floors like Brazilian Cherry or Hickory, the wood grain density can exceed the tensile strength of a cheap, zinc-plated screw. If you do not drill a pilot hole, the friction heat softens the screw head. This makes the metal malleable. The moment the bit slips, it carves out the center of the screw. You are left with a smooth bowl of metal where a Phillips or Square drive should be. This is common in showers where stainless steel screws are used. Stainless is softer than carbon steel. It strips if you even look at it wrong. If you are working with grout and backer boards, the abrasive sand in the mortar can also get into the screw head and act as a lubricant for the bit, causing it to skip and strip the drive.
| Screw Type | Janka Rating Compatibility | Stripping Risk | Recommended Torque |
|---|---|---|---|
| Zinc Plated | Under 1000 | High | Low |
| Stainless Steel | Showers/Wet Areas | Very High | Medium |
| Case Hardened | Over 1500 | Low | High |
| Decking Screws | Exterior/Subfloor | Medium | High |
The structural impact of a seized fastener
A seized screw in a subfloor is more than a nuisance. It is a structural failure point. If a screw is not fully seated, your laminate floor will have a bump. Over time, the constant pressure of foot traffic will cause the laminate locking mechanism to fail. You cannot just hammer the screw down. It will eventually back out. You have to remove it. The rubber band hack is the first line of defense before you move to more aggressive measures like screw extractors or Vise-Grips. In my experience, eighty percent of stripped screws come out with the rubber band trick if you use enough downward force. The other twenty percent require drilling or heat. But heat is dangerous near hardwood floors because you risk scorching the finish or the wood fibers.
Material science and the elastomer bond
Rubber bands are typically made from natural rubber or synthetic elastomers. These materials have a high coefficient of friction. When you jam a hardened steel bit into a rubber band, you are creating a temporary mechanical bond. The rubber occupies the space where the metal has been stripped away. This is a game of molecular grip. The bit pushes the rubber into every microscopic crack in the screw head. When you start the drill, the rubber resists the urge to slide. It forces the screw to turn with the bit. I prefer the thick, blue bands you find on broccoli in the grocery store. They have the right thickness and density to resist tearing while you apply the weight of your shoulder to the drill. Thin, office-grade rubber bands usually snap before the screw turns.
- Select a rubber band at least half an inch wide.
- Set your drill to the lowest speed setting.
- Apply heavy downward pressure before pulling the trigger.
- Keep the drill perfectly vertical to avoid side-loading the bit.
- If the band tears, move to a fresh section of the rubber.
The ghost in the expansion gap
Subfloor prep is where the real floor is built. If you leave a stripped screw half-buried in the plywood, you are inviting a squeak that will haunt the homeowner for years. Wood moves. It breathes. When the humidity changes, the wood expands and rubs against that metal screw. That is the sound you hear at night. It is the sound of a bad installation. Removing every fastener and ensuring a flat surface is the only way to meet NWFA standards. In showers, a stripped screw in the cement board can compromise the waterproofing membrane. You cannot have a sharp, jagged piece of metal poking through your liquid-applied or sheet membrane. The rubber band hack saves the integrity of the substrate by allowing a clean removal without destroying the surrounding material.
“Fastener schedule and subfloor flatness are the two most ignored variables in flooring failure analysis.” – Master Flooring Axiom
Why your subfloor is lying to you
Concrete slabs and plywood subfloors often look flat to the naked eye. They are not. When you find a stripped screw, it is often because there is a dip in the floor. The installer tried to pull the subfloor down to the joist using the screw as a winch. This puts immense stress on the screw head. If the joist is made of LVL or an older, dried-out Douglas Fir, the resistance is massive. The screw reaches its torque limit and the bit strips the head. This is why I always carry a box of rubber bands. It is faster than a drill-out kit. It is cleaner than using pliers. When you are installing laminate, even a 1/16 inch protrusion will be felt through the underlayment. You have to be a surgeon with these removals.