
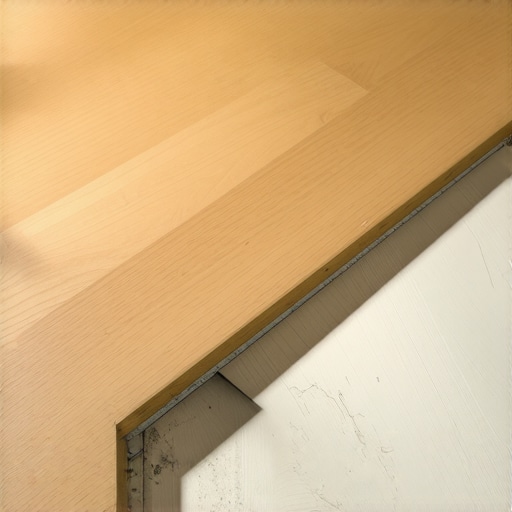
The structural physics of the laminate bounce
A bouncing laminate floor occurs when a gap exists between the flooring material and the subfloor, usually caused by a deviation in the subfloor levelness exceeding 3/16 of an inch over a 10-foot radius. This deflection creates a trampoline effect where the planks flex under foot traffic, eventually fatiguing the locking mechanisms. When you step on a high spot and then move to a low spot, the air trapped beneath the plank is displaced, creating that characteristic hollow thud or clicking sound. I spent three days grinding concrete on a job last month just so the floor wouldn’t click like a castanet. The homeowners thought they could just throw a thick underlayment over the dips and call it a day. They were wrong. Underlayment is not a structural filler. It is a cushion and a thermal break. If you have a one-half inch dip in your slab, no amount of foam will stop that plank from bending until it eventually snaps at the tongue. This is not just an aesthetic annoyance. It is a mechanical failure of the installation system. You are looking at a ticking clock before the joints separate and moisture from your morning coffee or a nearby shower enters the HDF core. Once that core swells, the floor is finished. High-density fiberboard is basically sawdust and resin. It hates water. It loves to expand. When it expands without a place to go, it peaks. When it has a void beneath it, it bounces. You must understand the relationship between the slab and the plank to fix this properly. It requires a level. It requires a straightedge. It requires the willingness to get your hands dirty with Portland cement-based compounds. Anything less is just a temporary patch on a permanent problem.
The subfloor secret that contractors ignore
Most installers are in a race to finish the job and get paid. They skip the most vital step of the entire process which is the subfloor audit. I have walked onto many job sites where the subfloor was a mess of high ridges and deep valleys. The installer just rolled out the plastic and started clicking planks together. Within six months, the floor felt like a sponge.
“A floor is only as good as the subfloor beneath it; deflection is the enemy of every joint.” – Master Flooring Axiom
This axiom should be tattooed on every apprentice’s arm. You cannot expect a rigid or semi-rigid plank to conform to a rolling topography. It will bridge the gaps. That bridge is what you feel when the floor bounces. It is a physical bridge over a structural void. To fix this, you have to find the voids. You take a 10-foot straightedge and you sweep the room. You mark the dips with a pencil. You mark the high spots with a different color. Then you get to work. You either grind down the hills or you fill the valleys. There is no third option that works. If you try to use extra layers of underlayment to fill a hole, you are actually making the bounce worse. Extra padding allows for more vertical movement. More vertical movement means more stress on the locking system. It is a cycle of destruction. I have seen $10,000 floors ruined because the guy didn’t want to spend $200 on self-leveling compound and a day of labor. It is a tragedy of laziness. You need to treat your subfloor like the foundation of a skyscraper. If the foundation is crooked, the penthouse windows won’t open. In the flooring world, if the subfloor is crooked, the laminate will bounce and click until it breaks.
Why foam underlayment cannot save a bad slab
Foam underlayment provides sound dampening and moisture protection but lacks the compressive strength to bridge subfloor deviations. Many people assume that a 5mm or 6mm underlayment will act like a mattress and absorb the unevenness of the concrete or plywood. This is a fundamental misunderstanding of material science. Underlayment is designed to be compressed. When you put a heavy piece of furniture or a 200-pound human on a plank over a void, the underlayment compresses further. It does not provide upward resistance. It actually facilitates the deflection. I often see people trying to double-stack underlayment to fix a bounce. This is a catastrophic error. Double-stacking creates a soft, unstable base that allows the planks to shift horizontally and vertically. This motion will eventually shear off the click-lock edges. Once those edges are gone, the floor will start to gap. You will see black lines between your planks where the tongue has pulled out of the groove. No amount of glue can fix it at that point. You are looking at a full tear-out. You must use the correct underlayment for the specific application. For laminate, you want something with a high density and a low compression set. You want the underlayment to be firm. If it feels like a yoga mat, it is probably too soft for a long-term laminate installation. We are looking for a balance between comfort and structural integrity. The underlayment should be the last thing you think about after the subfloor is perfectly flat. Flatness is measured as 1/8 inch over 6 feet or 3/16 inch over 10 feet. If you are outside those tolerances, your underlayment choice is irrelevant. The floor will fail. It is a matter of when, not if.
Subfloor Material Comparison and Tolerance Table
This table outlines the specific requirements for different subfloor types to prevent laminate bounce and mechanical failure of the locking system.
| Subfloor Type | Maximum Deviation | Required Preparation | Moisture Limit |
|---|---|---|---|
| Concrete Slab | 3/16 inch per 10 ft | Grind high spots, fill low spots | 3 lbs / 1000 sq ft |
| Plywood / OSB | 1/8 inch per 6 ft | Sand seams, check for deflection | 12% MC max |
| Existing Tile | 1/8 inch per 10 ft | Fill grout lines, ensure bond | Non-porous check |
| Radiant Heat | 1/8 inch per 10 ft | Embed coils, slow heat cycle | System specific |
The ghost in the expansion gap
Expansion gaps are mandatory around the entire perimeter of a laminate floor to allow the material to expand and contract with changes in humidity. Laminate is a wood-based product. It breathes. It moves. If you install your laminate tight against the baseboards or a stone fireplace, the floor has nowhere to go when it expands. It will move upward. This creates a bubble or a crown in the middle of the room. This crown feels like a bounce because the floor is no longer sitting on the subfloor. It is suspended in the air like a dome. I have walked into houses where I could literally push the floor down two inches with my foot because it was pinned against the walls. This is why we use spacers. You need at least a 3/8 inch gap. In larger rooms, you might need a 1/2 inch gap. You cover this gap with baseboards or shoe molding. Do not nail the molding into the flooring. Nail it into the wall. If you nail it into the floor, you have locked the floor in place. It is a common mistake that DIYers and bad contractors make. They think they are being neat, but they are actually sabotaging the floor. The floor must be a floating island. It should not touch anything vertical. No door frames. No cabinets. No pipes. If it touches, it will buckle. If it buckles, it will bounce. It is simple physics. The pressure has to be released somewhere. If the perimeter is locked, the center of the floor will rise. Always check your gaps before you put the trim back on. Use a pull bar to make sure the planks haven’t shifted during the final rows. A single plank touching a wall can ruin a thousand-square-foot installation.
The 1/8 inch that ruins everything
When we talk about subfloor prep, we are talking about precision. A 1/8 inch gap might seem small when you are looking at a piece of wood, but in the world of flooring, it is a canyon. Laminate flooring is engineered with very tight tolerances. The click-lock system is designed to hold the planks together on a flat plane. When you introduce a 1/8 inch dip, the plank has to bend to reach the bottom of that dip. The tongue is inserted into the groove at a specific angle. When the plank bends, that angle changes. This puts tension on the top lip of the groove. Over time, that lip will crack. You will hear a sharp snapping sound when you walk over it. That is the sound of your investment breaking. I always tell my clients that the prep work is 80 percent of the job. The actual clicking of the planks is the easy part. It is the reward for doing the hard work on the subfloor. If you spend your time with the grinder and the level, the floor will feel solid. It will feel like hardwood floors. It won’t sound like plastic clicking on concrete. Most people want the job done fast. Fast is the enemy of quality in flooring. You have to wait for the leveling compound to dry. You have to wait for the moisture to leave the slab. You have to wait for the planks to acclimate to the room’s temperature and humidity. Patience is a tool just like a saw or a hammer. Without it, you are just making a mess that someone like me will have to come and tear out in two years.
Pre-Installation Subfloor Audit Checklist
- Check subfloor levelness with a 10-foot straightedge or laser level.
- Identify and mark all high spots for grinding or sanding.
- Identify and mark all low spots for filling with approved compound.
- Perform a moisture test on concrete (Calcium Chloride or In-Situ Probe).
- Verify that the subfloor is structurally sound with no rot or insect damage.
- Check for any protruding nails or screws in wood subfloors.
- Ensure the subfloor is clean of all paint, oil, wax, and debris.
- Confirm that the crawlspace has a 6-mil vapor barrier and proper ventilation.
- Calculate the required expansion gap based on the room’s total width and length.
- Verify that the underlayment is compatible with both the subfloor and the laminate.
How moisture in the slab creates a trampoline effect
Moisture vapor rising through a concrete slab can cause the underside of laminate planks to swell, creating an uneven surface and a noticeable bounce. Even if your slab looks dry, it is likely emitting moisture vapor. This is why we use a 6-mil poly film as a moisture barrier. If you skip this, the HDF core will absorb that moisture. The bottom of the plank will expand faster than the top. This causes the plank to cup. When the planks cup, they lift off the subfloor at the edges. This creates a series of ridges. When you walk on them, they flatten out and then spring back up. This is the moisture bounce. It is often accompanied by a musty smell and visible peaking at the seams. I once saw a $15,000 wide-plank walnut floor cupping so bad it looked like a potato chip because the installer didn’t check the crawlspace humidity. The same thing happens to laminate, just on a smaller scale. You must verify the relative humidity of the slab before you install. If the slab is pouring out water, a simple plastic sheet might not be enough. You might need a liquid-applied moisture vapor barrier. These are epoxy-based coatings that seal the concrete. They are expensive, but they are cheaper than replacing the whole floor. Never assume a slab is dry because the house is old. Hydrostatic pressure can change over time. A new driveway next door or a change in local drainage can send water under your house and into your slab. You have to be a detective. You have to look for the signs of water before you lay the first plank. Check the grout in nearby tile rooms. If it is discolored, you have a moisture problem. Fix the water, then fix the floor.
Repairing the bounce without a full tear-out
If you already have a bouncing floor, you might be able to fix it without starting over. First, you have to determine the cause. If it is an expansion issue, you can remove the baseboards and cut back the planks that are touching the walls. A oscillating multi-tool is perfect for this. Once you create that 3/8 inch gap, the floor might settle down on its own. If the bounce is caused by a low spot in the subfloor, the fix is harder. You can try to inject a specialized floor repair adhesive through a small hole drilled in the plank. These adhesives are designed to expand and fill the void, providing a solid base for the floor. However, this is a tricky process. If you use too much, you will create a hump. If you use too little, the bounce stays. The best way is to pull up the floor starting from the nearest wall until you reach the problem area. Level the subfloor properly and then reinstall the planks. Since laminate is a floating floor, this is possible as long as you didn’t glue the joints. Be careful not to damage the locking tabs when you pull them apart. It is a slow process, but it is the only way to ensure a permanent fix. Most homeowners hate hearing this. They want a magic spray. There is no magic in flooring. There is only geometry and physics. If the floor is bouncing, the geometry is wrong. You have to correct the geometry to stop the bounce. It is worth the effort to do it right. A solid-feeling floor adds value to your home. A bouncy floor feels cheap and broken. Choose the path of quality. Spend the time on the subfloor. Your knees and your wallet will thank you in the long run.