
I once walked into a house where a $15,000 wide-plank walnut floor was cupping so bad it looked like a potato chip because the installer didn’t check the crawlspace humidity. The homeowner was in tears, and the guy who did the job was long gone. That sight stayed with me. It taught me that a floor is not just something you walk on. It is a mechanical system that lives and breathes with the house. When people ask me about maintenance, they usually focus on the small stuff, like a black streak from a sneaker. They want the quick fix. They want the WD-40. But as a man who spent thirty years with sawdust in his pockets and a moisture meter in his hand, I know that the surface is only the beginning. You have to understand the chemistry of the finish and the physics of the subfloor before you start spraying chemicals in your living room. My hands smell like oak dust and mineral spirits most days, and I have learned that the best tools are often the simplest ones, provided you use them with respect for the material.
The chemical interaction between rubber scuffs and polyurethane
Rubber scuff marks on hardwood floors are actually polymer transfers where the heat of friction bonds shoe sole materials to the polyurethane wear layer. These marks are not scratches in the wood itself. They are microscopic layers of rubber or plastic that have adhered to the top of the finish. Removing them requires a solvent that can break the chemical attraction of the rubber without damaging the cross-linked molecules of the floor coating. This is why WD-40 is a popular choice for many old-school installers. It acts as a lubricant and a mild solvent that gets under the edge of the scuff. However, you have to be careful about the residue. If you leave oily distillates on a floor, you create a slip hazard that can be more dangerous than the scuff was ugly.
“A floor is only as good as the subfloor beneath it; deflection is the enemy of every joint.” – Master Flooring Axiom
The molecular reality of using WD-40 on site-finished wood
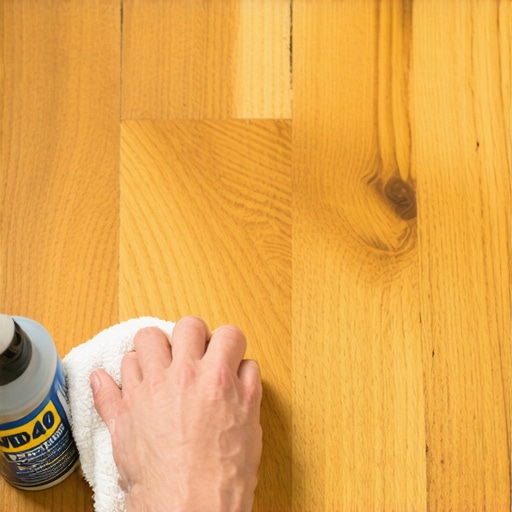
WD-40 works on hardwood floors because it contains aliphatic hydrocarbons that penetrate the non-polar bond of the rubber scuff mark. When you spray a small amount onto a soft cloth, the solvent begins to dissolve the sticky resins in the rubber. It does not soften the polyurethane because modern floor finishes are engineered to be chemically resistant. However, if your floor is an older wax finish or a shellac coating, the solvent will eat right through it. You need to know exactly what is on your wood. I have seen guys ruin a historic floor by thinking every clear coat is plastic. It is not. You have to test a small spot in a closet first. The goal is to lift the rubber without affecting the mil thickness of the protective finish. If you rub too hard, you create a shiny spot that will stand out like a sore thumb when the light hits it at an angle.
Why your subfloor is lying to you about floor health
Subfloor flatness is the structural foundation of any hardwood installation, and a dip in the plywood can cause board deflection that ruins the finish. If your subfloor is not level within 1/8 inch over a 10 foot radius, the boards will move every time you step on them. This movement creates friction. Friction creates heat. Heat can actually make scuff marks harder to remove because the finish is under constant stress. I spent three days grinding concrete on a job last month just so the floor wouldn’t click like a castanet. People think the underlayment hides the sins of the builder. It does not. If the subfloor is junk, the floor will be junk. You can clean scuffs all day long, but if the boards are rubbing against each other because the subfloor is uneven, you are going to see finish failure long before the wood actually wears out.
| Floor Type | Janka Hardness | Reaction to WD-40 | Acclimation Time |
|---|---|---|---|
| Red Oak | 1290 | Safe on Poly | 7 to 14 Days |
| White Oak | 1360 | Safe on Poly | 7 to 14 Days |
| Brazilian Cherry | 2350 | Dense, minimal soak | 14 to 21 Days |
| Black Walnut | 1010 | Soft, watch for dents | 10 to 14 Days |
| Laminate | N/A | Safe, use sparingly | 48 Hours |
The 1/8 inch that ruins everything in a floor layout
Expansion gaps are essential perimeter spaces that allow solid hardwood to expand and contract during seasonal humidity changes without buckling. If you don’t leave that gap, the floor has nowhere to go. It will push against the walls until the boards pop or the nails pull out. I have seen entire living rooms humped up in the middle because someone forgot the gap. When we talk about cleaning scuffs with WD-40, we are looking at the micro level. But the macro level is where the real failure happens. If your floor is tight against the baseboards, the pressure can cause the finish to crack at the joints. Once the finish is cracked, any liquid you use to clean the floor, including WD-40 or water, will seep into the wood grain. That is how you get black edges and permanent staining. Always check your perimeter before you worry about a few shoe marks.
Why WD-40 is a nightmare for grout and showers
Porous grout in tiled showers will absorb oily residues from WD-40 spray, leading to permanent discoloration and mold growth. If you are using this trick on a hardwood floor that leads into a master bathroom, you must be extremely careful. Grout is like a sponge. Once petroleum distillates get into the cementitious matrix, they are nearly impossible to get out. They will attract dirt and hair like a magnet. I have had clients call me complaining that their bathroom floor looks filthy no matter how much they mop. Usually, it is because they used an oily cleaner nearby. The same goes for the transition between your hardwood and the shower area. Moisture from the bathroom will swell the wood, and if there is oil on the surface, it can trap that moisture inside the grain, leading to rot. Keep the WD-40 on the cloth, never spray it directly on the floor near a tiled area.
- Always vacuum the area first to remove grit that could scratch the finish during rubbing.
- Use a white microfiber cloth to avoid dye transfer from the fabric to the wood.
- Apply the WD-40 to the cloth, not the floor, to control the spread of the solvent.
- Rub gently in a circular motion until the rubber mark disappears.
- Immediately clean the area with a dedicated wood floor cleaner to remove the oily film.
- Dry the area with a separate clean towel to ensure no slip hazard remains.
The ghost in the expansion gap and laminate stability
Laminate flooring requires floating installation because the HDF core responds to atmospheric moisture by expanding at a different rate than the subfloor. While hardwood is a natural cellular structure, laminate is a composite. Using WD-40 on laminate is generally safe for removing scuffs because the top layer is a tough melamine resin. However, the joints are the weak point. If the lubricant gets into the tongue and groove, it can cause the core to swell or the boards to slip. In my experience, people treat laminate like it is indestructible. It is not. It is a photograph glued to a wood-chip board. You have to treat the joints with respect. If you are cleaning a scuff near a seam, use the absolute minimum amount of solvent. If that liquid sits in the gap, it will ruin the floor faster than a leaky dishwasher.
“Moisture is the primary cause of hardwood floor failure; a dry subfloor is a happy subfloor.” – NWFA Technical Guide
The danger of oily residues on high-traffic transitions
Coefficient of friction is the scientific measurement of floor slipperiness, and oily residues from cleaning agents can dangerously lower traction. This is a major liability. If you use WD-40 to fix a scuff in a hallway and don’t clean it up properly, the next person walking through in socks is going to go airborne. As a professional, I always follow a solvent with a degreaser. A simple mixture of water and a drop of dish soap will break down the remaining WD-40. Then I hit it with a professional hardwood cleaner. You want the floor to be bone dry and squeaky clean. My knees have the scars from years of sliding around on slick floors, and I wouldn’t wish that on a homeowner. Safety is just as much a part of floor maintenance as aesthetics are. If you ignore the residue, you are asking for trouble. Flooring is about more than just looks, it is about creating a safe, stable surface for the life of the home.
{ “@context”: “https://schema.org”, “@type”: “HowTo”, “name”: “How to Remove Scuff Marks from Hardwood Floors with WD-40”, “step”: [ { “@type”: “HowToStep”, “text”: “Clear the area of dust and debris using a vacuum with a soft brush attachment to prevent scratching.” }, { “@type”: “HowToStep”, “text”: “Apply a small amount of WD-40 to a clean, white microfiber cloth. Do not spray directly on the floor.” }, { “@type”: “HowToStep”, “text”: “Gently rub the rubber scuff mark in a circular motion until the transfer is lifted from the finish.” }, { “@type”: “HowToStep”, “text”: “Wipe the area with a damp cloth and a drop of dish soap to remove the oily residue.” }, { “@type”: “HowToStep”, “text”: “Buff the area dry with a fresh towel to restore the floor’s original traction.” } ] }