
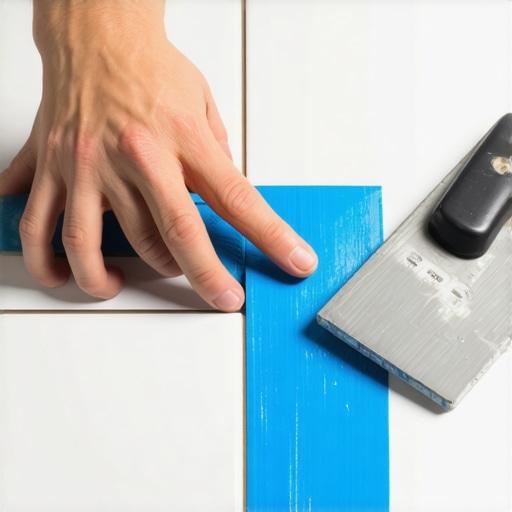
Cutting tile is not a matter of luck but a matter of physics and mechanical restraint. When you approach a piece of porcelain or ceramic with a diamond blade, you are engaging in a high-speed collision between industrial-grade minerals and a brittle silicate body. Most installers fail because they treat the saw like a wood tool. It is not. You are grinding, not slicing. One of the most effective ways to preserve the integrity of the glaze and prevent the dreaded jagged edge is the application of high-quality painter tape along the cut line. This simple barrier provides a sacrificial layer that absorbs the micro-vibrations of the blade as it exits the material, ensuring that the decorative surface remains intact rather than shattering into a thousand tiny shards.
The structural reality of a clean cut
A clean tile cut depends on the stabilization of the glaze layer and the control of thermal expansion during the grinding process. Using blue tape provides a mechanical advantage by holding the surface tension of the glaze in place. When the diamond grit on your blade hits the tile, it creates a massive amount of friction. This friction converts to heat, which can cause the brittle upper layer of the tile to expand and snap away from the body. The tape acts as a stabilizer, dampening the chatter that occurs at 3,500 revolutions per minute. Without this dampening, the blade effectively hammers the edge of the cut, leading to the micro-chipping that ruins a professional finish in high-visibility areas like showers or backsplashes.
Why your wet saw is ruining your porcelain
The common wet saw is a blunt instrument if not tuned correctly. Many installers overlook the importance of the arbor and the flange. If there is even a millimeter of play in the saw shaft, the blade will wobble. This wobble is the primary cause of chipping. When you combine a wobbling blade with a hard material like porcelain, which often has a Janka-equivalent hardness far exceeding any hardwood floors, the result is a messy edge. Porcelain is fired at much higher temperatures than standard ceramic, creating a dense, glass-like structure that does not tolerate vibration. The blue tape hack is a workaround for this mechanical reality, but it cannot fix a bad blade. You need a continuous rim diamond blade specifically designed for porcelain to achieve the results seen in high-end architectural installs.
“A floor is only as good as the subfloor beneath it; deflection is the enemy of every joint.” – Master Flooring Axiom
The mechanical advantage of painter tape
Applying the tape is a precise operation. You must ensure the tile is dry before application, or the adhesive will fail mid-cut. Once the tape is seated, you mark your cut line directly on the blue surface. This offers higher visibility than marking the tile itself, especially on dark or textured materials. The tape also protects the rest of the tile surface from the slurry of water and ground stone that sprays out during the cut. This slurry can be abrasive and can scratch the polished finish of expensive stone or glazed porcelain if it is allowed to sit. By keeping the surface covered, you maintain the pristine look of the material from the box to the thin-set. It is a small step that separates a mechanic from a handyman.
A hard lesson in subfloor preparation
Most guys skip the leveling compound. They think the underlayment will hide the dip. It won’t. I spent three days grinding concrete on a job last month just so the floor wouldn’t click like a castanet. If you do not start with a flat surface, your tile will crack regardless of how clean your cuts are. I have seen fifteen thousand dollar wide-plank walnut floors ruined because the installer didn’t check the crawlspace humidity, and the same applies to tile. If your subfloor has more than an eighth of an inch of variation over ten feet, your grout lines will eventually fail. The stress of an uneven floor will telegraph through the mortar and snap the bond. I don’t care how good your blue tape hack is if you are laying tile over a mountain range of uneven plywood or concrete. You must grind the high spots and fill the low spots. There are no shortcuts in the physics of a flat surface.
Tile hardness and material properties
Understanding what you are cutting is the first step to a successful installation. Not all materials respond to the blue tape hack in the same way. Natural stone like marble or travertine is porous and can actually be stained by the adhesive on some tapes if left for too long. Porcelain is nearly impervious and handles the tape perfectly. Laminate and hardwood floors require different cutting strategies, usually involving high-tooth-count carbide blades and a reverse-cutting approach to prevent splintering the decorative wear layer.
| Material Type | Hardness (MOHS) | Water Absorption | Cut Difficulty |
|---|---|---|---|
| Porcelain | 7 to 9 | Less than 0.5% | Extreme |
| Ceramic | 4 to 6 | More than 3% | Moderate |
| Natural Marble | 3 to 4 | Variable | High |
| Laminate Wear Layer | Varies | N/A | Low |
Grout chemistry and the shower environment
In a shower, the cut edges are often hidden by a corner bead or a transition, but that is no excuse for sloppy work. The interaction between the tile edge and the grout is a critical failure point for moisture. If the tile edge is chipped, the grout has a harder time forming a consistent seal. We see this often in modern walk-in showers where people use large format tiles. The grout needs to be packed into the joint to prevent air pockets. If the cut is clean, the grout sits flush and creates a water-resistant barrier. If the cut is jagged, you get thin spots in the grout that will eventually crack and allow water to penetrate the substrate. This leads to mold, rot, and the eventual failure of the entire assembly. Always use a polymer-modified grout in wet areas to ensure the bond is strong enough to handle the expansion and contraction of the house.
“Proper substrate preparation is the primary determinant of tile longevity and aesthetic success.” – TCNA Handbook Guidelines
Precision steps for a chip-free finish
Follow this protocol to ensure every cut is shop-quality. Skipping a step usually results in a ruined piece of expensive material. This is the process I use on every high-end job site.
- Inspect the diamond blade for any missing segments or glazing of the diamonds.
- Ensure the water reservoir is full and the pump is delivering a steady stream to both sides of the blade.
- Apply a strip of high-adhesion blue tape over the intended cut path.
- Measure and mark the cut line with a fine-point permanent marker for maximum accuracy.
- Make a shallow score pass first by barely touching the tile to the blade to set the path.
- Complete the cut with slow, consistent pressure, allowing the blade to do the work.
- Remove the tape immediately after the cut to prevent any adhesive residue from curing on the tile.
Transitioning to hardwood floors and laminate
The principles of edge protection do not stop at tile. When you are transitioning from a tiled shower or kitchen to hardwood floors, the edge is everything. A clean tile cut makes the transition to a wood header or a T-molding much tighter. If you are installing laminate, remember that it is essentially a photograph glued to a high-density fiberboard. The wear layer is incredibly thin and prone to chipping. Just like the blue tape hack for tile, you can use tape on laminate to prevent the blade from lifting the image layer away from the core. This is especially important when making circular cuts around pipes or complex door jambs. The physics of the material remain the same. You are trying to prevent the exit force of the blade from overcoming the internal bond of the material surface.
Maintaining the integrity of the wear layer
The longevity of any floor, whether it is laminate, hardwood, or tile, depends on the maintenance of the top surface. Once you have made your clean cuts and installed the floor, the battle is only half won. Hardwood needs to be kept at a consistent humidity to prevent cupping or crowning. Tile needs the grout to be sealed to prevent staining and water ingress. Laminate needs to be protected from standing water that can swell the fiberboard core. Every floor is a system of layers, and the cut edge is the most vulnerable part of that system. By using the blue tape hack and focusing on the mechanical stability of your subfloor, you are ensuring that the system stays intact for decades. Do not let a simple 1/8 inch mistake ruin your entire project. Take the time to prep the surface, use the right tape, and respect the material you are working with.