
Most homeowners believe that a new floor is something you buy in a box and click together on a Saturday afternoon. I have spent twenty five years with sawdust under my nails and the smell of WD-40 on my clothes, and I am here to tell you that the floor you see is only the skin. The real work is the skeleton. I spent three days grinding concrete on a job last month just so the floor would not click like a castanet. The slab looked fine to the naked eye. The homeowner thought I was crazy for charging him for prep. But once I put a straightedge on it, the truth came out. There was a quarter inch dip every four feet. If I had laid that laminate down without grinding, the locking mechanisms would have snapped within six months. That is the reality of modern flooring. It is a performance surface that depends entirely on the physics of the plane beneath it.
The brutal physics of a flat subfloor
A flat subfloor is a surface that does not deviate more than 3/16 of an inch over a 10 foot span or 1/8 of an inch over a 6 foot radius. These tolerances are not suggestions from the manufacturer to make your life difficult. They are structural requirements for the integrity of the click-lock tongue and groove system. Laminate floors are floating systems. They are not glued or nailed. They rely on gravity and the mechanical strength of a tiny piece of high-density fiberboard. When you walk across a floor with a void underneath it, the plank flexes. This is called deflection. Every time that plank dips into a hollow, the tongue is forced upward against the groove. Eventually, the wood fibers fatigue and the joint separates. Once that joint is gone, the floor is trash. You cannot fix a snapped locking mechanism. You can only replace the entire room. This is why the level test is the most important ten minutes of your installation process.
“A floor is only as good as the subfloor beneath it; deflection is the enemy of every joint.” – Master Flooring Axiom
[image_placeholder_1]
The hidden chemistry of moisture vapor transmission
Moisture vapor transmission is the movement of water molecules from a high-pressure area like a concrete slab to a lower pressure area like your living room. Even if a concrete floor feels dry, it is likely exhaling water. Concrete is a porous sponge. If you trap that vapor under a laminate floor without a proper 6 mil poly barrier, the core of the laminate will swell. I have seen wide-plank walnut floors cup until they looked like potato chips because the installer ignored the crawlspace humidity. Laminate is even more sensitive. The high-density fiberboard core is essentially compressed sawdust and resin. When it absorbs moisture, it expands in thickness. This expansion puts immense pressure on the locking joints. If the floor is locked against a wall or a heavy kitchen island, the pressure has nowhere to go. The floor will buckle and rise in the center of the room. You must use a moisture meter. Do not guess. If your slab reads above 3 percent moisture or your relative humidity is out of whack, you are inviting a disaster.
Why your underlayment might be too thick
Thick underlayment creates a trampoline effect that leads to mechanical failure of the floor locking system. This is the most common mistake I see. A homeowner thinks that if a 2 millimeter pad is good, a 6 millimeter pad must be better and softer. This logic is a trap. Too much cushion allows for too much vertical movement. When you step on the floor, the planks sink into the foam. The joint is then forced to carry the entire weight of your body. These locking systems are designed for minimal movement. A high-quality underlayment should be dense, not soft. It needs a high compressive strength to support the joints while providing sound dampening. If you can squeeze the underlayment between your fingers and it feels like a sponge, put it back on the shelf. You want something that feels like firm rubber. This provides the necessary support to keep the planks in a single, stable plane.
Technical Specifications Comparison
| Material Property | Laminate HDF Core | Solid White Oak | Engineered Wood |
|---|---|---|---|
| Janka Hardness | N/A (Variable) | 1360 lbf | 1200-1400 lbf |
| Acclimation Time | 48 Hours | 7-14 Days | 72 Hours |
| Expansion Gap | 1/2 Inch | 3/4 Inch | 1/2 Inch |
| Max Moisture Content | 12% MC | 9% MC | 10% MC |
The 1/8 inch rule that saves your warranty
The expansion gap at the perimeter of the room must be maintained to allow the entire floor to move as a single unit. Every manufacturer requires a gap between the floor and the wall. Usually, this is 3/8 to 1/2 of an inch. People hate this because it means they have to install baseboards or quarter round. They try to cut the floor tight to the drywall. That is a death sentence for the floor. Laminate floors expand and contract with the seasons. If the floor hits a wall, it will push back. Since the wall will not move, the floor will lift. I have walked into houses where the floor was floating three inches off the subfloor like a bubble. All because someone did not leave a gap. Also, you cannot pin the floor down. Do not nail your baseboards into the flooring. Do not put a 500 pound kitchen island on top of a floating floor. If you lock it down, it cannot breathe. When it cannot breathe, it breaks.
“Failure to provide adequate expansion space is the primary cause of floor failure in residential settings.” – NWFA Technical Guidelines
The molecular reality of high density fiberboard
High density fiberboard or HDF is the structural core of laminate flooring and its density determines the floor resistance to impact and moisture. Not all HDF is created equal. The cheaper products use a lower resin-to-wood ratio. This makes the board softer and more prone to swelling. High-end laminate uses a much tighter bond. When we talk about the AC rating of a floor, we are talking about the wear layer, but the core is what holds it all together. A dense core will resist the indentation of a high heel or a dropped pot. It also provides a cleaner cut for the locking mechanism. When the tongue is milled into a low-quality core, it is brittle. It can snap off during installation. I always tell people to check the weight of the box. A heavy box of laminate usually means a denser, more stable core. This density is what prevents the floor from feeling like plastic under your feet.
Subfloor Preparation Checklist
- Check for flatness using a 10 foot straightedge.
- Grind down high spots in concrete with a diamond cup wheel.
- Fill low spots with a high-compressive strength self-leveling compound.
- Ensure the subfloor is clean of all drywall mud and paint.
- Check moisture levels using a calcium chloride test or pinless meter.
- Secure any loose plywood sheets with deck screws to stop squeaks.
A final word on the three foot level test
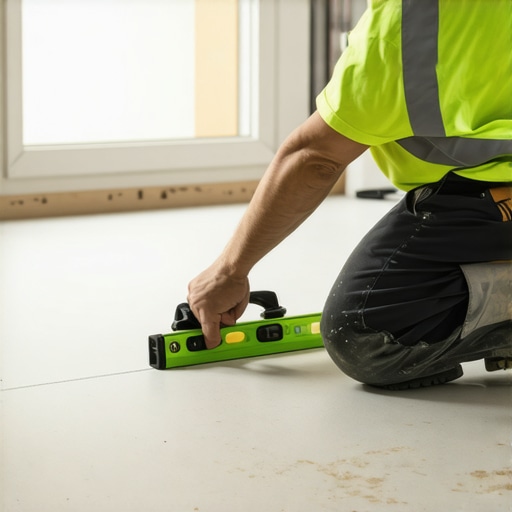
If you take a three foot level and slide it across your floor, you will find the truth. If you see light under that level, you have work to do. Do not trust the underlayment to hide the dip. It will not. Do not trust the flooring to bridge the gap. It will fail. You must address the subfloor. Use a cement-based patch for small dips. Use a self-leveler for large areas. Take the time to get the surface perfect. Your knees might hurt today, but your floor will last for twenty years. If you rush the prep, you are just installing a temporary floor that you will be ripping out in three seasons. I have seen it a thousand times. The difference between a master and an amateur is not the saw. It is the level. Keep your subfloor flat, keep it dry, and leave your expansion gaps. That is how you build a floor that lasts. “,”image”:{“imagePrompt”:”A close-up, high-angle shot of a professional floor installer’s hands using a long metal straightedge level on a gray concrete subfloor. The scene shows a slight gap under the level where a dip occurs. There is fine sawdust and a moisture meter nearby on the floor. The lighting is bright and industrial, highlighting the texture of the concrete.”,”imageTitle”:”Professional Subfloor Levelness Testing”,”imageAlt”:”Installer using a straightedge to check for subfloor dips before laminate installation”},”categoryId”:0,”postTime”:””} Ready for Click-Lock Laminate”}