
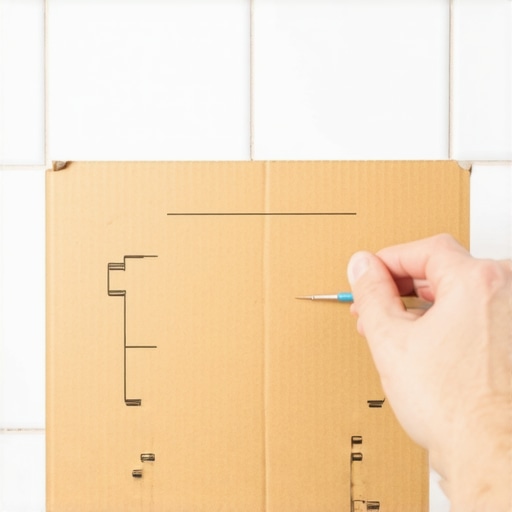
The Cardboard Template Trick for Flawless Tile Cutouts Around Plumbing
I spent three days grinding concrete on a job last month just so the floor wouldn’t click like a castanet. Most guys skip the leveling compound because they think the underlayment will hide the dip. It won’t. I have spent twenty five years on my knees with a moisture meter and a level, smelling like WD-40 and oak dust, and I have learned that a floor is a performance surface, not a decoration. When you are dealing with plumbing cuts for showers or toilets, the precision of your cut is only as good as your measurement. If you mess up a piece of expensive porcelain, you are not just losing money, you are losing the structural integrity of the layout. This guide focuses on the mechanical reality of the jobsite where sawdust under the nails is the mark of a pro.
The physics of subfloor deflection and tile failure
Subfloor deflection and structural integrity are the invisible killers of tile installations. Most installers ignore the joist spacing and plywood thickness, leading to cracked grout and snapped tiles regardless of how well the cuts are made. Before you even think about the cardboard template trick, you must verify that your floor meets the L/360 standard. This means for a ten foot span, the floor should not bend more than one third of an inch. If you are laying over a bouncy subfloor, your tile will pop, your grout will turn to powder, and your plumbing seals will fail. We use a straightedge to find high spots and low spots because the thin-set is an adhesive, not a filler. It is a chemical bond that relies on a consistent depth to cure properly without shrinking and pulling the tile into a lippage nightmare.
“A floor is only as good as the subfloor beneath it; deflection is the enemy of every joint.” – Master Flooring Axiom
The secret of the cardboard template for plumbing
Plumbing cutouts require a template method to ensure precision and professional results. Instead of measuring from the wall and hoping your math is right, you use a piece of scrap cardboard to create a physical guide for the wet saw or grinder. This is the difference between a gap that is covered by the flange and a gap that leaks water into your subfloor. You take a piece of cardboard the exact size of your tile. You slide it into place, mark the center of the pipe, and cut the hole in the cardboard first. Once the cardboard fits perfectly over the shower valve or the toilet drain, you lay it on top of your porcelain and trace. It is foolproof because cardboard is cheap and mistakes on stone are expensive.
Why your subfloor is lying to you
Subfloor moisture and alkalinity levels can destroy hardwood floors and laminate if they are not tested with a calibrated meter. Even if the surface feels dry, the vapor emission rate from a concrete slab can be high enough to delaminate your glue. When I walk onto a job and see an installer skipping the calcium chloride test, I know the floor will be cupping within six months. The subfloor looks flat but it is a living, breathing entity that reacts to the humidity of the crawlspace. You need a six mil poly barrier at the minimum, and even then, you are at the mercy of the physics of wood expansion. If you are installing laminate near a shower, that cardboard template trick becomes even more vital because laminate swells like a sponge the moment water hits a raw edge.
The 1/8 inch that ruins everything
Expansion gaps and perimeter spacing are necessary for the thermal expansion of floating floors. If you do not leave a quarter inch gap at the walls, the floor will buckle and peak at the joints. I have seen guys tight-fit their tile against a wall, only to have the grout crack because the house shifted. You need the room to breathe. When you are using the cardboard template trick around a toilet flange, don’t cut the hole so tight that the tile touches the pipe. You need a small buffer. This is not about being lazy, it is about allowing for the vibration of the house. A house is not a static object. It is a shifting structure of wood and steel that moves with the seasons.
| Material Type | Janka Hardness | Acclimation Time | Moisture Tolerance |
|---|---|---|---|
| Solid White Oak | 1360 | 7 to 14 Days | Low |
| Engineered Maple | 1450 | 3 to 5 Days | Medium |
| Laminate Planks | N/A | 48 Hours | Low to Medium |
| Porcelain Tile | N/A | None | High |
The chemistry of grout in moisture heavy zones
Epoxy grout and polymer-modified thin-set provide the chemical resistance needed in wet environments. Standard cementitious grout is porous. It has microscopic holes that allow water to seep through via capillary action. This is why your shower smells like a swamp after a year. When you use the cardboard template trick to get a tight fit, you are also reducing the amount of grout you need to fill the gap. Less grout means less surface area for water penetration. I always recommend a high-grade epoxy for bathroom floors because it is non-porous and acts as a secondary waterproof barrier. It is harder to work with and it sticks to everything, but it will outlast the house itself.
- Check the subfloor for deflection using a ten foot straightedge.
- Acclimate all wood products to the room temperature for at least 72 hours.
- Use a diamond hole saw for circular cuts instead of a grinder for better edge quality.
- Verify that the toilet flange sits on top of the finished floor, not under it.
- Apply a waterproof membrane like Kerdi over the subfloor before tiling.
The ghost in the expansion gap
Hardwood floors and laminate must have transition strips between rooms to prevent mechanical binding. If you run a floor through a doorway without a break, you are asking for a failure. The floor in the hallway is expanding at a different rate than the floor in the bedroom. Eventually, the tension will snap the locking mechanisms. This is why I hate the zero-threshold look that architects love. It looks clean until the floor starts to pop like popcorn. Use the cardboard template to mark your transition points accurately so the T-molding covers the gap without looking like a bulky speed bump. We are looking for precision, not guesswork.
“Tile is a rigid material on a flexible world; if you don’t plan for movement, the world will win.” – TCNA Handbook Wisdom
The molecular bond of thin-set and polymer
Thin-set mortar functions through the hydration of Portland cement and the cross-linking of polymers. When you mix your thin-set, the water starts a chemical reaction that creates crystals. These crystals grow into the pores of your subfloor and the back of your tile. If you add too much water, the crystals are weak. If the subfloor is too dusty, the crystals have nothing to grab. This is why I spend so much time cleaning. A single layer of drywall dust will act as a bond breaker. You can have the perfect cut from your template, but if your bond is weak, that tile will be loose in a month. Use a damp sponge to wipe the back of every tile before you set it. It takes an extra ten seconds but it ensures the molecular bond is unbreakable.
The Cardboard Template Execution
To execute the trick, start with a rigid piece of corrugated cardboard. Cut it to the size of the tile you are currently installing. Place the cardboard against the existing layout and press it against the plumbing obstacle. Use a utility knife to nibble away at the cardboard until it slides perfectly over the pipe. Now, take that piece of cardboard and lay it over your tile. Trace the opening with a wax pencil. Use a diamond bit or a wet saw with a fresh blade. The result is a cut that looks like it was made at the factory. This is how you avoid the ugly gaps that homeowners try to hide with mountains of caulk. Caulking is for painters. We are flooring architects. We make things fit.