
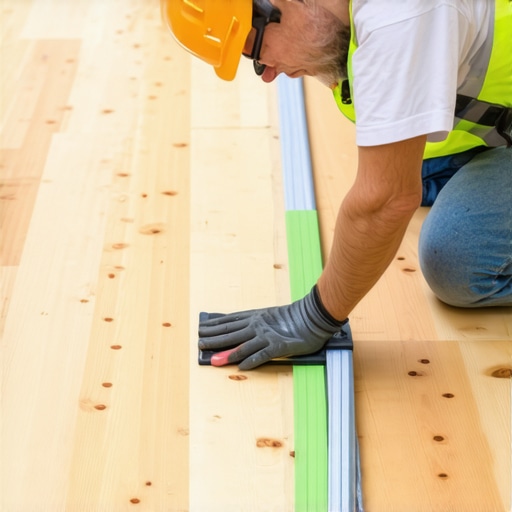
I spent three days grinding concrete on a job last month just so the floor wouldn’t click like a castanet. Most guys skip the leveling compound. They think the underlayment will hide the dip. It won’t. If you ignore a 3/16 inch birdbath in your slab, your tile grout will crack within six months. I have seen 12000 dollar porcelain installations fail because the installer was too lazy to pull a string line. The floor looked beautiful on day one, but by day ninety, the hollow sound of debonded tile was all you could hear when someone walked across the room in slippers. You cannot hide structural incompetence with expensive finish materials. Subfloor prep is the dirty, dusty work that separates a floor that lasts fifty years from one that fails in five.
The 1/8 inch that ruins everything
Subfloor flatness is the single most important factor for a successful tile installation. To determine if you need self-leveling compound, you must measure the floor deviation using a 10-foot straightedge or a laser level. If the floor deviates more than 1/8 inch over 10 feet, leveling is required. This tolerance is not a suggestion. It is a mathematical necessity for the structural integrity of your grout and the bond of your thin-set. When you place a rigid tile over a valley in the subfloor, the tile bridge the gap. This creates a void. When a person steps on that tile, the ceramic flexes into the void. Ceramic does not like to flex. It cracks. Or the grout, which is even less flexible, crumbles into dust. This is why you see grout lines popping up in high-traffic hallways. It is rarely the grout’s fault. It is almost always the subfloor’s lack of flatness.
Why your subfloor is lying to you
A floor can be level without being flat, and it can be flat without being level. For tiling purposes, flatness is much more critical than being perfectly level relative to the earth’s horizon. You check for flatness by identifying high spots and low spots across the entire surface area. Many homeowners look at their plywood or concrete and assume it is good enough because the house was built by a reputable firm. That is a mistake. Concrete shrinks as it cures. It curls at the edges. Plywood subfloors sag between the joists over decades of load-bearing stress. Even a new build often has a 1/4 inch dip in the center of the room where the joists have settled. When you are installing large format tiles, which are any tiles where one side is longer than 15 inches, the industry standard is even stricter. You need that floor to be nearly perfect. You are fighting physics, and physics always wins in the end.
“A floor is only as good as the subfloor beneath it; deflection is the enemy of every joint.” – Master Flooring Axiom
Signs of subfloor betrayal
Visual inspection alone is never enough to confirm if a subfloor is ready for tile. You must use mechanical means to find the dips and humps that the eye misses. Common signs include puddling during cleaning, furniture that wobbles, and visible gaps under baseboards that have been installed recently. If you take a marble and it rolls to the center of the room, you have a slope. If it stops in a specific spot every time, you have a birdbath. These are the topographical features of a bad floor. You need to map these out with a pencil directly on the substrate before you even think about opening a bag of thin-set. If you ignore these signs, you are essentially gambling with your material costs.
- Identify high spots using a long level or a chalk line pulled tight across the floor.
- Mark low spots with a circle and write the depth of the dip in fractions of an inch.
- Check for deflection by jumping near the center of the room; if the china rattles, your subfloor is too bouncy.
- Inspect the perimeter for settling where the floor meets the wall plates.
- Use a moisture meter to ensure the substrate is not actively off-gassing or holding water.
The science of the birdbath
When we talk about a birdbath in a concrete slab, we are talking about a localized depression. The chemistry of self-leveling compound is designed to fill these depressions via gravity and surface tension. Modern self-leveling compounds are often polymer-modified. This means they contain long-chain molecules that provide flexural strength and better adhesion to the base layer. Standard concrete is brittle. Self-leveling compound is a different beast entirely. It has a high flow rate, achieved through superplasticizers that reduce the water-to-cement ratio while maintaining a liquid state. This allows the material to seek the lowest point and create a surface that is hydraulically flat. If you don’t prime the floor first, however, the dry concrete will suck the moisture out of the leveling compound before it has a chance to level itself. This results in a lumpy, sandy mess that is harder to fix than the original dip.
| Substrate Type | Flatness Tolerance (per 10 ft) | Recommended Solution |
|---|---|---|
| Standard Ceramic Tile | 1/4 inch | Patching compound or SLC |
| Large Format Tile (15″+) | 1/8 inch | Full pour SLC |
| Natural Stone | 1/8 inch | Full pour SLC and anti-fracture membrane |
| Solid Hardwood | 3/16 inch | Sanding high spots or SLC |
The myth of the thick underlayment
Many DIY installers believe that a thick, cushioned underlayment or a heavy layer of thin-set can compensate for a wavy floor. This is a dangerous misconception that leads to catastrophic floor failure. Thin-set is an adhesive, not a leveling agent, and it will shrink as it dries. While most people want the thickest underlayment, too much cushion actually causes the locking mechanisms on LVP to snap under pressure and causes tile grout to crack. Thin-set is designed to be applied with a notched trowel to a specific thickness, usually around 3/32 to 1/8 of an inch after the tile is embedded. If you try to use thin-set to fill a half-inch hole, the moisture within the mortar will evaporate unevenly. This causes the mortar to pull away from the tile or the subfloor, leading to a hollow spot. You must level the floor first, then tile. Never try to do both at the same time.
“The Tile Council of North America requires a subfloor flatness of 1/8 inch in 10 feet for all large format tile installations to prevent lippage.” – TCNA Handbook
Moisture is the ghost in the slab
Before applying any self-leveling compound, you must test the concrete for moisture vapor emission rates. High moisture levels will prevent the primer from bonding and cause the leveling compound to delaminate over time. A simple calcium chloride test or an in-situ RH probe is necessary. If your slab is pushing up too much water, you need a moisture vapor barrier. Without it, the chemistry of the leveling compound is compromised. The alkaline salts in the concrete will rise to the surface, a process called efflorescence, and break the chemical bond of your adhesive. I have seen entire floors peel up like an orange rind because the installer didn’t check the RH levels in a basement. It is a costly mistake that no amount of grout can fix. You are not just building a surface, you are managing a chemical reaction between the earth and your home.
How to apply self leveling compound like a pro
Preparation is ninety percent of the job. You must sweep, vacuum, and then vacuum again. Any dust left on the floor acts as a bond breaker. Once the floor is pristine, apply a high-quality primer. This primer is the bridge between the old substrate and the new leveling layer. It seals the pores of the concrete. When you mix the compound, use a high-speed drill and a clean paddle. Follow the water ratios to the milliliter. If you add too much water, you weaken the crystalline structure of the cement. If you add too little, it won’t flow. Pour the material starting at the deepest point and use a gauge rake to spread it. Finally, use a spiked roller to release any trapped air bubbles. This ensures a smooth, glass-like finish that is ready for tile within twenty-four hours. It is a satisfying process when done right, but a nightmare when rushed.