
The grit beneath the gloss
Large format tile installation requires a perfectly flat subfloor and specialized handling tools to prevent lippage and structural failure. Using a simple suction cup allows for precise placement and back-buttering checks. Professional installers rely on these tools to manage the heavy weight and thin mortar beds typical of modern porcelain.
Most guys skip the leveling compound. They think the underlayment will hide the dip. It won’t. I spent three days grinding concrete on a job last month just so the floor wouldn’t click like a castanet. I was prepping for a massive slab installation in a high-end master bath. The homeowner had bought these beautiful forty-eight inch porcelain planks. They looked like Italian marble, but they were as unforgiving as a debt collector. If the floor is out by even a sixteenth of an inch, those edges will catch the light and look like a mountain range. I had my grinder out, the vacuum humming, and dust everywhere despite the shroud. It is the kind of work that breaks your back and fills your lungs with silica if you are not careful. But that is the difference between a floor that lasts fifty years and one that cracks when you drop a coffee mug. You cannot hide behind a thick layer of thin-set anymore. Modern adhesives are designed for thin-bed applications, not for building up low spots. When you are dealing with large format tile, or LFT, the physics of the bond change entirely. You are no longer just sticking a piece of ceramic to a floor. You are managing a massive, rigid plane that will fight every imperfection in the house. This is where the simple suction cup becomes the most valuable tool in the bucket. It is a five dollar solution to a thousand dollar problem. Without it, you are trying to wedge your fingers under a heavy slab while keeping your mortar ridges intact. It is a recipe for a failed bond and a miserable result.
Why your subfloor is lying to you
Subfloor flatness is the single most important factor in the success of any flooring project, especially for large format tile or hardwood floors. Wood and concrete move at different rates based on ambient humidity and temperature. Identifying deflection limits ensures that the rigid surface above does not crack or delaminate.
A subfloor might look flat to the naked eye, but the eye is a liar. I always carry a ten foot straightedge. When you lay that across a room, you see the truth. There are valleys and hills that will ruin your day. For large format tile, the TCNA requires a flatness of one eighth of an inch in ten feet. That is a tight tolerance. If you are installing hardwood floors, you might get away with a bit more, but not much. Solid oak or walnut will cup or crown if the moisture levels in the subfloor do not match the environment. I have seen fifteen thousand dollar wide-plank walnut floors turn into potato chips because the installer did not check the crawlspace. The subfloor acts as the foundation. If the foundation moves, the house falls. In the world of flooring, movement equals failure. We measure this movement as deflection. For tile, you are looking for a deflection limit of L over three hundred and sixty. This means the floor should not bend more than the span divided by three hundred and sixty under a standard load. If you are using natural stone, that requirement doubles to L over seven hundred and twenty. Most houses built by developers today barely hit the minimum. They use thin OSB and wide joist spacing. I often find myself adding a second layer of plywood or using a high-flow self-leveling underlayment to stiffen the whole assembly. It adds cost, but it saves the floor.
“A floor is only as good as the subfloor beneath it; deflection is the enemy of every joint.” – Master Flooring Axiom
The invisible vacuum of the glass lifter
Suction cups work by creating a pressure differential between the atmosphere and the space beneath the rubber seal. For tile installers, this tool allows for the vertical lifting and precise positioning of heavy porcelain without disturbing the mortar bed. This prevents air pockets and ensures a full mechanical bond between the tile and substrate.
You might see these tools in a glass shop or a window installation crew. In the flooring world, we call them the finger savers. When you have back-buttered a thirty pound tile, the last thing you want is to drop it or slide it into place. Sliding destroys the ridges you worked so hard to notch out with your trowel. When those ridges collapse unevenly, you get air pockets. Air pockets are where cracks start. I use a single-pad suction cup to drop the tile straight down. This allows me to pull it back up if I need to check the coverage. You cannot do that easily with your bare hands. The suction cup gives you a handle on a surface that has no handles. It allows you to vibrate the tile into the mortar bed, which is a process called collapsing the ridges. This ensures that the adhesive is touching one hundred percent of the tile back and the subfloor. For showers, this is non-negotiable. Any void in a shower floor or wall becomes a reservoir for mold and bacteria. I have pulled up tiles in old showers where the mortar was only touching half the tile. It was a swamp underneath. A five dollar tool prevents that by giving you the control to seat the tile properly every single time. It is about the physics of the bond. You want a continuous interface of polymer-modified cement.
Chemistry in the thin-set bond
Modern thin-set mortars are complex chemical mixtures containing Portland cement, graded sand, and water-retention agents. Polymer additives, such as ethylene-vinyl acetate, provide the flexibility and shear strength required to hold large format porcelain to a substrate. Understanding the open time and pot life of these chemicals is essential for a lasting bond.
When you mix a bag of high-performance mortar, you are starting a chemical reaction. This is not just mud. It is a structural adhesive. The polymers in the mix act like tiny bridges. They reach into the microscopic pores of the porcelain and the substrate to lock them together. Large format tiles are often very dense, meaning they have a water absorption rate of less than point five percent. This makes them hard to stick to. You need those polymers to create a mechanical lock. I always tell people to stop buying the cheap stuff at the big-box stores. They sell entry-level mastic or unmodified thin-set that has no place in a modern home. You want a mortar that meets or exceeds ANSI A118.15 standards. This is the heavy hitter of the tile world. It stays flexible. This is important because your house is breathing. It expands in the summer and shrinks in the winter. If your adhesive is too brittle, it will snap. I have seen entire floors pop loose because the installer used a cheap, dry-set mortar on a large tile. The tile stayed perfect, but it just let go of the floor. It sounded like a gunshot when it happened. That is the sound of chemistry failing. I also watch the clock. Every mortar has an open time. That is the window of time you have to get the tile into the bed before a skin forms. Once that skin forms, the bond is dead. You have to scrape it up and start over.
| Material Type | Janka Hardness / Density | Max Deflection Limit | Acclimation Time |
|---|---|---|---|
| Solid White Oak | 1360 lbf | L/360 | 7 to 14 Days |
| Porcelain Tile | High Density | L/360 | None |
| Natural Stone | Variable | L/720 | None |
| Laminate Flooring | Medium Density | L/240 | 48 Hours |
The 1/8 inch that ruins everything
Precision in flooring is measured in fractions of an inch, where a gap of even one eighth of an inch can lead to structural failure or aesthetic ruin. Expansion gaps at the perimeter are mandatory to allow for the natural movement of the building envelope. Ignoring these gaps causes buckling in laminate and hardwood floors.
I have walked into houses where the laminate was peaking at the seams like a tent. The homeowner was blaming the product, but the product was fine. The installer had jammed the boards tight against the baseboards. When the humidity spiked in July, the floor expanded. Since it had nowhere to go, it went up. Wood is a living material. Even after it is cut, dried, and finished, it reacts to the air. It is a bundle of tubes that suck up moisture. If you don’t leave that expansion gap, the floor will destroy itself. The same goes for large format tile, though for different reasons. We use movement joints in large tiled areas. Every twenty to twenty-five feet, you need a soft joint filled with silicone instead of grout. If you don’t, the stress of the house shifting will telegraph through the tile and cause a crack right down the middle of your beautiful floor. I see it all the time in commercial spaces where they tried to create a seamless look. There is no such thing as a seamless floor in a world that moves. You have to plan for the movement. You have to respect the eighth of an inch. It is the difference between a professional result and a DIY disaster. I spend a lot of time talking people out of bad ideas. They want no transitions and no gaps. I tell them they can have that for a week, or they can have a floor that stays flat for a decade. Most people choose the decade once they hear the cost of a teardout.
Why showers are the ultimate test of patience
Shower installations represent the most complex environment for flooring due to constant water exposure and temperature fluctuations. Effective waterproofing requires a continuous membrane and specific slope-to-drain ratios. Grout choice in these areas determines the longevity and maintenance requirements of the system.
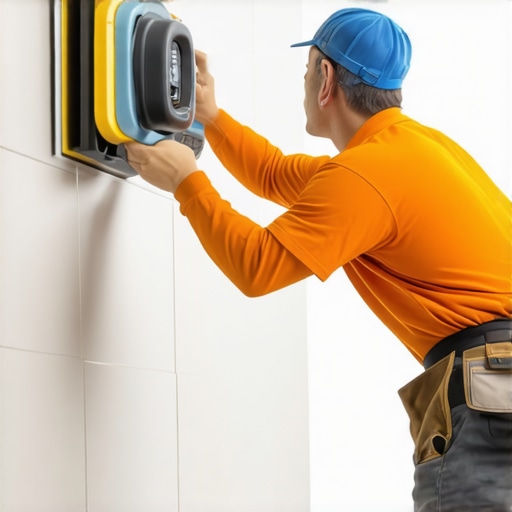
A shower is not just a place to wash up. It is a wet-room environment that is constantly trying to destroy the structure of your home. I use the TCNA Handbook as my bible here. You need a pre-slope, a waterproofing membrane, and a final slope. If you are using large format tiles on a shower wall, the suction cup is your best friend. Trying to hold a heavy porcelain slab against a vertical wall while the mortar is wet is a nightmare. You need the cup to position it and hold it until the mechanical suction of the mortar takes over. Then there is the grout. Most people think grout is waterproof. It isn’t. It is a porous filter. Water goes through it, which is why the membrane behind the tile is so important. I prefer epoxy grouts for showers, even though they are a pain to work with. They are non-porous and resistant to stains. If you use a standard sanded grout in a shower, you are going to be scrubbing it with a toothbrush in six months. I have seen showers where the grout was so moldy it looked black. That is because the installer didn’t use a high-performance grout or the homeowner didn’t seal it. But even the best sealer only lasts a year or two. In a shower, I want a grout that acts like a plastic. I want something that blocks the water from getting into the setting bed. It takes more time to apply, and it costs three times as much, but you never have to worry about it again. That is the mechanic’s way of doing things. You do it once, and you do it right.
“Grout is the most common point of failure in a wet environment; choose your chemistry wisely.” – Tile Council Standards
The checklist for a professional floor
- Check subfloor moisture levels with a pin-type or ultrasonic meter before starting.
- Verify joist spacing and subfloor thickness to ensure deflection limits are met.
- Grind down high spots and fill low spots with a cementitious leveling compound.
- Use a large-format-tile mortar with high polymer content to ensure a strong bond.
- Always back-butter the tile to achieve at least 95 percent coverage in wet areas.
- Use suction cups for handling and placing large slabs to avoid air pockets.
- Maintain a consistent expansion gap around the perimeter of the entire room.
- Select the correct grout type based on the joint width and environmental exposure.
The chemistry of the final seal
Sealing a floor is the final step in protecting the investment from environmental contaminants and moisture. For natural stone and cementitious grouts, a penetrating sealer provides a hydrophobic barrier within the pores. Hardwood floors require a poly-urethane or oil finish to prevent oxidation and liquid damage.
I remember a job where a lady spent twenty thousand dollars on tumbled travertine. It was beautiful, earthy, and full of character. Then her kid dropped a bottle of grape juice on it. Because the installer hadn’t sealed it, the juice soaked right into the stone. It was a permanent purple stain on a three hundred dollar tile. That is the kind of heartbreak I try to prevent. For stone, you need a high-quality solvent-based sealer. It doesn’t change the look, but it fills those microscopic holes so liquids bead up on top. For hardwood floors, I prefer a water-based polyurethane. The old oil-based stuff smells for weeks and turns yellow over time. Modern water-based finishes are incredibly tough. They use nano-ceramic particles to resist scratches. But you have to apply them in a clean environment. One speck of dust in the finish will look like a boulder once it dries. I always shut off the HVAC system and tack-cloth the entire floor three times before I open the can. It is about the environment. You have to control the variables. If you don’t, the variables will control you. Flooring is a science of details. If you miss one, the whole thing falls apart. Whether it is the five dollar suction cup or the hundred dollar gallon of sealer, every tool has a purpose in the architecture of a perfect floor.