
Most guys skip the leveling compound. They think the underlayment will hide the dip. It won’t. I spent three days grinding concrete on a job last month just so the floor wouldn’t click like a castanet. That same mindset applies to shower corners. You can’t just slap goop on a gap and expect a seal. I’ve seen thousand dollar laminate jobs ruined because a shower corner leaked and wicked moisture right under the transition strip. The water doesn’t care about your aesthetic. It follows the path of least resistance. It finds the microscopic gap in your grout and starts the slow rot of the subfloor. A perfect silicone bead is the difference between a dry house and a moldy nightmare. It requires more than a steady hand. It requires an understanding of surface tension and chemical adhesion.
The physics of silicone and why it sticks
Silicone caulk forms a waterproof barrier by creating a chemical bond with non-porous surfaces like tile and glass through a process called cross-linking. To achieve a professional finish in shower corners, the surfaces must be free of moisture and residual oils to allow the polymers to anchor deeply. When you apply a bead of 100 percent silicone, you are managing a viscous fluid that wants to stick to itself as much as the tile. If the tile is cold, the silicone moves like molasses. If it is hot, it flows too fast. The goal is a uniform concave shape that sheds water. Most people use their bare finger. That is a mistake. The oils on your skin contaminate the bond. The friction of skin on silicone creates a jagged surface. This is where the rubber glove trick becomes the standard for high-end installers. A nitrile glove provides a smooth, non-reactive surface that glides over the bead without pulling the material away from the edges. It is a tool, not just a covering.
Why most DIY shower seals fail within six months
Poor surface preparation and the use of the wrong sealant types are the primary reasons for premature failure in shower corners. Most homeowners rely on acrylic-based caulks that shrink as they dry, leading to hairline fractures that allow water to penetrate the grout and subfloor layers. You have to scrape out every bit of the old grout in the corner. Grout is rigid. Houses move. When the walls shift, the grout cracks. If you put silicone over cracked grout, the silicone will pull the grout away from the wall. You need a clean, open joint. I use a vacuum with a HEPA filter to pull the dust out of the crack. If there is dust, the silicone will stick to the dust instead of the tile. This leads to the classic ‘peeling’ effect. You see it all the time in cheap flips. They try to hide the gap between the tile and the hardwood floors with a big glob of caulk. It looks like garbage and fails by the first winter.
The actual mechanics of the rubber glove method
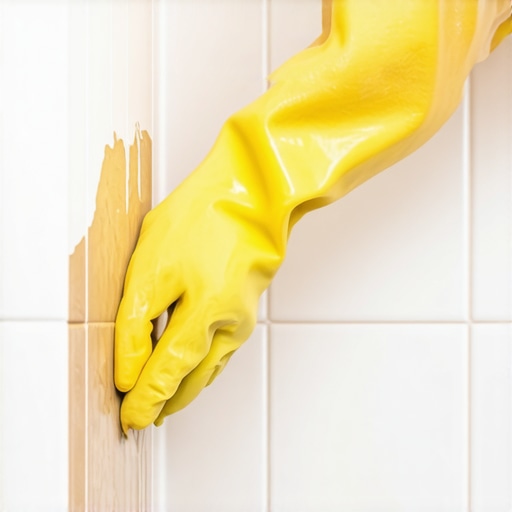
The rubber glove trick involves wearing a tight-fitting nitrile glove and using a lubricant like denatured alcohol or soapy water to smooth the silicone bead. This technique eliminates the drag associated with bare skin and creates a perfectly symmetrical concave profile that prevents water pooling in corners. Put on the glove. It needs to be tight. If the glove is loose, the excess material will fold and create ripples in the caulk. Apply a consistent bead of silicone using a high-thrust caulk gun. Do not go for a massive bead. You want just enough to fill the gap plus ten percent. Dip your gloved finger into a solution of water and a few drops of dish soap. Lightly press against the bead. Start from the top and pull down in one continuous motion. Do not stop. Do not lift your finger. The soap acts as a release agent. It allows the silicone to be shaped without sticking to the glove. This leaves the edges crisp.
The 1/8 inch that ruins everything
Maintaining a consistent 1/8 inch gap in the corner is the industry standard for allowing necessary structural expansion without compromising the sealant integrity. If the gap is too narrow, the silicone cannot compress, and if it is too wide, the material will slump before it cures. I’ve seen installers try to force silicone into a tight butt-joint where the tiles are touching. It won’t work. You need enough mass of silicone to handle the movement. Think of the silicone like a rubber band. If it is too thin, it snaps. If it is thick enough, it stretches. This is the same principle I use when installing hardwood floors. You leave that expansion gap at the perimeter for a reason. If you don’t, the floor buckles. In a shower, if you don’t have a gap, the silicone just sits on the surface. The first time the house settles, the silicone pops right off the tile.
“A floor is only as good as the subfloor beneath it; deflection is the enemy of every joint.” – Master Flooring Axiom
Material science behind the 100 percent silicone choice
Only 100 percent RTV silicone should be used in wet environments because it does not shrink and remains flexible for decades. Lower grade caulks containing fillers will evaporate over time, leaving the seal brittle and prone to detachment from the vertical planes of the shower. I smell the vinegar scent of acetic cure silicone and I know it is the real deal. It is tough. It is stubborn. It is a pain to clean up. But it works. Neutral cure silicone is better for stone like marble because it doesn’t stain. If you are dealing with a shower that transitions into a laminate floor hallway, you must be surgical. If that silicone seal fails, the water will travel under the tile and hit the core of that laminate. Laminate is basically pressed sawdust. It will swell up like a sponge. One bad corner can cost you a whole floor.
Structural movement and the failure of rigid grout
Grout is a cementitious product that lacks the elasticity required to bridge the intersection of two different structural planes. When walls expand and contract due to seasonal humidity changes, rigid grout in corners will inevitably crack, necessitating the use of a flexible sealant. Many people ask why they can’t just use matching grout caulk. Most grout caulk is just sanded acrylic. It looks like grout but it doesn’t have the lifespan of pure silicone. It dries out. It gets moldy. The rubber glove trick works best with the high-solids content of pure silicone. You want the material to stay where you put it. In my years on the job, I have never seen a grouted corner last more than two years without a crack.
| Material Type | Elasticity | Water Resistance | Lifespan |
|---|---|---|---|
| 100% Silicone | High | Excellent | 20+ Years |
| Siliconized Acrylic | Medium | Good | 5 Years |
| Standard Grout | None | Poor | <1 Year (Corners) |
Hardwood and laminate transitions near wet zones
Flooring materials like hardwood and laminate require strict moisture management when they are installed adjacent to bathrooms and showers. A failure in the shower corner sealant can lead to subfloor saturation, causing the organic fibers in the wood to expand and the finish to delaminate. I always check the moisture content of the subfloor before I even think about laying a plank. If the shower has been leaking because of a bad caulk job, the plywood will be holding water. You can’t see it, but the meter doesn’t lie. You lay wood over that and you are just asking for a callback. I tell my clients that the best insurance for their new hardwood floors is a twenty dollar tube of silicone and a pair of rubber gloves.
- Remove all old sealant with a razor scraper.
- Clean the joint with denatured alcohol to remove soap scum.
- Ensure the area is bone dry before application.
- Apply the bead with a steady, slow pressure.
- Smooth the bead with a lubricated nitrile glove.
- Avoid using the shower for at least 24 hours.
The ghost in the expansion gap
Invisible moisture vapor is the most dangerous element in a flooring installation because it works slowly to degrade adhesives and wood stability. Properly sealed shower corners prevent bulk water from entering the wall cavity, which is the leading cause of hidden structural rot. I once walked into a house where the homeowners thought they had a ghost. The floor was creaking and popping in the middle of the night. It wasn’t a ghost. It was the hardwood planks expanding and rubbing against each other because the subfloor was soaked. The source was a tiny pinhole in the shower caulk three rooms away. The water had traveled along the floor joists. That is the zoom-in reality of this business. Everything is connected.
“Moisture migration is the primary cause of flooring failure in adjacent living spaces.” – Master Flooring Axiom
Managing the transition to the bathroom floor
The threshold where the tile meets the bedroom flooring is the most vulnerable point for water damage. Using the rubber glove technique to create a watertight seal at the base of the shower door and along the perimeter of the bathroom floor prevents water from escaping into the living areas. I don’t use T-moldings if I can help it. I want a clean transition. But a clean transition needs to be a sealed transition. If you have laminate floors running up to a tile bathroom, you better have a plan for the water. People walk out of the shower dripping wet. If that water gets into the expansion gap of the laminate, the floor is done. I use the same rubber glove trick to put a thin, transparent bead of silicone at that transition. It is invisible but it stops the water.
Final verification of the seal integrity
After the silicone has cured, it should have a smooth, glossy finish with no visible bubbles or gaps between the sealant and the tile surface. A successful application using the rubber glove method results in a durable bond that can withstand daily thermal cycling and exposure to cleaning chemicals. Don’t touch it while it is curing. I’ve seen guys try to ‘fix’ a small bump ten minutes later. All you do is create a mess. If you messed up a spot, let it dry, cut it out, and redo it. The rubber glove trick is about getting it right the first time. It is about the speed and the consistent pressure. You are a mechanic of the home. You are building a machine that sheds water. Every bead of caulk is a part of that machine. Treat it with the same respect you give the layout of a wide-plank oak floor. Precision is the only thing that lasts. [{“@context”: “https://schema.org”, “@type”: “HowTo”, “name”: “How to Smooth Silicone Caulk with the Rubber Glove Trick”, “step”: [{“@type”: “HowToStep”, “text”: “Clean the corner joint thoroughly using a razor and denatured alcohol.”}, {“@type”: “HowToStep”, “text”: “Apply a consistent bead of 100 percent silicone caulk into the gap.”}, {“@type”: “HowToStep”, “text”: “Wear a tight nitrile glove and dip your finger into soapy water.”}, {“@type”: “HowToStep”, “text”: “Smooth the bead in one continuous motion to create a concave profile.”}, {“@type”: “HowToStep”, “text”: “Allow the sealant to cure for 24 hours before exposing it to water.”}]}]