
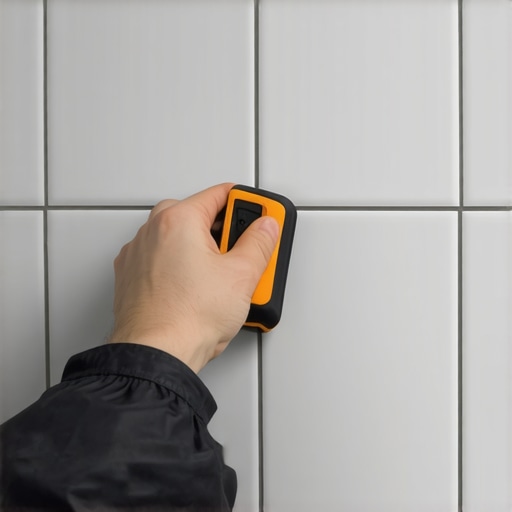
The Spacer Rule: Why You Can’t Trust Your Eyes for Tile Alignment
Most guys skip the leveling compound. They think the underlayment will hide the dip. It won’t. I spent three days grinding concrete on a job last month just so the floor wouldn’t click like a castanet. My boots were white with dust, and the smell of hot stone and WD-40 filled the air. I have been on my knees for twenty five years, and if there is one thing I have learned, it is that your eyes are liars. You see a straight line on a subfloor, but the level shows a valley. You see a square corner, but the laser shows an eighty eight degree nightmare. When you are installing hardwood floors, laminate, or showers, the grout lines are the only thing standing between a professional finish and a structural failure. You cannot eyeball a floor and expect it to survive ten years of foot traffic. Gravity and physics do not care about your visual intuition. They only care about the flat plane and the mechanical bond.
The illusion of the straight line
Tile alignment and grout joint width are determined by the ANSI A108 standards to ensure that porcelain or ceramic tile can handle structural deflection and thermal expansion. Using spacers creates a uniform grid that prevents lippage and ensures the integrity of the substrate. Your brain wants to find patterns where they do not exist. When you lay down a piece of large format tile, your perspective is skewed by the height of your own shoulders. This parallax error is the reason why a row that looks straight at the doorway looks like a crooked snake by the time you reach the far wall. Spacers are not just for aesthetics. They are mechanical governors that force the material to respect the math of the room. If you are working with a thirty six inch plank, a variance of even one thirty second of an inch at the start will result in a two inch gap at the end of a long run. This is not a suggestion. It is a law of geometry that every apprentice learns the hard way after they have already mixed three bags of thin set.
Why your subfloor is lying to you
Subfloor flatness must meet the TCNA requirement of no more than one eighth inch of variation over ten feet for large format tile. Professional installers use self leveling underlayment and mechanical grinders to prepare the concrete slab or plywood substrate before any thin set mortar is applied. A floor is a structural assembly. If the subfloor has a dip, the tile will try to bridge that dip. When you step on that tile, the air pocket underneath collapses, and the grout cracks. I have seen entire kitchen floors ruined because the contractor thought a thick bed of mortar would compensate for a wavy floor. It will not. Mortar is an adhesive, not a filler. It shrinks as it hydrates. If one side of the tile has a quarter inch of mud and the other side has an eighth, they will pull at different rates. The result is a floor that looks like a topographical map of the Rockies. You must spend the time with the straight edge and the floor patch. If you are not sweating over the prep work, you are not doing it right.
| Substrate Type | Max Deviation (10 ft) | Recommended Prep | Expansion Gap |
|---|---|---|---|
| Concrete Slab | 1/8 inch | Diamond Grinding | 1/4 inch |
| Exterior Plywood | 1/16 inch | Sanding Joints | 1/2 inch |
| Self Leveling | 1/32 inch | Primer Coat | 1/4 inch |
| Radiant Heat | 1/8 inch | Thermal Break | 1/2 inch |
The physics of the mechanical bond
Modified thin set contains polymer additives that create a chemical bond between the tile back and the substrate surface. Proper trowel technique involves directional troweling to collapse air ridges and achieve ninety percent coverage for wet areas like showers. When you press a tile into the mortar, those ridges flatten out. If you move the tile back and forth, you are creating a vacuum that sucks the tile down. This is where the spacer becomes vital. As you press, the tile wants to drift. Without a hard plastic spacer to stop it, the tile will slide into the path of least resistance. This is especially true on walls. Gravity is pulling that heavy stone down every second it sits in wet mud. The spacer is the only thing keeping your grout lines from collapsing. I have seen guys use toothpicks or folded cardboard. That is amateur hour. You need calibrated spacers that do not compress under the weight of the material. Anything less is just guessing.
“A floor is only as good as the subfloor beneath it; deflection is the enemy of every joint.” – Master Flooring Axiom
Grout and the science of the gap
Grout joints must be at least one sixteenth of an inch wide to allow for movement and to ensure the grout material can fully penetrate the joint. Sanded grout is required for joints larger than one eighth inch to provide structural stability and prevent shrinkage cracks. People always want those tiny, invisible grout lines. They want the floor to look like a single slab of stone. But a house is a living thing. It breathes. It expands in the summer and contracts in the winter. If you do not leave enough room for that movement, the tiles will push against each other until they pop off the floor. This is called tenting. I once saw a floor tent so violently it sounded like a gunshot. The grout is the shock absorber of the flooring world. It is softer than the tile for a reason. It is designed to take the stress so the porcelain does not have to. When you use a spacer, you are ensuring that the shock absorber is the same size across the entire surface.
Shower floors and the geometry of drainage
Shower installation requires a pre slope of one quarter inch per linear foot toward the drain assembly to prevent standing water and mold growth. The waterproof membrane must be integrated with the drain flange to create a sealed system that protects the subfloor from moisture intrusion. Showers are the ultimate test of an installer. You are fighting water, and water always wins eventually if you give it a chance. The spacers in a shower pan are even more important because you are working on a slope. Each tile is at a slightly different angle than its neighbor. If you do not maintain perfect spacing, the drain will not sit center, and the water will pool in the corners. I have spent hours trimming mosaic sheets just to make sure the grout lines stay consistent around a center drain. It is tedious work. It is the kind of work that makes your back ache and your eyes blur, but it is the difference between a shower that lasts fifty years and one that rots your floor joists in five.
The hardwood transition challenge
Hardwood floors require a perimeter expansion gap and a moisture barrier to prevent cupping and crowning caused by humidity fluctuations. When transitioning to tile, a T molding or Schluter strip must be used to protect the edges and allow the wood to move independently. Mixing hardwood floors and tile is a recipe for disaster if you do not understand the Janka Hardness Scale and the moisture content of the wood. Wood moves a lot more than tile. If you butt a piece of oak directly against a ceramic tile with only a bead of caulk, that wood will eventually crush the caulk or crack the tile. You need a transition that respects both materials. While most people want the thickest underlayment, too much cushion actually causes the locking mechanisms on LVP to snap under pressure. The same logic applies to wood. You want a solid, stable base. I always check the moisture of the subfloor with a pin meter before I even bring the wood into the house. If the house is at twelve percent and the wood is at six, you are going to have a bad time.
- Verify subfloor flatness using a ten foot straight edge
- Measure moisture content of concrete slabs using relative humidity probes
- Select the correct notched trowel based on tile size and back profile
- Use a laser level to establish a primary reference line in both directions
- Clean thin set out of the joints before it cures to ensure grout depth
- Calibrate the layout to avoid slivers or small cuts at the focal walls
“The National Wood Flooring Association mandates that solid wood flooring must be acclimated to the site’s equilibrium moisture content before installation.” – NWFA Standards Manual
The math of lippage
Tile lippage is the vertical displacement between adjacent tiles and is limited by ANSI standards to less than one thirty second of an inch for narrow joints. Leveling systems and large format spacers are used to mechanically pull tiles into a flush plane during the curing process. Lippage is what happens when one tile sits higher than the one next to it. It is a trip hazard. It catches the mop. It looks like garbage when the sun hits it from a low angle. Using spacers is the first step, but for big tiles, you need a leveling system. These are clips that go under the tile and wedges that go on top. They lock the two tiles together so they dry at the exact same height. Some guys call it cheating. I call it physics. Porcelain tiles are rarely perfectly flat. They have a slight crown from the kiln. A leveling system forces that crown out and creates a flat walking surface. It takes more time and more money, but the result is a floor that feels like a sheet of glass under your socks. If you are not using these tools on modern tile, you are living in the past. Your eyes cannot see a thirty second of an inch, but your toes will feel it every time you walk across the room. Stick to the spacers. Trust the level. Respect the subfloor. That is the only way to build a floor that outlasts the mortgage.