
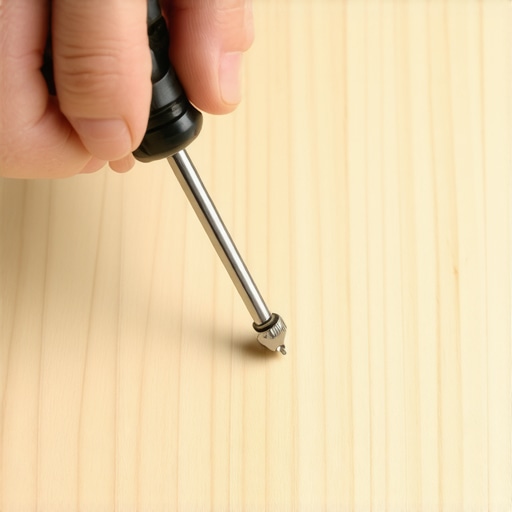
A stripped screw in a hundred year old plank of white oak is not just a nuisance. It is a mechanical failure that threatens the integrity of the entire installation. I once walked into a house where a $15,000 wide-plank walnut floor was cupping so bad it looked like a potato chip because the installer didn’t check the crawlspace humidity. The homeowner tried to fix the boards by driving screws through the face. Every single one of them stripped out because he used a high-torque impact driver on aged timber. He ended up with a floor that looked like a war zone and screws that wouldn’t budge. This is where the physics of friction becomes more important than brute force.
The friction that saves a project
The rubber band trick works by increasing the coefficient of friction between the screwdriver tip and the mangled recesses of the screw head. By placing a wide rubber band over the stripped hole, the rubber conforms to the remaining metal geometry, providing the grip necessary to transfer torque without further slipping. This method is the first line of defense before you reach for the drill bits and extractors that risk damaging the surrounding hardwood floors. The rubber acts as a sacrificial interface. It fills the gaps created by rounded edges in the screw head. You need a thick, wide band for this to work. Thin office bands will just shear under the pressure of the screwdriver. You want something with a high durometer rating that can withstand the rotational force required to break the bond between the metal threads and the wood fibers.
Why metal fails against ancient oak
Hardwood is a biological machine. It reacts to moisture, temperature, and pressure. When you drive a screw into a dense material like white oak or maple, the wood fibers are compressed to an extreme degree. Over time, these fibers can seize around the threads of the screw. This is known as mechanical interlocking. If the screw is made of a soft alloy, the head will give way before the threads break loose. This is especially common in older homes where the wood has had decades to petrify.
“A floor is only as good as the subfloor beneath it; deflection is the enemy of every joint.” – Master Flooring Axiom
A screw strips because the drive tool loses its seat. Most guys use the wrong bit size. They use a number two Philips when the screw might be a specific architectural fastener. Once that bit slips once, it creates a ramp of metal shavings. The rubber band stops that slip by creating a temporary custom fit. It is a primitive but effective solution to a complex metallurgical problem.
The structural reality of wood fiber
Wood density is measured by the Janka scale which dictates how much force a specific species can withstand before it deforms. High Janka ratings mean the wood provides more resistance to fasteners, which ironically makes stripping a screw more likely if you do not pre-drill correctly. The following table illustrates how different species affect fastener retention and the risk of stripping metal heads.
| Wood Species | Janka Hardness (lbf) | Fastener Resistance | Acclimation Time |
|---|---|---|---|
| White Oak | 1360 | High | 10 to 14 Days |
| Brazilian Cherry | 2350 | Extreme | 21 Days |
| Black Walnut | 1010 | Moderate | 7 to 10 Days |
| Laminate Core | N/A | Low | 48 Hours |
When you are working with Brazilian Cherry, you are basically working with rock. If you don’t use a high-quality stainless steel or hardened screw, the head will pop off or strip every single time. The rubber band trick is less likely to work on these ultra-dense woods because the torque required to move the screw often exceeds the shear strength of the rubber. In those cases, you have to move to heat. Applying a soldering iron to the screw head for sixty seconds can sometimes expand the metal enough to break the friction bond with the wood fibers.
The extraction of a failed fastener
To execute the rubber band trick, you must use a manual screwdriver rather than a power drill to maintain maximum control over the downward pressure. Place the band flat over the screw head and slowly insert the bit into the most intact part of the drive recess. Follow this checklist for a successful removal without ruining your hardwood floors.
- Select a wide rubber band with a textured surface for maximum grip.
- Choose a manual screwdriver with a high-grip handle to allow for maximum downward force.
- Clear any sawdust or metal debris from the screw head using a dental pick.
- Apply steady pressure while turning counter-clockwise at a very slow pace.
- Keep a vacuum handy to remove any metal shards that could scratch the wood finish.
If the rubber band snaps, you are dealing with a seized thread. This usually happens because of moisture. If the subfloor has high moisture content, the screw can rust in place. This creates a chemical bond between the iron and the wood tannins. This is a common issue near wet areas like showers where the grout might be failing. When grout in a bathroom fails, water migrates under the transition strip and into the subfloor of the adjoining room. That moisture travels up the screw shaft and locks it in place through oxidation.
The physics of the expansion gap
Expansion gaps are the lungs of a hardwood floor and failing to respect them often leads to the exact structural stress that snaps or strips fasteners. A floor that cannot move will put immense lateral pressure on any screw used to pin it down. You see this in amateur laminate installations where they try to screw the transition strips directly through the planks. The floor moves but the screw doesn’t. Eventually, the screw head strips or the laminate buckles. Most people think a 1/8 inch gap is enough. It isn’t. The NWFA suggests at least 1/2 inch to 3/4 inch depending on the species and the regional climate.
“Wood is hygroscopic; it will always seek an equilibrium with the moisture in the surrounding air.” – Master Flooring Axiom
If you are in a high-humidity environment, that screw is under constant tension. When you try to back it out, you are fighting the weight of the entire floor pushing against the side of the fastener. The rubber band trick provides the grip, but sometimes you need to relieve the pressure on the floor first by trimming the expansion gap with a toe-kick saw.
Chemistry in the adhesive bond
Modern flooring isn’t just held by screws. We use silane-modified polymers that create a flexible but unbreakable bond. However, when these adhesives get into the head of a screw during a glue-assist installation, they dry as hard as plastic. If you find a screw head filled with adhesive, the rubber band trick will fail because the bit cannot seat. You must use a solvent or a mechanical pick to clean that drive recess completely. I have seen guys try to use wood filler to hide a stripped screw. This is a hack move. The proper way is to extract the screw, plug the hole with a matching wood dowel, and re-drill. This maintains the structural integrity of the plank. Using the rubber band allows you to save the plank without having to use an extractor bit which usually leaves a much larger hole. The goal is always the smallest possible surgical intervention.
The 1/8 inch that ruins everything
Precision is not a suggestion in flooring. It is the law. If a subfloor has a dip of more than 1/8 inch over a ten-foot span, every fastener in that area is going to be stressed. When a person walks over that dip, the floor deflects. That movement acts like a claw hammer on the screws. It slowly pulls them or wiggles them until the wood fibers around the threads are crushed. Then the screw starts to squeak. Homeowners try to tighten these screws to stop the noise, but because the wood fiber is already compromised, the screw just spins and strips. While most people want the thickest underlayment to fix this, too much cushion actually causes the locking mechanisms on laminate and LVP to snap under pressure. You don’t fix a dip with underlayment; you fix it with self-leveling compound or by sistering the joists. If you’re trying to back out a screw in a deflected area, you need to lift the board slightly to take the pressure off the threads while you use the rubber band trick. This reduces the friction enough for the rubber to do its job.