
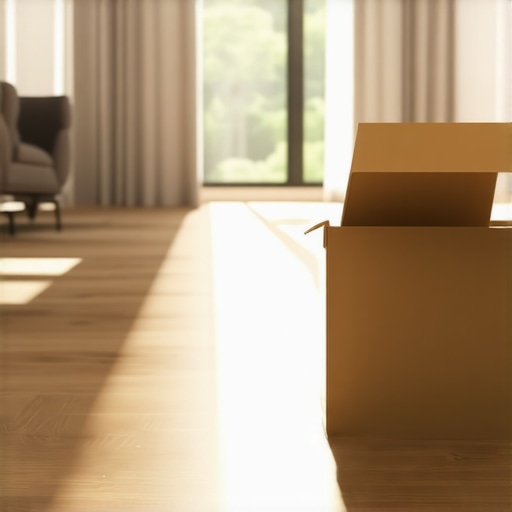
Why You Should Always Acclimate Laminate in the Middle of the Room
I have spent twenty five years on my knees with a moisture meter and a level. You can tell a hack from a pro by how they stack the boxes. If you see laminate piled against a cold exterior wall, walk away from that job immediately. I once saw a fifteen thousand dollar wide-plank walnut floor cupping so bad it looked like a potato chip because the installer did not check the crawlspace humidity and stacked his materials next to a drafty sliding glass door. My boots smell like WD-40 and oak dust, and my joints ache when a storm is coming, but my floors never buckle. We are talking about the structural integrity of your home, not just some weekend DIY decoration project.
The physics of wood fiber expansion in the center of the room
Acclimating laminate in the middle of the room ensures the High Density Fiberboard (HDF) core reaches equilibrium moisture content (EMC) in a stable environment. Placing boxes in the center of the living space, away from thermal bridging and exterior wall moisture, prevents uneven expansion of the planks. This allows the melamine wear layer and the balancing film to stabilize simultaneously before the clicking process begins. When you stack boxes against a wall, the side facing the drywall absorbs moisture at a different rate than the side facing the open room. This creates a microscopic curve in the board that will haunt you during the installation process. The core of a laminate plank is essentially compressed sawdust held together by urea-formaldehyde resins. These fibers are hygroscopic, meaning they act like tiny sponges. If those sponges are not at the same temperature and humidity as the air they will live in for the next twenty years, they will fight you. I have seen guys skip the leveling compound and then wonder why their floor clicks like a castanet. It is because the boards were not ready for the environment.
The danger of moisture vapor transmission from concrete slabs
Concrete subfloors act as a massive reservoir for moisture vapor that can destroy a floating floor system if not properly managed. You must perform a calcium chloride test or use an in-situ probe to measure the relative humidity (RH) of the slab before the first plank touches the ground. Most manufacturers demand a reading below 75 percent RH. If you are working in a basement, that slab is a living, breathing entity. It pulls moisture from the earth and pushes it upward. Without a 6-mil poly vapor barrier, that moisture hits the bottom of your laminate and stays there. The fibers swell, the joints peak, and suddenly your beautiful floor looks like a rolling sea. I spent three days grinding concrete on a job last month just so the floor would not have a 1/8 inch dip that would have snapped the locking mechanisms. People want to talk about colors and textures, but the real work happens in the chemistry of the bond and the physics of the subfloor. If the subfloor is not flat to within 3/16 of an inch over a ten foot radius, your laminate is doomed regardless of how long it sat in the room.
“A floor is only as good as the subfloor beneath it; deflection is the enemy of every joint.” – Master Flooring Axiom
Why waterproof labels are often misleading for homeowners
Waterproof laminate flooring typically refers to the topical moisture resistance of the surface and the wax-impregnated joints, not the ability to withstand flooding. If water gets under the perimeter or through the expansion gap, the HDF core will still swell and delaminate. This is why you should never install laminate in showers or wet rooms where standing water is a constant threat. Unlike ceramic tile which uses portland cement grout to create a rigid, water-resistant grid, laminate is a floating system. It needs to move. If you trap it under a heavy kitchen island or a bathroom vanity, you have effectively killed the floor. It cannot breathe. It cannot shift with the seasons. I have seen homeowners treat their living room like a swimming pool because the box said waterproof. That is a marketing lie. The only truly waterproof floors are those that can be submerged without structural change, like certain luxury vinyl planks (LVP) or porcelain tile. Even then, the static load of a heavy refrigerator can pin a floating floor down, causing it to separate at the weakest joint during a dry winter month.
| Material Type | Recommended Acclimation | Janka Hardness Rating | Expansion Requirement |
|---|---|---|---|
| Solid Hardwood | 7 to 14 Days | 1290 (White Oak) | 3/4 inch |
| Engineered Wood | 3 to 5 Days | Variable | 1/2 inch |
| Laminate (HDF) | 48 to 72 Hours | N/A (AC Rating) | 3/8 inch |
| LVP (SPC Core) | 24 to 48 Hours | N/A | 1/4 inch |
The ghost in the expansion gap and perimeter traps
Expansion gaps are the most misunderstood installation requirement in the flooring industry, providing the necessary space for the floor to grow as humidity rises. You need a minimum of 3/8 of an inch around the entire perimeter, including doorways, pipes, and transitions. Many installers try to hide the gap with baseboards or quarter round, but if you nail that trim into the flooring instead of the wall, you have locked the floor in place. This is a death sentence for a floating floor. It will buckle. It will peak. It will eventually snap the tongues off the planks. I once walked into a house where the homeowner had used silicone caulk to fill the expansion gap because they did not like how it looked. Within three months, the floor had pushed the baseboards off the wall. The force of expanding wood is immense. It can bend steel nails and crack drywall. You have to respect the movement. You have to allow the floor to be its own independent slab, floating on top of the underlayment. Speaking of underlayment, do not buy the thickest, softest pad you can find. While most people want the thickest underlayment for comfort, too much cushion actually causes the locking mechanisms on laminate to snap under pressure because the floor deflects too much when you walk on it.
The 1/8 inch that ruins everything in your installation
Subfloor levelness is the single most common cause of floor failure and joint separation in modern residential construction. If you have a dip in your plywood or concrete, the laminate will bridge over it. Every time you step on that spot, the plank flexes. Over thousands of footsteps, that microscopic bending fatigues the click-lock system until the fiberboard breaks. Then you have a gap that you can never close. I do not care how much you spent on the material. If you do not spend the time with a straightedge and self-leveling underlayment, you are wasting your money. You also need to consider the Ambient Air Temperature. If you are installing in a house that does not have the HVAC system running, you are asking for trouble. The house should be between 60 and 80 degrees Fahrenheit. The humidity should be between 35 and 55 percent. Anything outside of that range and the material is going to change shape the moment the air conditioner kicks on in July or the heater starts up in December. I have seen hardwood floors in the high desert of Arizona shrink so much in the winter that you could drop a nickel between the boards. Laminate is more stable, but it is not immune to the laws of thermodynamics.
“Wood moves. It is a biological fact that no amount of glue or finish can fully suppress.” – NWFA Technical Manual
The chemistry of adhesives and core density
Melamine resins and aluminum oxide coatings provide the durability of laminate, but the density of the core determines its life span. A high-quality laminate will have a core density of over 850 kilograms per cubic meter. This density provides the impact resistance needed to survive dropped kitchen knives or heavy foot traffic. When you are acclimating these boards, you are letting those resins and fibers reach a state of stasis. If you rush the process, you are inviting delamination. The bond between the decorative paper layer and the HDF core is strong, but it is susceptible to shear forces if the core is expanding while the top layer remains static. This is why you see peeling in cheap products. They use lower density cores and less stable resins. If you are looking at hardwood floors, you are dealing with a whole different animal, but the principle of the moisture barrier remains the same. You have to protect the wood from the house and the house from the wood.
Professional Installation Checklist
- Measure the moisture content of the subfloor and the flooring material using a pin-style or pinless meter.
- Clean the subfloor of all debris, drywall mud, and old adhesive residues.
- Verify the subfloor is level within 3/16 of an inch over 10 feet.
- Stack the laminate boxes in a log cabin pattern in the center of the room.
- Maintain a consistent HVAC temperature for at least 72 hours prior to installation.
- Leave a 3/8 inch expansion gap around all vertical obstructions.
- Use a tapping block and a pull bar to avoid damaging the tongues.
- Install a vapor barrier over all concrete or crawlspace-adjacent subfloors.
The final word on floor movement is simple. Respect the material. Laminate is an engineered marvel that allows for beautiful hardwood floor looks at a fraction of the cost, but it requires an architect’s precision to install correctly. Stop looking at the color and start looking at the mil-thickness of the wear layer. Stop worrying about the grout lines of the tile you replaced and start worrying about the deflection of your floor joists. If you follow the rules of the NWFA and the TCNA, and you give the boards their 72 hours of peace in the middle of the room, you will have a floor that lasts. If you cut corners, I will be the guy you call in two years to tear it all out and start over. And trust me, I am much more expensive the second time around. Your floor is a performance surface. Treat it like one.