
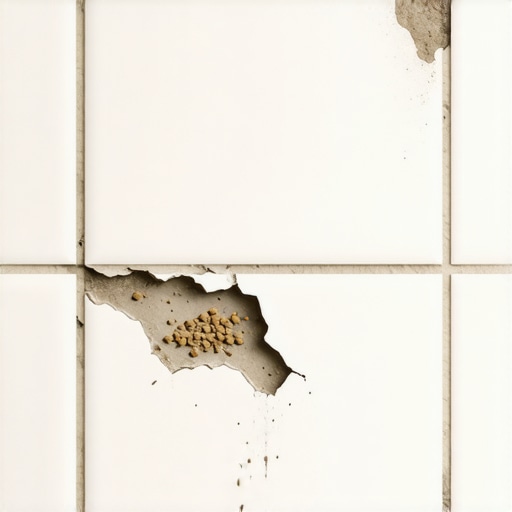
I spent three days grinding concrete on a job last month just so the floor wouldn’t click like a castanet. Most guys skip the leveling compound. They think the underlayment will hide the dip. It won’t. I have seen this same shortcut taken in showers more times than I can count. When you see grout turning into powder or sloughing off like beach sand, you aren’t looking at a cleaning problem. You are looking at a structural or chemical failure. A floor is a performance surface. It is a system of layers that must work in perfect harmony. If one layer fails, the whole stack comes down. In my twenty-five years of fixing botched installations, the culprit is almost always hidden beneath the surface. You cannot hide a bad subfloor with pretty tile.
The structural movement that destroys grout joints
Grout failure in showers is primarily caused by excessive deflection in the subfloor or wall framing which exceeds the rigid capacity of the cementitious bond. When a floor system bends beyond the L/360 standard, the grout, which is essentially a brittle masonry bridge, undergoes compression and tension it was never designed to handle. This creates micro-fractures. Over time, these fractures allow water to penetrate, further degrading the bond until the material simply reverts to its granular state. You can scrub it, you can seal it, but you cannot stop the laws of physics from tearing it apart if the house is moving too much beneath your feet.
The Tile Council of North America, known as the TCNA, has strict guidelines on this. If you are installing heavy natural stone, that deflection limit doubles to L/720. Most builder-grade homes are barely hitting the L/360 mark with their 24-inch on-center joist spacing. I have walked into bathrooms where I could feel the floor bounce. In those cases, I don’t even talk about tile yet. We talk about sistering joists or adding a second layer of exterior-grade plywood. If the skeleton is weak, the skin will crack. This is the hard truth that many discount installers won’t tell you because they want to finish the job in two days and disappear before the first crack shows up.
“A floor is only as good as the subfloor beneath it; deflection is the enemy of every joint.” – Master Flooring Axiom
The chemistry of a botched hydration process
Improper mixing ratios and the use of too much water during the cleanup phase are the leading causes of grout becoming soft and powdery. When you add too much water to the initial mix, you dilute the polymer additives and create microscopic voids in the cement matrix once the water evaporates. This results in a low-density material that has no compressive strength. Furthermore, if an installer uses a soaking wet sponge to wipe the tiles, they are essentially washing the cement right out of the top layer of the joint. What remains is a high concentration of sand with no binder to hold it together.
We call this dry-shaking or washing out the joint. It is a hallmark of a rushed job. Cement requires a specific amount of water to undergo the chemical process of hydration. If you mess with that ratio, you are effectively creating a sandcastle. I have seen guys use a garden hose to clean up their grout haze. It makes me sick. You should be using a damp, well-wrung sponge and changing your water constantly. If the water in your bucket looks like milk, you are just spreading weak cement back into the joints. This is why your grout feels like it is disintegrating when you touch it with a fingernail.
| Material Property | Standard Cement Grout | High-Performance Grout (ANSI A118.7) | Epoxy Grout |
|---|---|---|---|
| Water Absorption | High | Low | Near Zero |
| Flexural Strength | Low | Medium | High |
| Stain Resistance | Minimal | High | Maximum |
| Cure Time | 24-48 Hours | 3-4 Hours | 24 Hours |
The ghost in the expansion gap
A total lack of movement joints at the change of plane is a guaranteed recipe for grout de-bonding and crumbling in shower corners. Physics dictates that every building material expands and contracts with changes in temperature and humidity. In a shower, you have hot water hitting cold tile. This creates thermal shock. If you have filled the corners where the walls meet or where the wall meets the floor with rigid grout, there is nowhere for that energy to go. The grout will be crushed by the expanding tile or pulled apart as it shrinks.
The TCNA EJ171 standard is very clear about this. You must use a flexible sealant, typically a 100 percent silicone caulk, at all changes of plane. If your installer ran grout into the corners, they failed the most basic test of professional tile work. That grout will crack within six months. Once it cracks, water gets behind the system. In many older homes, we see hardwood floors in adjacent rooms starting to buckle because water from a failing shower corner is migrating through the subfloor. It is a slow-motion disaster that starts with a single 1/8 inch mistake. People love the look of a continuous grout line, but you cannot fight the expansion of matter.
The myth of the waterproof tile
Tile and grout are not inherently waterproof systems and they rely entirely on the moisture management layer hidden directly beneath the thin-set. Many homeowners assume that because tile is glazed and grout is hard, the water just stays on top. This is a dangerous lie. Cementitious grout is porous. It acts like a hard sponge. Water will eventually migrate through it. If you have a traditional mud bed with a simple PVC liner buried deep beneath several inches of concrete, that water sits in the mortar bed forever. This leads to a swampy, stinking mess that eventually rots out the framing.
When we talk about modern showers, we talk about surface-applied membranes. Whether it is a liquid-applied roll-on or a bonded sheet membrane, the goal is to keep the water in the tile layer where it can evaporate. If your grout is sloughing off, it might be because the substrate behind it is constantly saturated. If the thin-set is always wet, it loses its bond. I have seen installations where the installer used a moisture-sensitive adhesive in a wet area. That is a crime in my book. You need a modified thin-set that can handle constant immersion. If you are seeing white, crusty deposits on your grout, that is efflorescence. It is a sign that water is moving through the system and carrying minerals to the surface. It is a warning light on your dashboard that you shouldn’t ignore.
Precise installation checklist for a permanent bond
- Verify subfloor stiffness meets L/360 for ceramic or L/720 for natural stone.
- Ensure the substrate is free of dust, oils, and bond-breakers before applying thin-set.
- Use a moisture meter to check that the wood subfloor is within 2 percent of the ambient humidity.
- Measure water for grout mixing with a graduated cylinder to ensure exact ratios.
- Wait the full manufacturer-recommended slake time before the final mix of the grout.
- Install 100 percent silicone sealant at all corners and changes of plane.
- Wait at least 72 hours before exposing new grout to heavy water flow.
Why your subfloor is lying to you
A subfloor may look flat to the naked eye while actually possessing significant dips that cause the locking mechanisms of flooring to snap. I see this mostly with people trying to transition from a shower to a bedroom with laminate or hardwood floors. They think because the shower floor is new, the rest of the room is fine. It isn’t. If you have a 3/16 inch dip over a 10-foot span, your flooring will flex every time you step on it. This vertical movement is the silent killer of floors. It pulls at the transitions. It puts pressure on the shower curb. It eventually leads to the grout in the doorway crumbling because the transition strip is bouncing like a trampoline.
While most people want the thickest underlayment possible, too much cushion actually causes the locking mechanisms on LVP or laminate to snap under pressure. You need a firm base. I spent those three days grinding that concrete because I knew that if I didn’t, the floor would fail. The homeowner complained about the dust and the noise. I told them they could have a quiet job now and a broken floor in a year, or a loud job now and a floor that lasts thirty years. They chose the noise. That is the difference between a contractor and a craftsman. One wants your money; the other wants his work to outlive him.
“Deflection is the silent killer of the ceramic installation; the eye sees the beauty, but the foot feels the failure.” – Master Flooring Axiom
The 1/8 inch that ruins everything
A single missing expansion gap at the perimeter can cause an entire floor to tent or grout joints to explode across the room. This applies to the shower and the adjacent rooms. If you are running hardwood floors up to a shower marble threshold, you need a gap. Wood expands. If it hits that marble with nowhere to go, it will either buckle or it will push that marble right off the thin-set bed. I have seen showers where the wall tile was tight to the ceiling. When the house settled in the winter, the pressure from the ceiling joists pushed down on the wall tile, crushing the grout joints and popping the tiles off the wall. We call this structural loading. You must leave a gap at the top. You must leave a gap at the bottom. You cover these gaps with trim or sealant, but you never, ever fill them with grout. It is a basic rule that is ignored every single day by guys who learned their trade from a five-minute video.