
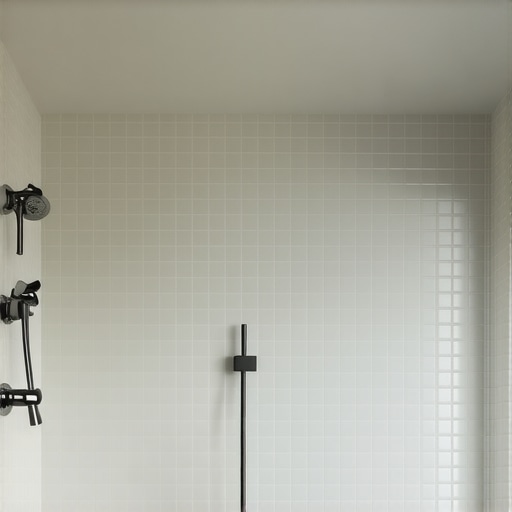
Why Your Shower Tile Pattern Looks Crooked Near the Ceiling
Most guys skip the leveling compound. They think the underlayment will hide the dip. It won’t. I spent three days grinding concrete on a job last month just so the floor wouldn’t click like a castanet. When a homeowner calls me to complain that their shower tile pattern looks slanted or wedge-shaped near the top, they usually blame the ceiling or the crown molding. They are wrong. The failure started weeks ago when the studs were framed or when the subfloor was ignored. A floor is a performance surface. If the foundation is out of plumb by even a sixteenth of an inch at the base, that error compounds as you move up the wall. By the time you hit the six-foot mark, you are staring at a massive, ugly sliver of tile that screams amateur hour.
The invisible failure of wall plumbness
Shower walls are almost never perfectly vertical or square in standard residential construction. When ceramic tile or porcelain tile is installed on a wall that leans, the grout lines act as a visual grid that highlights every structural defect in the framing. This happens because gravity and geometry do not negotiate. If the bottom of your wall is wider than the top, your rectangular tiles will eventually require a diagonal cut to bridge the gap. I have seen guys try to hide this by shimming the backer board, but if you do not start with a laser level and a straight edge, you are just chasing a ghost.
“A floor is only as good as the subfloor beneath it; deflection is the enemy of every joint.” – Master Flooring Axiom
The 1/8 inch that ruins everything
Tile layout requires mathematical precision and a deep understanding of spatial plane alignment. If an installer starts a running bond pattern without checking the ceiling height at both corners, they will inevitably end up with a sliver cut. A sliver cut is a thin piece of tile, often less than an inch wide, that makes the entire shower enclosure look crooked. I always tell my apprentices to dry-lay the grid. You measure the total height, divide by the tile width plus the grout joint, and adjust your starting course. If the math says you will have a tiny piece at the top, you cut the bottom row so the top row is at least half a tile. This creates a symmetrical visual field that hides the fact that your house is settling into the dirt.
Why your subfloor is lying to you
Subfloor deflection and joist spacing are the primary causes of grout failure and tile misalignment in modern bathrooms. If your subfloor is 1/2 inch plywood over 24 inch centers, that floor is going to bounce like a trampoline. Every time you step in that shower, you are putting stress on the thin-set bond. Eventually, the vapor barrier or the waterproof membrane will stretch or tear. This movement translates up the wall studs. If the floor joists are not stiff enough to meet L/360 standards, the walls will kick out at the base. You might not see the movement with the naked eye, but your laser level will show a wall that is bowing outward, causing the tile pattern to drift away from the vertical axis.
| Material Type | Janka Hardness | Deflection Limit | Acclimation Time |
|---|---|---|---|
| Solid White Oak | 1360 | L/360 | 10 to 14 Days |
| Engineered Walnut | 1010 | L/480 | 3 to 5 Days |
| Porcelain Tile | N/A | L/720 | None |
| LVP Flooring | N/A | N/A | 48 Hours |
Chemical bonds and thin-set physics
Polymer-modified thin-set is not just glue, it is a chemical engineering marvel that creates a mechanical bond between the tile back and the substrate. In a shower environment, you need a C2S1 or C2S2 rated adhesive to handle the thermal expansion. When hot water hits porcelain, the material expands. When it cools, it contracts. If your thin-set is too rigid, it will snap. If it is too soft, the tile will slump during the curing process. Slumping is a major reason why tile patterns look crooked. If the mortar does not have enough grab, the weight of the tiles above will push the lower tiles down, closing the grout joints and ruining the horizontal alignment. I always check the wetting out of the mortar to ensure 100 percent coverage, because air pockets are just invitations for mold and structural failure.
The ghost in the expansion gap
Expansion joints are the most ignored part of a professional tile installation, yet they are required by TCNA EJ171 standards. You cannot run tile tight into a corner or up against a ceiling. You must leave a gap. If you pack that gap with hard grout, it will crack or spall because it has nowhere to go when the house shifts. You must use 100 percent silicone sealant that matches your grout color. This allows the wall planes to move independently. When an installer ignores this, the pressure of the expanding tiles can actually lift the ceiling course, making the pattern look like it is diving into the drywall. It is a common mistake made by contractors who think caulk is for amateurs. In reality, caulk is the only thing keeping your shower from exploding during a temperature swing.
“A floor is only as good as the subfloor beneath it; deflection is the enemy of every joint.” – Master Flooring Axiom
The gravity of grout selection
Grout joints provide the visual contrast that defines the tile pattern. If you choose a high-contrast grout, like black grout with white subway tile, every fractional error is magnified by a thousand. I recommend using epoxy grout for showers because it is non-porous and chemically resistant. It does not shrink like cementitious grout. When standard grout dries, the water evaporates and the mass of the joint decreases. This shrinkage can pull tiles out of alignment if the spacers were removed too early. If you want a shower that looks like a grid of perfection, you need to understand the molecular density of the filler material you are shoving into those joints. I have seen expensive stone ruined by pigment migration from cheap, unbuffered grout.
- Check wall plumbness with a 6-foot level before ordering tile.
- Verify that subfloor deflection meets L/720 for large format tile.
- Use a self-leveling laser to establish a datum line around the entire room.
- Apply a topical waterproofing membrane to prevent moisture-induced stud swelling.
- Ensure 95 percent thin-set coverage in all wet areas per ANSI standards.
- Plan the layout to avoid sliver cuts at the ceiling and floor transitions.
The thermal reality of modern bathrooms
Radiant heat systems and steam showers introduce extreme temperature gradients that most flooring materials cannot handle. If you are installing hardwood floors outside a shower, the humidity from the bathroom will cause the wood to cup or crown if you do not have a dedicated ventilation system. I have walked into luxury homes where the walnut floors were buckling because the master bath was essentially a sauna with no moisture barrier. You need to think about the building envelope as a whole. The crooked tile in your shower might actually be caused by the subfloor expanding in the bedroom. It is all connected by joists and fasteners. If one part of the structural system fails, the aesthetic finish is the first thing to show the damage.