
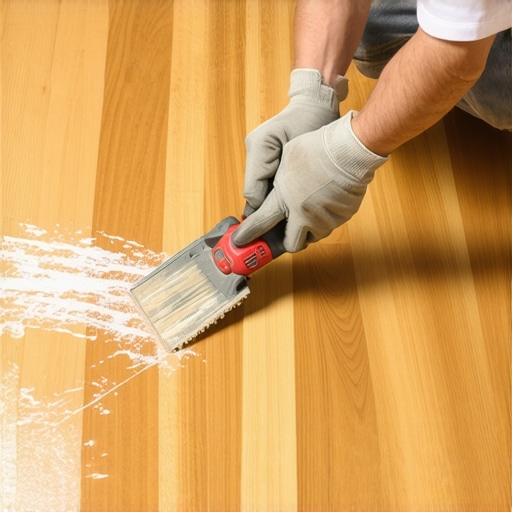
I once walked into a house where a 15000 dollar wide plank walnut floor was cupping so bad it looked like a potato chip because the installer did not check the crawlspace humidity. That was a tragedy of moisture. But just as painful is seeing a pristine floor marred by hardened blobs of polyurethane construction adhesive. It happens more often than you think. A contractor gets sloppy with the subfloor glue. A DIY enthusiast drops a bead of Liquid Nails. They try to wipe it while it is wet. They end up smearing it into the grain. By the time it is discovered, the mess is a rock hard ridge of chemical bonding agents that feels more like concrete than glue. Removing this without destroying the wood fibers or the topcoat is a surgical operation. You cannot just hack at it with a paint scraper. You need to understand the physics of the bond and the chemistry of the solvents involved. I have spent 25 years looking at floors from the ground up. I know that wood is not a static material. It is a bundle of cellular tubes. When you introduce a high strength adhesive, it forms a mechanical lock within those tubes. Removing it requires a balance of thermal energy, chemical softening, and mechanical precision. If you rush, you will be looking at a full sand and refinish job. If you follow the steps I have developed over decades of fixing other people’s mistakes, you can save the floor.
The nightmarish reality of adhesive spills
To remove dried construction adhesive from hardwood you must soften the bond using a solvent like mineral spirits or a specialized adhesive remover before carefully scraping with a plastic putty knife. This process requires patience because aggressive mechanical force will tear the wood fibers or gouge the finish beyond repair. You have to work in small sections and allow the chemistry to do the heavy lifting rather than your muscles. Construction adhesives are formulated to resist moisture and temperature fluctuations. They are often moisture cured polyurethanes. This means they actually use the humidity in your home to get stronger. When they sit on a finished floor, they create a secondary bond with the polyurethane or aluminum oxide finish. If you try to pop it off dry, the adhesive is often stronger than the bond between the finish and the wood. You will end up pulling the finish right off the plank. This leaves a ghost mark or a crater that is impossible to hide. You have to break that bond at the molecular level before you apply any upward or lateral pressure. Most guys in this business are too fast. They want to get in and out. But a floor is a performance surface. It requires a delicate touch when it is under duress.
“A floor is only as good as the subfloor beneath it; deflection is the enemy of every joint.” – Master Flooring Axiom
Why scraping is a gamble with your grain
Mechanical scraping is the most dangerous part of the removal process because it introduces the risk of permanent indentation or gouging in the hardwood. You should never use a metal blade unless you have the hands of a neurosurgeon because one slip will create a valley in the oak or maple that no amount of wax will fill. I prefer a stiff plastic scraper or even a credit card for the initial pass. You have to consider the Janka Hardness Scale of the wood you are working on. If you are dealing with Brazilian Cherry, you have a bit more room for error. If you are working on White Pine or even a softer Walnut, the wood will compress under the pressure of a scraper. This creates a permanent bruise in the wood structure. When light hits that floor at an angle, that bruise will glow like a neon sign. You also have to worry about the heat generated by friction. If you scrape too fast, you can actually melt the adhesive back into the wood grain. This makes it twice as hard to remove on the second pass. It is about steady, even pressure. You want to feel the adhesive give way. You are not trying to cut the glue. You are trying to shear the bond between the glue and the floor finish. It is a game of patience and tactile feedback.
| Adhesive Type | Removal Difficulty | Best Solvent | Risk Level |
|---|---|---|---|
| Polyurethane | Very High | Mineral Spirits | Critical |
| Synthetic Rubber | Medium | Adhesive Remover | Moderate |
| Water Based | Low | Warm Water/Soap | Low |
| Epoxy Glue | Extreme | Heat/Acetone | High |
The chemistry of construction grade bonding agents
Construction adhesives are typically composed of polyurethane prepolymers or synthetic elastomers that create a permanent cross linked bond upon curing. These chemicals are designed to bridge gaps between subfloors and joists, which means they are excellent at filling the microscopic valleys in your hardwood grain. When the adhesive dries, it undergoes a chemical reaction that makes it nearly impervious to most household cleaners. This is why you cannot just use a damp mop. You need a non polar solvent. Mineral spirits are usually the gold standard because they have a slow evaporation rate. This allows the solvent to sit on the adhesive and penetrate the surface without immediately vanishing into the air. Acetone is too aggressive. It will eat through a standard floor finish in seconds. You want something that targets the glue without dissolving the protective layer of the wood. I always test a small, inconspicuous area first. Usually inside a closet or under where a baseboard will sit. You are looking for any sign of softening in the floor finish itself. If the finish stays hard but the glue gets tacky, you have the right chemical for the job.
Mineral spirits versus mechanical force
The use of mineral spirits allows for the chemical breakdown of the adhesive matrix which reduces the amount of physical force required for removal. This is the secret to preserving the integrity of the floor. You apply the solvent with a clean white rag. Do not use a colored rag because the solvent can cause the dye to bleed into the wood. Let it sit for five to ten minutes. You will see the edges of the adhesive blob start to curl or look slightly translucent. That is your window. Once the adhesive is softened, you can use your plastic tool to gently nudge it. If it does not move, do not force it. Reapply the solvent. I have seen guys spend hours scrubbing one spot. That is a mistake. You want the chemistry to do the work. If the adhesive is particularly thick, you might need to use a heat gun on its lowest setting. But be careful. Too much heat will blister the floor finish. You want just enough warmth to make the adhesive pliable. It is like working with cold taffy versus warm taffy. One breaks, the other stretches. We want the stretch. This protects the wood fibers underneath from being yanked out of the board.
A checklist for surface preservation
- Identify the type of hardwood and the finish type before applying any chemicals.
- Test your chosen solvent in a hidden area to ensure it does not dull the topcoat.
- Use only white lint free cloths to avoid dye transfer or debris contamination.
- Keep a plastic scraper and a dull wooden dowel handy for detail work in the grain.
- Work in small sections to prevent the solvent from drying out or spreading too far.
- Have a clean rag ready to neutralized the area with water or a specific floor cleaner afterward.
The ghost in the expansion gap
Adhesive that has dripped into the expansion gaps at the perimeter of the room can cause structural issues by locking the floor in place. Hardwood floors are living systems. They expand and contract with the seasons. If you have dried construction adhesive wedged between the floor plank and the wall, you have created a hard point. When the floor tries to expand in the summer, it will hit that block of glue. This leads to buckling or crowning in the center of the room. I have seen entire floors lift off the subfloor because a few globs of glue were left in the gaps. You must clear these out. Use a thin oscillating tool or a hand saw to carefully cut away the adhesive. Do not worry about the aesthetics here as the baseboard will cover it. Worry about the movement. A floor needs to breathe. If you lock it down with construction adhesive, you are asking for a catastrophic failure when the humidity spikes. It is the small details like this that separate a master installer from a guy with a hammer. You have to think three seasons ahead. What looks fine in the dry winter will be a disaster in the humid summer if that glue is not removed.
“Every hardwood plank is a straw that drinks moisture from the air; ignore this at your peril.” – Master Flooring Axiom
Recovering the finish after the cleanup
Once the adhesive is removed you will often find a dull spot or a slight residue left behind that requires a specific buffing technique to restore the original sheen. Even if you are careful, the solvent might have stripped some of the oils from the finish. I use a high quality floor buffing paste or a specialized hardwood touch up kit. Do not just spray furniture polish on it. Those contain silicones that will make it impossible to ever refinish the floor in the future. You want a product that is compatible with polyurethane. Rub it in a circular motion with a microfiber cloth. The goal is to blend the spot back into the surrounding area. If the adhesive actually took some of the finish with it, you might need to use a small artist brush to dab on some wipe on poly. It takes a steady hand. You are essentially performing a localized refinish. It will never be 100 percent perfect if you look at it with a magnifying glass, but to the naked eye, it will disappear. This is how you save a client thousands of dollars. You fix the problem at the source and restore the surface without calling in the big sanding machines. It is about respect for the material. Wood took decades to grow. It deserves more than a clumsy scraper and a lack of patience.
The hidden dangers of chemical interaction
Mixing different cleaning agents or solvents can lead to chemical reactions that permanently stain the wood or create hazardous fumes in an enclosed space. I never use ammonia based cleaners near mineral spirits. The reaction can be unpredictable. You also have to be aware of the moisture content in the wood. If you soak a spot with a water based remover and the wood is already at its moisture limit, you can cause localized swelling. This will make the edges of the plank rise. Now you have a physical hump and a glue stain. Always keep a moisture meter in your kit. If the wood is above 10 percent moisture, be extremely sparing with any liquid. You want the solvent to stay on the surface. If it gets into the joints, it can sit there for weeks, slowly eating away at the tongue and groove. I have seen floors where the glue was gone but the joints started squeaking six months later because the solvent destroyed the internal friction of the wood. It is a delicate ecosystem. Treat it with the same care you would a piece of fine furniture. Because that is what a hardwood floor is. It is a giant piece of furniture you walk on every day.
Why your subfloor is lying to you
The presence of construction adhesive on the surface often points to a deeper issue with how the subfloor was prepared or how the flooring was installed. If you see glue on the top of the boards, it means the installer was being messy or the subfloor was so uneven that they had to use excessive amounts of adhesive to bridge the gaps. This is a red flag. While you are cleaning the surface, you should be checking for hollow spots. Tap the floor with a knuckle. If it sounds like a drum, the adhesive failed to bond the plank to the subfloor. Now you have a surface stain and a structural void. This is common when people try to glue down solid hardwood over concrete without a proper moisture barrier. The moisture from the slab attacks the glue from underneath, causing it to fail, while the excess glue squeezed out the top during installation. It is a mess from top to bottom. If you find multiple spots of glue, you might want to reconsider the entire installation. A clean job is a sign of a professional. A messy job with glue spills is usually a sign of someone who was rushing and cutting corners. You can fix the glue, but you might not be able to fix the underlying structural failure without a lot more work.