
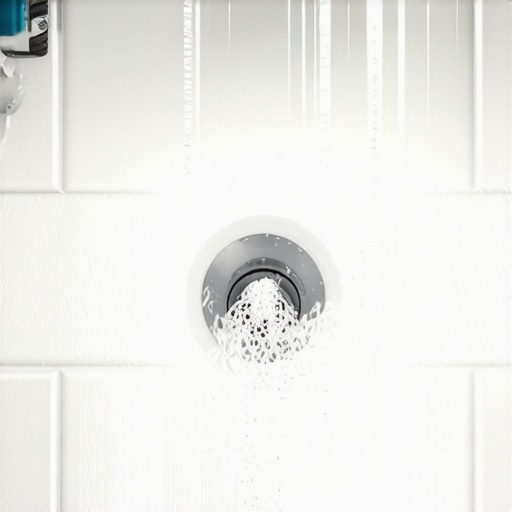
The Soap Test for Finding Leaks in Shower Pan Membranes
I spent three days grinding concrete on a job last month just so the floor wouldn’t click like a castanet. That job actually started because a client thought their hallway laminate was defective. It was not. The master shower ten feet away was leaking through a pinhole in the PVC liner that the original installer probably made with a stray utility knife. Most guys skip the leveling compound and most guys skip the 24 hour flood test too. They think the underlayment will hide the dip and the tile will hide the leak. It won’t. You can’t hide physics. When that water gets under the tile it travels. It finds the subfloor. It finds the joists. Then it finds your expensive hardwood floors in the next room and turns them into a warped mess that smells like a swamp. I’ve seen homeowners lose twenty thousand dollars in flooring because they didn’t want to spend twenty minutes checking a shower pan. Flooring isn’t about the pretty patterns. It is about water management and structural integrity. If you don’t respect the subfloor it will humiliate you every single time.
The microscopic truth of shower pan failures
Shower pan failures usually occur at the weep holes or the corners of the membrane where the material is folded and stressed. A leak in a shower pan is rarely a massive flood but rather a slow migration of moisture through capillary action that saturates the pre-slope and eventually rots the plywood subfloor or OSB deck. Understanding the molecular behavior of water is the first step toward a successful installation. Water molecules are polar. They want to stick to each other. This is called surface tension. In a standard flood test you might not see a tiny leak because that surface tension allows the water to bridge over a pinhole puncture. This is why we use the soap test. By introducing a surfactant we break that tension and force the water to reveal the path of least resistance.
“A floor is only as good as the subfloor beneath it; deflection is the enemy of every joint.” – Master Flooring Axiom
The bubble that saves five thousand dollars
The soap test for finding leaks works by applying a concentrated liquid soap solution to the drain flange and the corners of the membrane to identify air movement or liquid escape. This method is particularly effective when you suspect the mechanical bond between the clamping ring and the PVC liner has failed. If you have the luxury of a pressurized test you will see actual bubbles forming at the site of the failure. Without pressure the soap acts as a marker. It changes the viscosity of the water. It allows it to penetrate the microscopic gaps in the grout or the thin-set that would otherwise remain hidden by the natural resistance of the water. This is the difference between a floor that lasts thirty years and a floor that needs to be ripped out in thirty months.
The chemistry of the surfactant solution
Surfactants like common dish soap are amphiphilic molecules that significantly reduce the surface tension of water and allow for deeper penetration into membrane punctures. When you mix soap into your test water you are essentially making the water wetter. This is a chemical reality. The hydrophobic tails of the soap molecules push away from the water and stay at the surface while the hydrophilic heads stay in the water. This disrupts the hydrogen bonding between water molecules. In the context of a shower pan membrane this means the water can now fit through a hole that is less than a millimeter wide. If your waterproof liner has a microscopic tear from a dropped trowel the soapy water will find it while plain tap water might just sit on top of it.
The relationship between hydrostatic pressure and liner integrity
Hydrostatic pressure increases with the depth of the water during a shower flood test and puts direct stress on the seams of the liner. For every inch of water you add to the shower pan you are increasing the weight and the pressure pressing down on that moisture barrier. This pressure is what forces the soapy water through the leak. Most installers only fill the pan an inch deep. I fill it to the top of the curb. I want to see if the corner dams are actually sealed. I want to see if the fasteners used for the cement board are too low and are puncturing the liner. If you are in a high humidity area like Florida the moisture in the air is already fighting your subfloor. You don’t need a leaky shower adding to the problem.
Why your subfloor is lying to you about the leak
Subfloor materials like oriented strand board and plywood can absorb a massive amount of moisture before showing visible signs of a leak on the surface. By the time you see the hardwood floors cupping or the laminate swelling the subfloor is already compromised. This is the danger of the slow leak. The soap test allows us to find the failure before the wood reaches its fiber saturation point. Once wood reaches that point it begins to expand and it will never return to its original dimensions. You can dry it out with fans but the structural integrity is gone. The lignin in the wood fibers has been disrupted and the floor will always be soft in that spot.
Comparing membrane materials and their failure points
Different shower membranes have varying levels of chemical resistance and elasticity which dictates how they should be tested for leaks. A PVC liner is a thick sheet but it is vulnerable at the solvent welded seams. A liquid applied membrane is only as good as the mil thickness the installer achieved. If it is too thin it will crack. If it is too thick it might not cure properly.
| Membrane Type | Material Basis | Elongation Break | Vulnerability |
|---|---|---|---|
| PVC Liner | Polyvinyl Chloride | 300% | Seams and Corners |
| CPE Liner | Chlorinated Polyethylene | 400% | Solvent Bonds |
| Liquid Applied | Polymer Synthetic | 50% | Low Mil Thickness |
| Fabric Sheet | Polyethylene Fleece | 150% | Joint Banding |
A protocol for finding the failure
Performing a soap test requires a systematic approach to ensure that every potential leak path is identified and verified. You cannot just splash some bubbles around and call it a day. You need to be methodical. You need to understand where the weep holes are and how the drain assembly works.
- Clean the drain area and remove all debris.
- Insert a pneumatic or mechanical test plug below the weep holes.
- Fill the shower pan with water up to the top of the threshold.
- Apply a high viscosity liquid soap solution to all perimeter seams.
- Apply the soap solution to the clamping ring and drain flange.
- Observe the water level over a 24 hour period.
- Check the underside of the subfloor with a moisture meter.
The 1/8 inch that ruins everything at the drain flange
The slope of the pre-slope must be a minimum of one quarter inch per foot to ensure that water moves toward the weep holes. If the installer didn’t get this right the water sits on the membrane. This creates a permanent state of hydrostatic pressure. Eventually even the best PVC cement or polyurethane sealant will fail. I’ve seen guys try to level a shower floor with thin-set after the pan was already in. That is a recipe for disaster. The water gets trapped in the mud bed and has nowhere to go. It just sits there and rots.
“Moisture migration through capillary action can ruin a hardwood installation twenty feet from the source of the leak.” – Master Flooring Axiom
The myth of the waterproof grout
Grout is not waterproof and should never be relied upon as a moisture barrier in a shower installation. Grout is porous. It is essentially a specialized form of concrete. Water will move through it. This is why the membrane underneath is the most important part of the entire room. If someone tells you they are using epoxy grout so they don’t need a liner they are lying to you or they are ignorant. Epoxy grout is water resistant but the expansion joints at the corners will eventually crack as the house shifts. When that happens the water goes straight to the subfloor.
The impact of moisture on hardwood floors and laminate
Hardwood floors and laminate flooring are extremely sensitive to the relative humidity of the subfloor and will fail if the shower pan is leaking. Hardwood is a living material. It breathes. It expands and contracts. When it absorbs water from a leaky shower it undergoes cupping. This is where the edges of the boards are higher than the center. Laminate is even worse. It is made of high density fiberboard which is basically compressed sawdust and glue. Once that gets wet it expands like a sponge and it will never go back down. While most people want the thickest underlayment too much cushion actually causes the locking mechanisms on LVP to snap under pressure. This is another reason why a solid subfloor is non-negotiable.
The final word on shower integrity
A shower is a machine for moving water. If that machine has a leak it will destroy the rest of your house. The soap test is a simple and effective way to ensure that your moisture barrier is actually doing its job. Don’t trust the builder-grade shortcuts. Don’t trust the click-lock promises. Trust the physics of surfactants and the structural reality of your subfloor. Take the time to do the flood test. Use the soap. Save your floors. If you don’t have the patience to wait 24 hours for a test you shouldn’t be installing floors in the first place.